Revox G mini Benutzerhandbuch
Seite 15
mini
Re:sound G
13
Step
Step
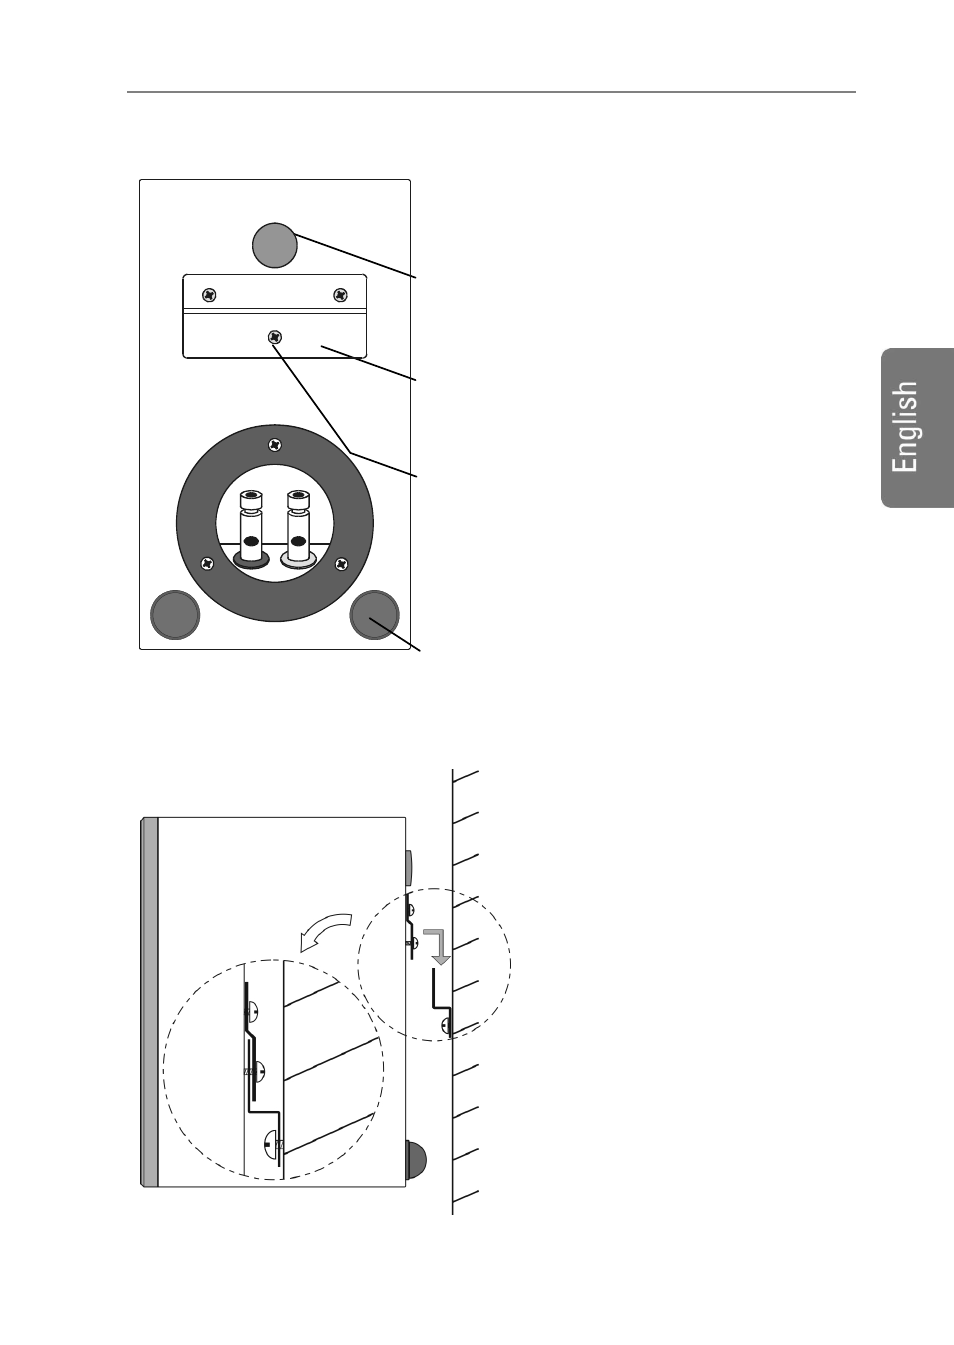
Fit the wall mounting bracket
for the back wall of the
speaker, also using the
screws provided. There are
already three holes on the
back of the speaker for this
purpose. Make sure that the
upper part of the mounting
bracket lies flush against the
back wall of the speaker. The
middle screw should only be
hand-tightened.
Also see Step
Close off the bass tube with the
supplied foam plug, in order to
avoid ventilation sounds.
- Mount the rubber feet -
Mounting
bracket for the
back wall of the
speaker
The last step is to connect the
two connection cables to the
connection terminal.
Please take note of the polarity!
Bring the speaker into position,
as shown in the graphic on the
left, and slide the two elements of
the mounting bracket into each
other.
If the two elements are seated
correctly, the Re:sound G mini
now “floats” on the wall and has
a space around it of about 10
mm/ 0.4 inches.
Insert the
foam plug
Mount the
rubber feet
Only hand-tighten
the middle screw