Beating cream – Silvercrest SMZ 260 C2 Benutzerhandbuch
Seite 7
- 5 -
Risk of personal injury!
Never attempt to remove food from the bowl 6
when the blade 7 is still in motion. Contents could
shoot out and make a mess.
³
Wait until the blade 7 has stopped rotating.
³
Lift the motor block 2 from the lid collar 3.
³
Remove the lid 4.
Risk of personal injury!
To avoid injuries, exercise caution when handling
the extremely sharp blade 7. Keep the blade 7
out of the reach of children.
³
Carefully pull the blade holder 5 with the knife
7 out of the bowl 6.
³
Remove the contents.
Note:
Due to the grinding of hard and abrasive foodstuffs,
the bowl 6 can take on a dull appearance over
time. This is normal and does not influence the func-
tioning of the appliance.
Note:
After you have finished processing the foodstuffs,
you can use the appliance base
o
as a cover for
the bowl
y
, this will help to keep the foodstuff fresh
for longer.
³
Remove the motor block 2 and the lid 4 from
the bowl
y
.
The blade retainer 5 with the blade 7 can, if
you wish, remain in the bowl
y
.
³
Loosen the appliance base
o
from the undersi-
de of the bowl
y
. You can now place applian-
ce base
o
on the bowl
y
so that it seals the
bowl
y
.
Beating cream
Using the whisk attachment 0, you can also whip
cream with this appliance:
³
Place the bowl 6 in the appliance base 9.
³
Place the blade holder 5 with the knife 7 on
the mounting 8.
³
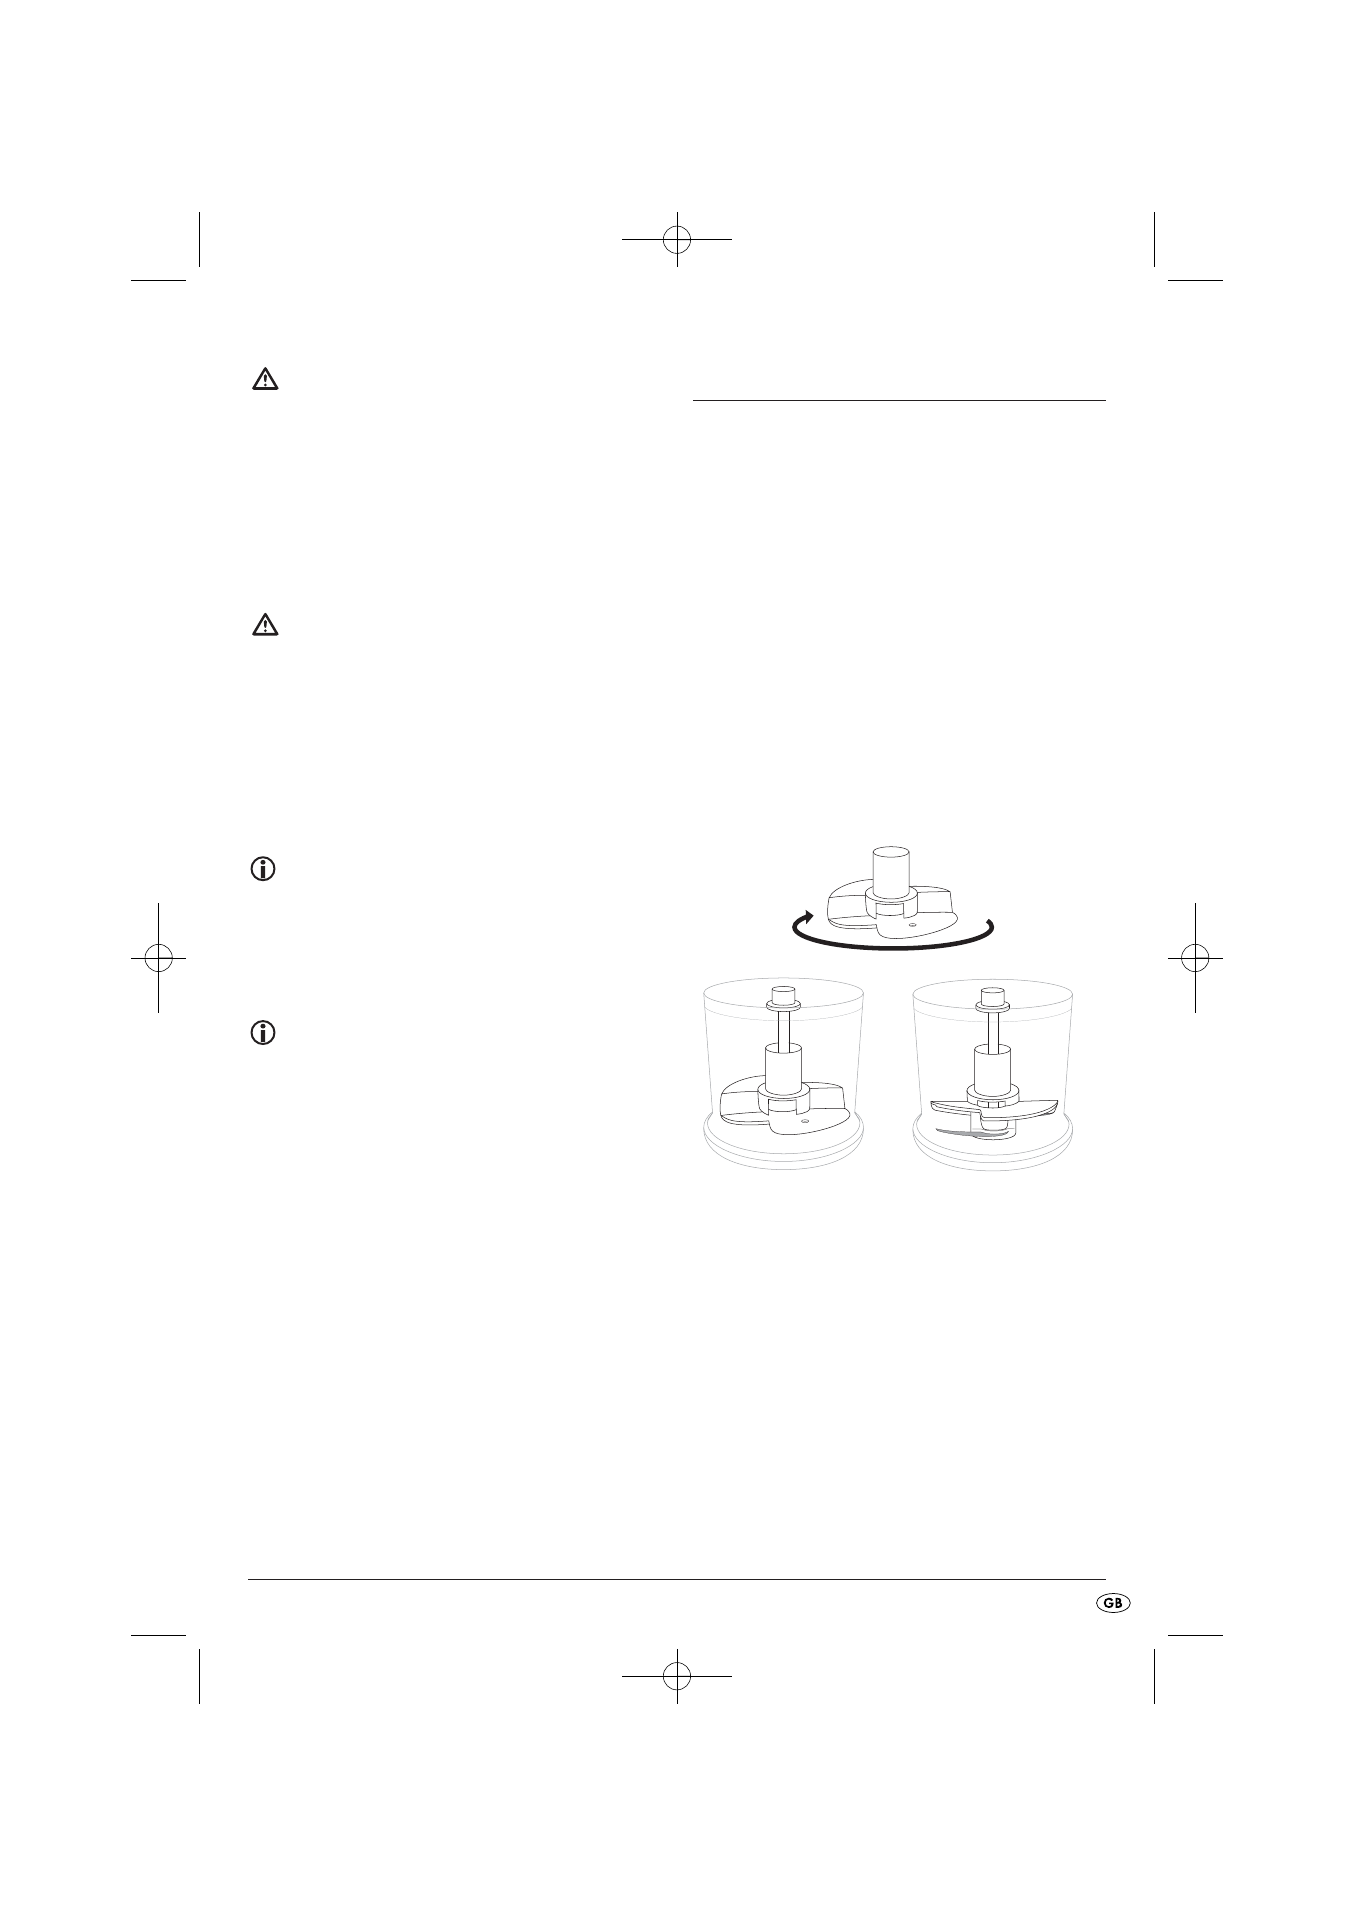
Push the whisk attachment 0 onto the blade hol-
der 5:
For 100 ml of cream, place it on the blade hol-
der so that the whisk attachment 0 rests on the
two blades and engages.
For 200 ml of cream, turn the whisk attachment
0 vertically through 180°, so that it rests on
only one blade and engages. It then ploughs
higher through the cream:
³
Pour the cream in.
³
Close the bowl 6 with the lid 4: Place it on the
bowl 6 so that the lugs on the lid 4 engage in
the slots on the bowl 6. Then turn the lid 4 so
that the lugs slide unter the slots and the lid 4
locks into place.
³
Place the motor block 2 on the lid collar 3.
³
Press the motor block 2 downwards , as shown
in Figure B. The motor starts with the normal ope-
rating speed.
IB_68666_SMZ260C2_LB3 29.09.2011 11:18 Uhr Seite 5