Operation, Start-up / operation, Presetting the speed – Parkside POF 1200 A1 Benutzerhandbuch
Seite 11: Set the milling depth, Readjust the milling depth, Set the milling depth with the step stop, Milling direction
11
GB/CY
Operation
Switching off:
Release the ON / OFF switch
19
.
Presetting the speed
Set the desired speed using the speed setting
wheel
1
.
1–2 = low speed
3–4 = middle speed
5–7 = high speed
Set the milling depth
1.
Ensure that the clamping lever
16
is locked down.
If it is loose turn it anti-clockwise until it is locked.
2. Place the device on the work piece to be worked
upon.
3. Turn the step stop
9
until it locks into the lowest
position.
4. Loosen the lock screw
11
.
5. Loosen the clamping lever
16
by turning it
clockwise and pushing the device down until the
route bit touches the surface of the work-piece.
6. Lock the clamping lever in place
16
by turning
it anti-clockwise.
7. Push the depth stop
12
down until it reaches
the lowest position of the step stop
9
. Move
the index indicator
13
to the position “0“ on
the dial milling depth adjustment
14
.
8. Adjust the depth stop
12
to the desired depth,
tighten the lock screw
11
. Afterwards the index
indicator
13
should no longer be adjustable.
9. Loosen the clamping lever
16
and and lead the
device back up.
Readjust the Milling depth
The milling depth can be adjusted with the con-
trol dial
15
.
Loosen the clamping lever
16
by turning it
clockwise and pushing the device down until
the depth stop
12
touches the step stop
9
.
Lock the clamping lever in place
16
by turning
it anti-clockwise.
Set the milling depth with the control dial
15
.
Loosen the clamping lever
16
by turning it
clockwise and lead the device back up. Check
the milling depth through a further practical test.
Set the milling depth with the
step stop
You can use the step stop
9
with deeper depths in
several steps with less takeoff.
Set the desired milling depth with the lowest
step of the step stop
9
(as described above).
Then set it at higher level for the first attempt.
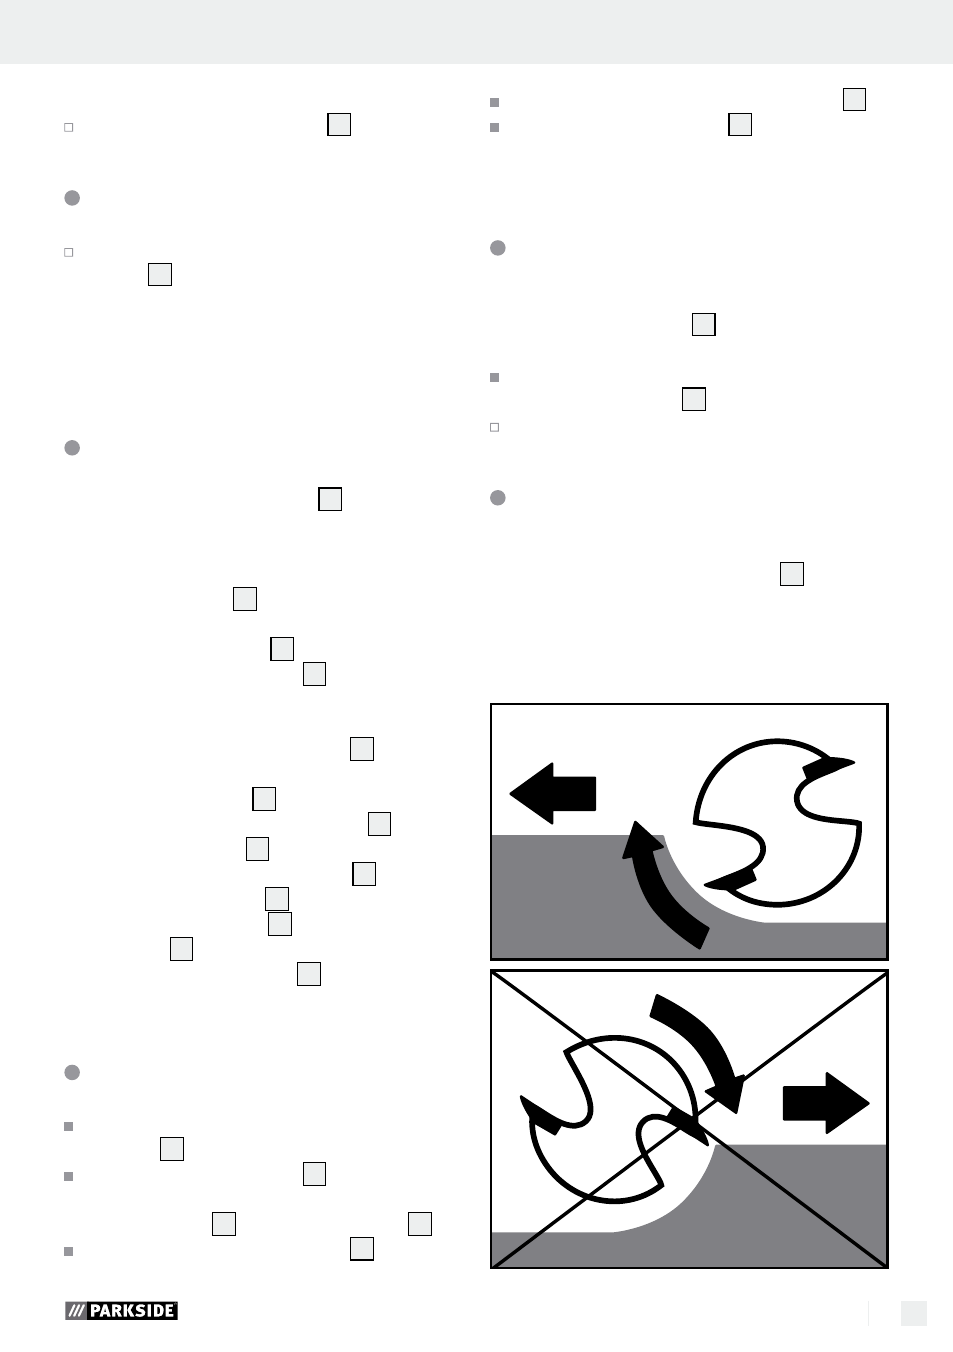
Milling direction
The milling process must always go against the
rotationary direction on the router bit
17
(Counter
rotation).
ATTENTION: When milling in the direction of the
router bit (counter rotation) the device fly out of
your hand.
Start-up / Operation