2 rigging the fixture – JB-Lighting Sparx 10 Benutzerhandbuch
Seite 34
- 34 -
10
Connection non EU-modell:
The Sparx10 may only be connected to mains supply systems according to this drawing:
mains
Sparx10
2 conductor
1 phase
L
N
L
N
PE
3 conductor
1 phase
L
N
L
L
PE
N
4 conductor
3 phase
L
1
L
2
L
3
N
L
N
PE
WARNING: only can be used in
Canadian mains supply system
with 2 cond., 1 phase with max.
120V!
ATTENTION: Le A8 peut être uti-
lisé au Canada avec 2 conduc-
teurs, 1 phase et une tension
maximal de 120V!
!
3.2 Rigging the fixture
WARNING: Keep fixtures at least 1,0 m away from inflamable articles! Always use a
safety cable attached to the base!
ATTENTION: Respecter une distance minimale de 1,0 m entre le projecteur est
d‘éventuelles objets inflammables! Sécuriser toujours le Sparx10 avec une élingue
de sécurité appropriée!
!
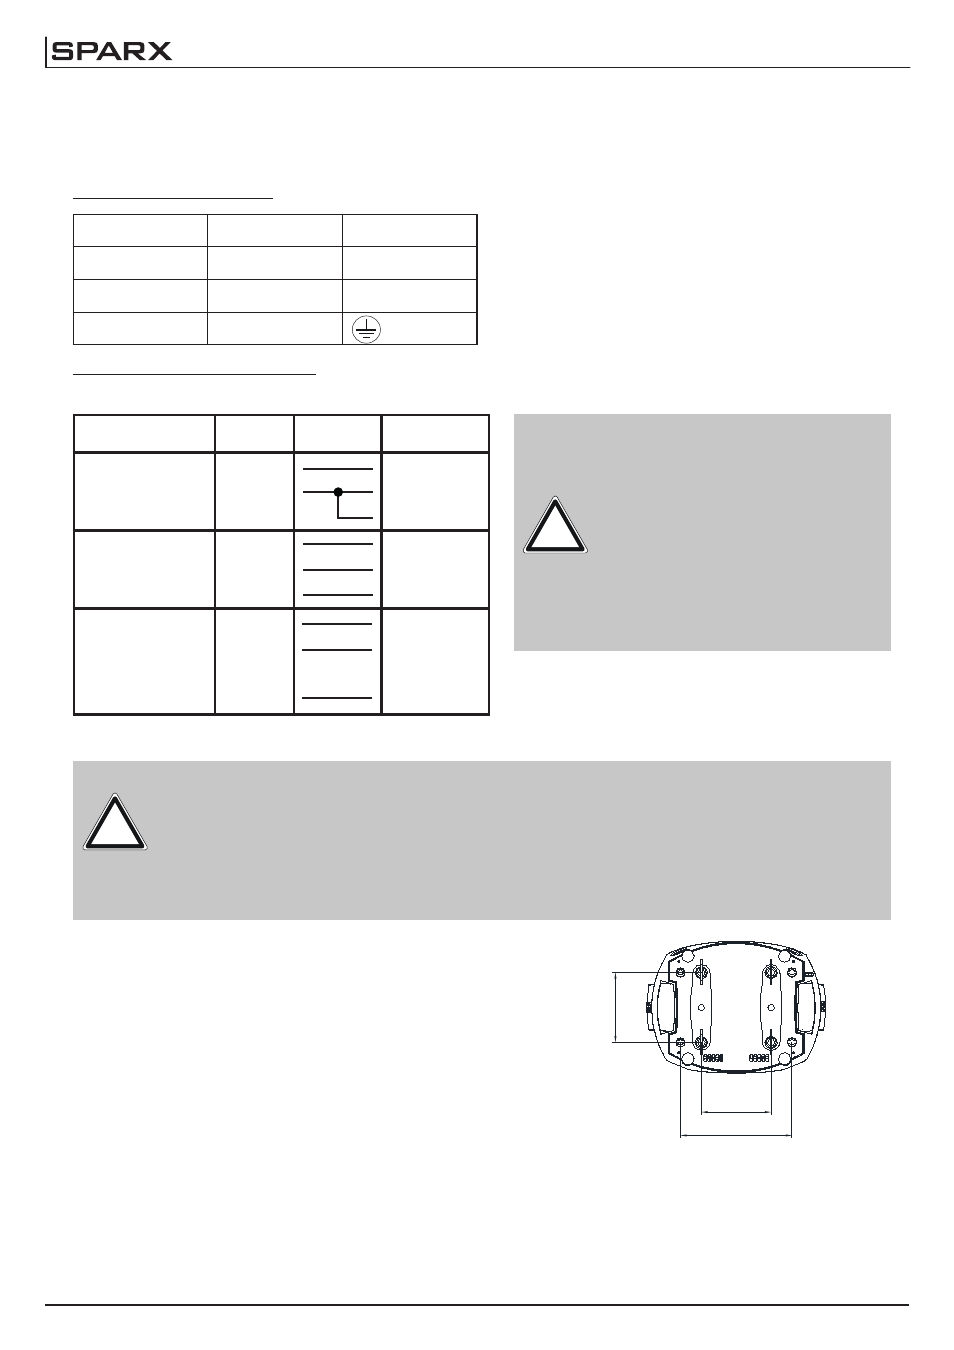
The Sparx10 can either be placed on the floor or hang
on a trussing system in any position. When placing the
unit on the floor make sure that it stands on rigid ground,
because the air inlets in the base must not be covered
with anything! To mount the unit on a trussing system
use two of the original JB-Lighting omega brackets with
Camloc-connectors. The Camlocs must snap in to be
locked propperly. Always attach a safety cable to secure
the unit.
The Sparx10 is supplied with a power cable with a Neutrik PowerCon connector. Install a 3-prong
grounding type plug that fits your supply. US model comes without power cable and connectors.
Required cable type see 4.5. Connected load: voltage 100-240 V, frequency 50 - 60 Hz
Connection EU-modell:
Color
Function
Symbol
brown
Live
„L“
blue
Neutral
„N“
green/yellow
Ground
140
224
140