General safety advice / use general safety advice, Original accessories / attachments, Sharpening a drill – Parkside PBSG 95 A1 Benutzerhandbuch
Seite 9
9
GB/IE/CY
should always make sure that no-one is at risk
from them and that no combustible materials
are located in the proximity of the area of work.
RISK OF INJURY! Use the
ON / OFF switch
4
to switch the grinder off
in the event of a power failure or when pulling
out the mains plug. This prevents the grinder restart-
ing by accident, which could cause injury to you.
Never operate the grinder if the power
cable or mains plug is damaged.
Grinding stones must be carefully
stored and handled according to the
manufacturer’s instructions.
Make sure that the grinding tools are
appropriate in line with the instructions
of the manufacturer.
Check the grinding stone before using
it; do not use any broken, cracked or otherwise
damaged goods.
Make sure that a grinding tool is correct-
ly fitted and fastened before using it.
Place the grinder in a safe place and allow it
to run idly for 30 seconds. Stop it immediately if
considerable oscillations occur or if defects are
observed. If this occurs, check the machine to
find out the cause.
Q
Original accessories /
Attachments
Use only the accessories and attachments
detailed in the operating instructions.
The use of inserted tools or accessories other
than those recommended in the operating in-
structions could lead to you suffering an injury.
Q
Use
Q
Sharpening a drill
NOTE: Badly damaged drills should first be coarsely
sharpened on a sharpening block.
Fully lower the sharpening stone. To do this turn
the rotary switch
1
in the DOWN direction
as far as it will go.
Insert the drill into the smallest suitable drill
guide
11
on the drill sharpener. The exact size
(Ø) of each drill guide
11
is shown by the ad-
jacent lettering (3 to 10).
Press the ON / OFF switch
4
into position “I”
to switch on the device.
Turn the rotary switch
1
in the UP direction
until you hear a grinding noise.
NOTE: The rotary switch
1
controls the posi-
tion of the sharpening stone in the sharpening
head housing and therefore the pressure of the
sharpening stone against the drill. The further
you turn the rotary switch
1
in the UP direction,
the greater the pressure. Ensure that you do not
turn the sharpening stone too far up. Otherwise
the sharpening stone could strike the housing.
Turn the drill under slight pressure loosely and
quickly to and fro between the left and right
stops about 10 times (with small drills about 5
times).
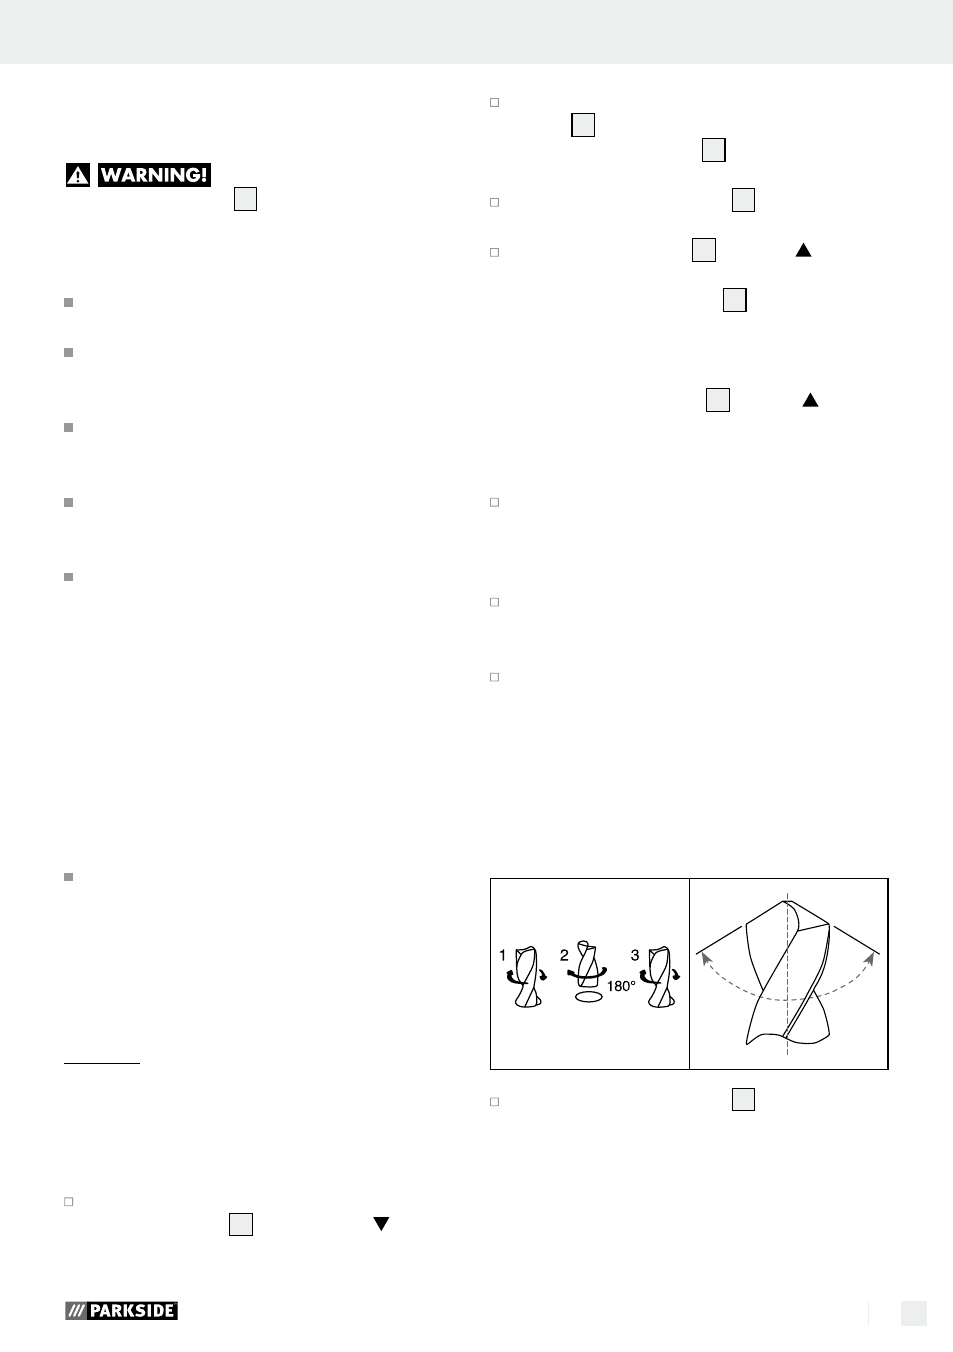
Pull the drill out, turn it through 180° (horizontally)
and insert it again until it meets the sharpening
stone.
If necessary repeat whole process until both
cutting edges of the drill are sharp. Control the
grinding operation so that the angle between
the main and transverse cutting edges for a
standard drill is 130°. Both cutting edges (b)
must have the same angle to the drill axis (a)
and be the same length so that the drill runs
concentrically (see following figures).
(b)
(b)
(a)
Press the ON / OFF switch
4
into position “0”
to switch off the device.
General safety advice / Use
General safety advice