Preparations for use, Fitting the light, Directing the spotlights – Livarno 2356/042L Benutzerhandbuch
Seite 8: Changing the bulbs, Maintenance and cleaning
8 GB/IE
J
Familiarise yourself with all instructions and
diagrams in this manual as well as with the
light before installation.
J
Before installation, ensure that the cable that
the light is to be attached to is not live. Remove
its fuse or switch off the automatic cutout in the
fuse box (0 position).
J
Use the voltage tester to check that there is no
voltage.
Q
Preparations for use
Q
fitting the light
j
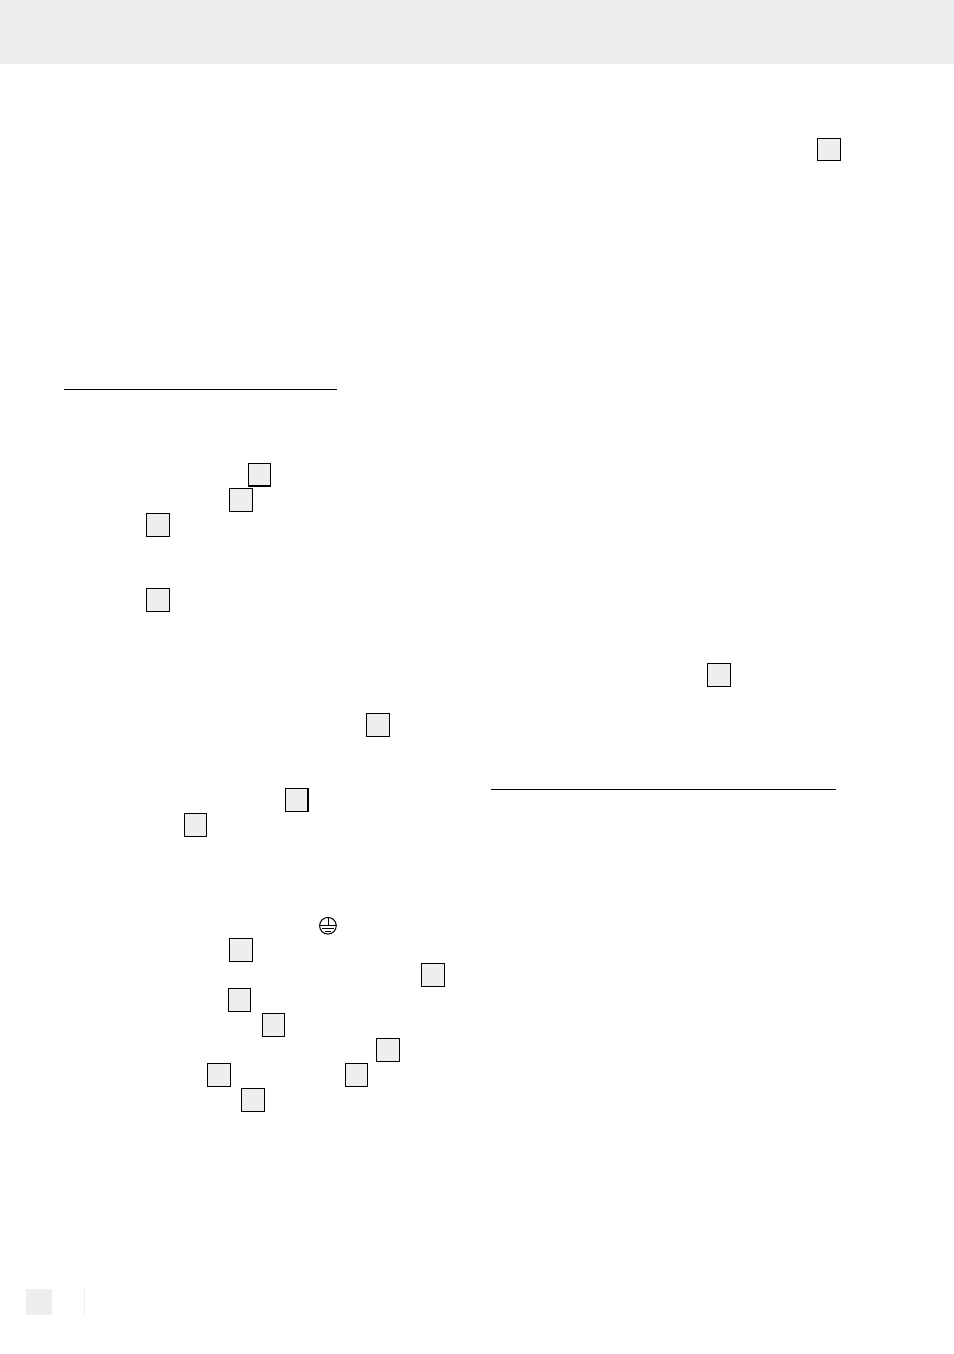
Remove the screws
10
visible on the side of the
terminal housing
3
and take the installation
frame
11
on the back off (see diagram).
j
Mark the boreholes using the slotted holes
provided for the screws in the installation
frame
11
.
j
Now drill the screw holes (approx. 6 mm,
depth approx. 40 mm). Ensure that the feed
cable is not damaged.
j
Insert the wall plugs into the drilled holes.
Firmly attach the installation frame
11
with the
screws provided.
j
Connect the light’s connection cable to the
mains connection cable
1
using the insulating
screw joint
2
(see diagram).
j
Ensure that the cables have been connected in
line with the correct colour coding.
j
Now connect the earthed conductor (green-
yellow) to the earth terminal labelled in the
terminal housing
3
(see diagram).
j
Screw the light onto the installation frame
11
using the screws
10
.
j
Push the lamp shade
5
over the socket and
fasten it in place with the rubber ring
7
and the
threaded ring
8
using the tool
9
(see Fig.).
j
Then turn the bulb
6
into the socket. Check
that it is correctly seated.
j
Your light is now ready for operation.
Q
Directing the spotlights
j
Change the direction of the spotlights
4
only
after the light has been switched off.
Allow the light to cool down completely.
j
Turn the individual spotlights at their bases in
the desired direction. The spotlights can be
turned through approx. 270°.
Q
Changing the bulbs
c CauTIon! DangeR of eleCTRIC
ShoCk! To replace the bulb, first of all iso-
late the lamp from the mains circuit. Remove its
fuse or switch off the automatic cutout in the
fuse box (0 position).
j
Allow the lamp to cool down completely.
j
Only change the bulb when it has completely
cooled down. Use a clean, lint-free cloth when
changing light bulbs.
j
Only use 230 - 240 V ~ halogen light bulbs,
maximum 40 W and with a E 14 base.
j
Now turn the new bulb
6
into the socket.
Check that it is correctly seated.
Q
Maintenance and Cleaning
c CauTIon! DangeR of eleCTRIC
ShoCk! Before cleaning the lamp make sure
that it is isolated from the mains supply.
Remove its fuse or switch off the automatic
cutout in the fuse box (0 position).
j
Allow the lamp to cool down completely.
c CauTIon! DangeR of eleCTRIC
ShoCk! For reasons of electrical safety, the
light must never be cleaned with water or other
fluids or be immersed in water. When cleaning,
only use a dry, lint-free cloth.
j
Do not use any solvents, petrol or similar. This
would cause damage to the light.
Before installation / Preparations for use / Maintenance and Cleaning