JB-Lighting Varyscan 7 1200 HT Benutzerhandbuch
Seite 21
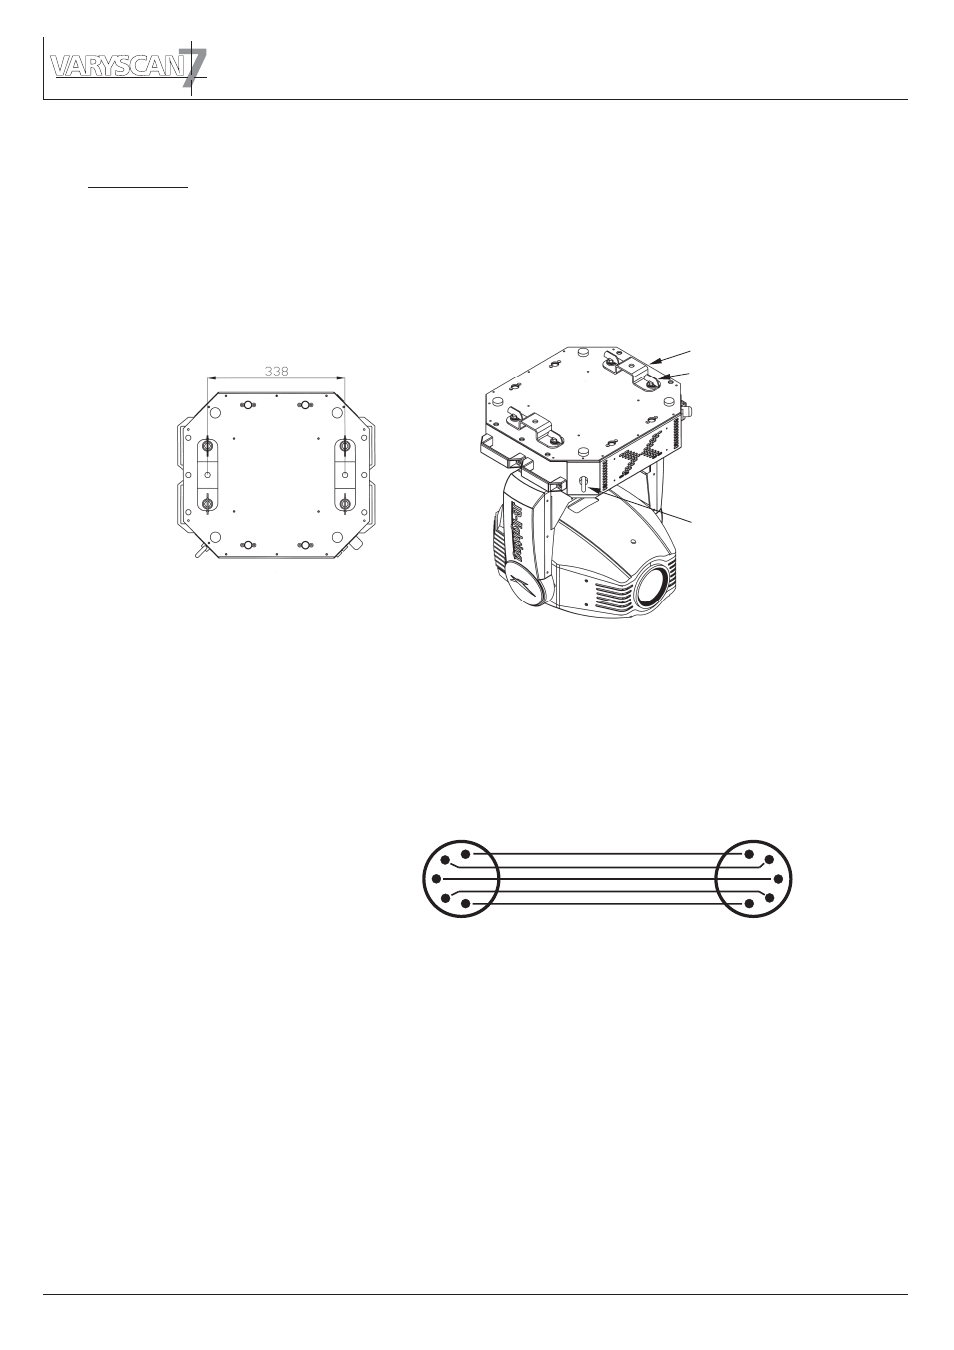
ringeye for safety cable
Omega bracket
Camloc
4
2
3
4
2
3
5
1
5
1
2.3 Rigging the fixture
WARNING: Keep fixtures at least 2 m away from inflamable articles!
Always use a safety cable attached to the base!
The Varyscan7 can either be placed on the floor or hung on a trussing system in a vertical
or horizontal way. If mounting the unit to walls in a vertical way, the lamplife might be
reduced. To mount the unit on a trussing system use the original JB-lighting omega brackets
with Camloc-connectors. The Camlocs must snap in to be locked propperly. Alway attach a
safety cable to secure the unit.
2.4 DMX wiring
Use a shielded twisted-pair cable with two pairs to connect the serial link.
For short distances a microphone cable may be used. If a microphone cable is used
the software can not be updated via DMX line for pin 4 and 5 are not connected.
Use 5-pin XLR connectors.
Pin assignment
Pin 1 = shield
Pin 2 = data -
Pin 3 = data +
Pin 4 = data out -
Pin 5 = data out +
The pin assignment is the same for all Varyscans in line.
If the output socket of the control desks offers a 5 pin XLR female socket,
pin 4 and 5 are not occupied.
Connect the DMX-out of the control desk to the first Varyscan in line.
(lighting control desk DMX-Out / Varyscan DMX-In). Connect the second Varyscan
to the first in line, and so on (Varyscan 2 DMX-In / Varyscan 1 DMX-Out).
The DMX-Out of the last unit in line is not occupied unless problems occure. Then
use a termition plug with the last Varyscan in line.(XLR-connector with a 120 Ohm resistor
soldered between pin 2 and pin 3). Problems might occure when the line is overloaded, e.g.
shielded signal cable
22