Montage-prüfung stecken und trennen, Plugging and unplugging – Multi-Contact MA275 Benutzerhandbuch
Seite 7
Advanced Contact Technology
www.multi-contact.com
7 / 8
18
19
17
16
(ill. 16)
Achtung:
Bevor die Kunststoffisolationen
durch die Bohrungen geführt
werden, muss sichergestellt sein,
dass die Flachdichtung auf der
Isolation sitzt.
(ill. 16)
Attention:
Before mounting the plastic
insulations through the bore, the
gasket must be located on the
insulation.
Gefahr:
Bei fehlender oder nicht korrekt
montierter Flachdichtung ist der
Schutz nach IP65 und IP68 nicht
gewährleistet!
Danger:
In case of lacking gasket or
incorrect mounting, the ingress
protection IP65 and IP68 will be
compromised.
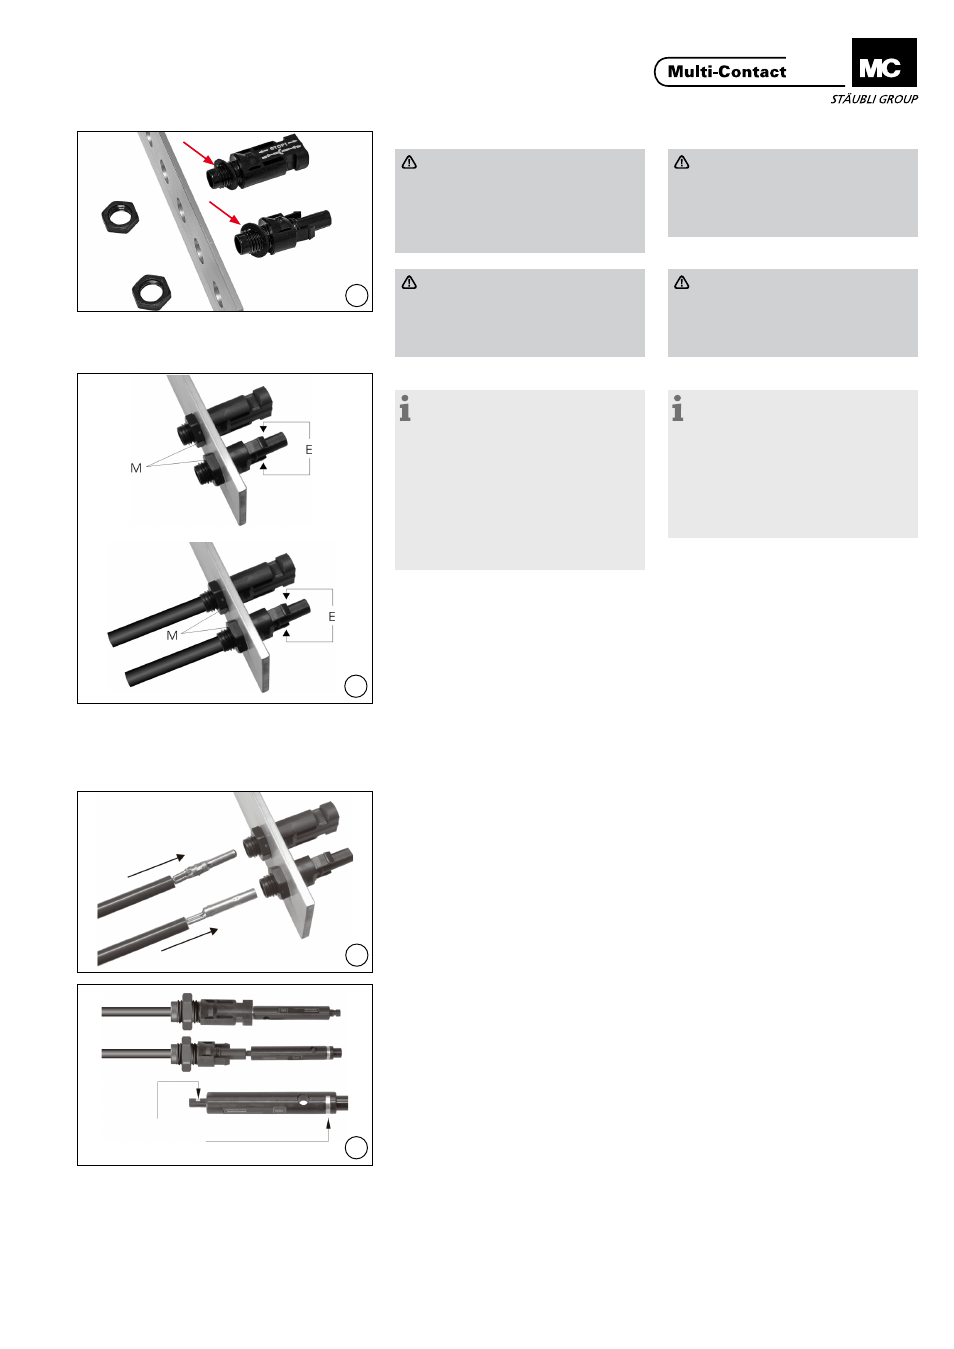
(ill. 17)
Hinweis:
Richten Sie die Kunststoffteile (E)
so aus, dass sie gesteckt und getrennt
werden können. Schrauben Sie die
Muttern (M) auf und ziehen Sie sie
mit dem Drehmomentschlüssel an.
Typische Werte liegen bei 2 Nm
1)
.
Das passende Anzugsdrehmoment
muss je nach Gehäusebeschaffenheit
im der jeweiligen Endanwendung
verifiziert werden.
(ill. 17)
Note:
Position the plastic parts (E) so that
they can be plugged and unplugged.
Screw on the nuts (M) and tighten
them with the torque wrench.
Typical values lie at 2 Nm
1)
. The ap-
propriate torque has to be verified in
the end use according to the respec-
tive housing
1)
Wir empfehlen, die Eich- und Kalibrieranwei-
sungen für den verwendeten Drehmoment-
schlüssel genauestens zu beachten!
1)
We recommend precisely following the calibra-
tion procedures defined for each specific torque
wrench used!
In der Montageposition muss die
Flachdichtung am äusseren Gehäuse-
teil zwischen Isolation und Montage-
platte anliegen.
Während einer visuellen Kontrolle dür-
fen keine Risse, Falten oder sonstige
Störungen zwischen der Isolation und
der Montageplatte erkennbar sein.
In mounting position, the flat gasket
must lie even on the outer side of the
mounting surface.
During a visual check after assembly,
no cracks, foldings or other disturban-
ces should exist!
(ill. 18)
Führen Sie die angecrimpten Kontakte
von der Rückseite in die Isolation ein,
bis sie einrasten. Kontrollieren Sie das
Einrasten durch leichtes Ziehen an der
Leitung (Zugkraft max. 20 N).
(ill. 18)
Insert the crimped-on contacts into
the insulation from the rear side until
it engages.
Check correct engagement by pulling
lightly on the lead (max. pulling force
20 N).
Montage-Prüfung
Assembly check
(ill. 19)
Stecken Sie den Prüfstift mit der dafür
vorgesehenen Seite bis zum Anschlag
in die Buchse bzw. in den Stecker.
Bei richtig montiertem Kontakt muss
die weisse Markierung am Prüfstift
noch sichtbar sein.
(ill. 19)
Insert the appropriate end of the test
pin into the socket or plug as far as
possible.
If the contact is correctly assembled,
the white mark on the test pin must
still be visible.
weisse Markierung
white mark
ohne Leitung
without cable
mit Leitung
with cable