HUBER+SUHNER Splicing fiber tray into ODR Benutzerhandbuch
Seite 5
Assembly Instruction / Montageanleitung
FiberTray II into NGR
FiberTray II in NGR
Created by: LiSA R&D
DOC-0000351880
Rev: C
www.hubersuhner.com
uncontrolled copy
5 / 8
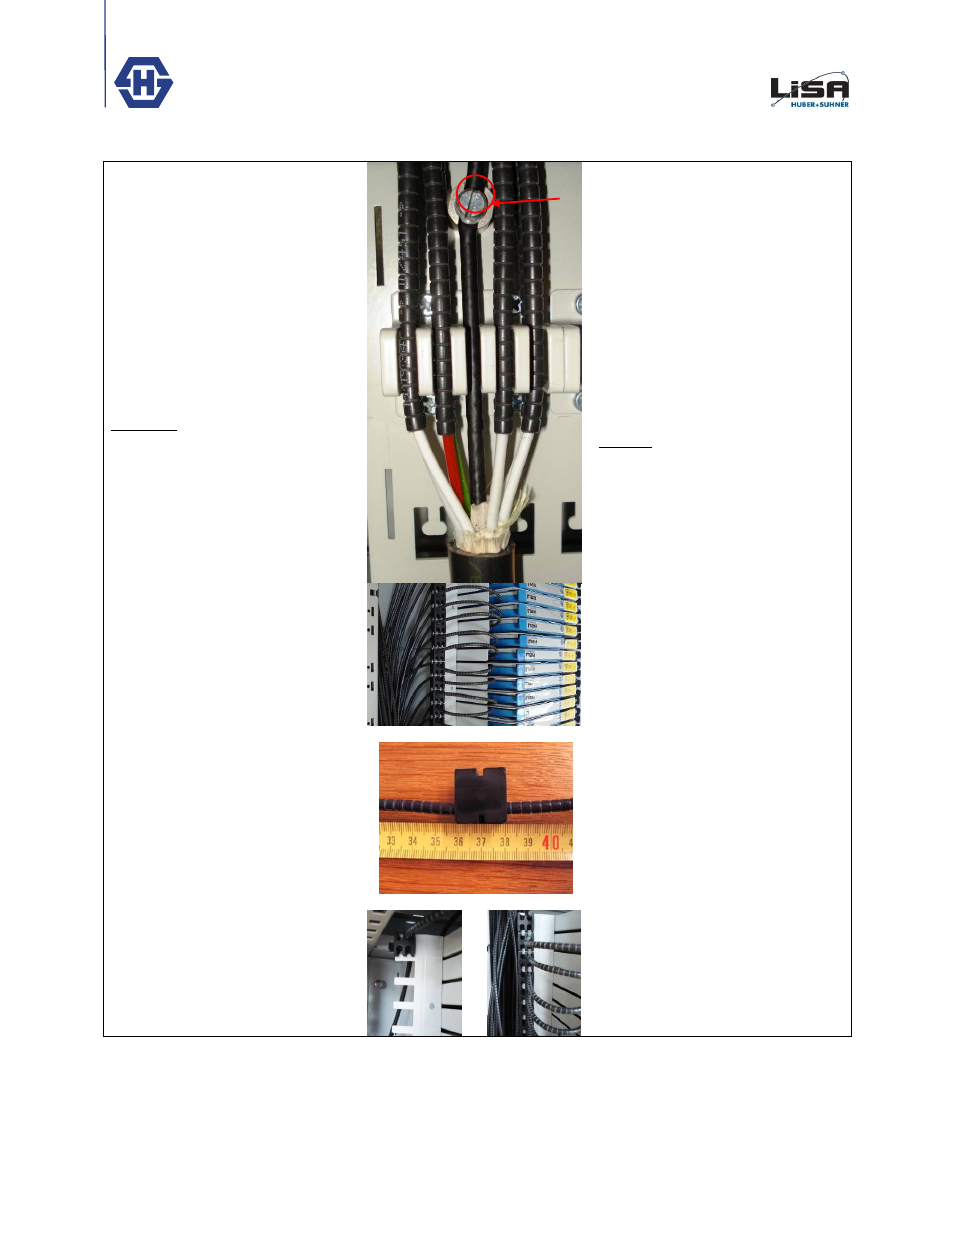
Fix the conduits in position 1,2 and
4,5 of the break-out plate so that at
least 2 ribs are protruding.
Push all conduits fed to the same
FiberTray into one slot of the conduit
bracket.
A maximum of 3 conduits can be
inserted per slot.
Move the cable towards the conduits
and fix it with a cable tie.
Important: The minimal bend radius
of 30mm must be maintained.
Guide the central element through
the middle position (3) and fix it in
the Central Element Clamp (6).
In den Positionen 1,2 und 4,5 der
Kabelabfangplatte werden die
Schutzrohre so befestigt, dass
mindestens 2 Rippen vorstehen.
Alle Schutzrohre, die zu einem
FiberTray geführt werden, in eine
Rille der Schutzrohrhalterung
drücken.
Pro Rille können mindestens 3
Schutzrohre eingelegt werden.
Das Kabel zu den Schutzrohren
hinschieben und mit Kabelbinder
befestigen.
Wichtig: den Mindestbiegeradius von
30mm nicht unterschreiten.
Das Zentralelement durch die
mittlere Position (3) führen und in der
Zugentlastungsklemme (6)
befestigen.
Lead the conduits along the sidewall
of the Fiber Tray Unit to the
appropriate Fiber Tray. The bend to
the Fiber Tray should be as large as
possible.
Die Schutzrohre seitlich der
Trägereinheit zum entsprechenden
FiberTray führen. Wobei die Biegung
zum FiberTray in einem möglichst
grossen Radius ausgeführt werden
soll.
Insert the conduit, as shown in the
picture, into the clip at a distance of
37cm measured from the end of the
conduit.
Eine Klammer gemäss Abbildung bei
einer Distanz von 37cm - vom Ende
des Schutzrohres gemessen –
befestigen.
Snap the clip into the recess of the
Tray Unit.
Die Klammer in die Aussparung der
Trägereinheit schieben.
1
2
3
4
5
6