Installing the receiver, Connecting the interfaces of the back panel, Connecting the interfaces on the front panel – Guntermann & Drunck DVI-Extender-F Benutzerhandbuch
Seite 27
Installation
G&D DVI-Extender-F · 6
Installing the receiver
The remote monitor is connected to the receiver (DVI-Extender-F-CON).
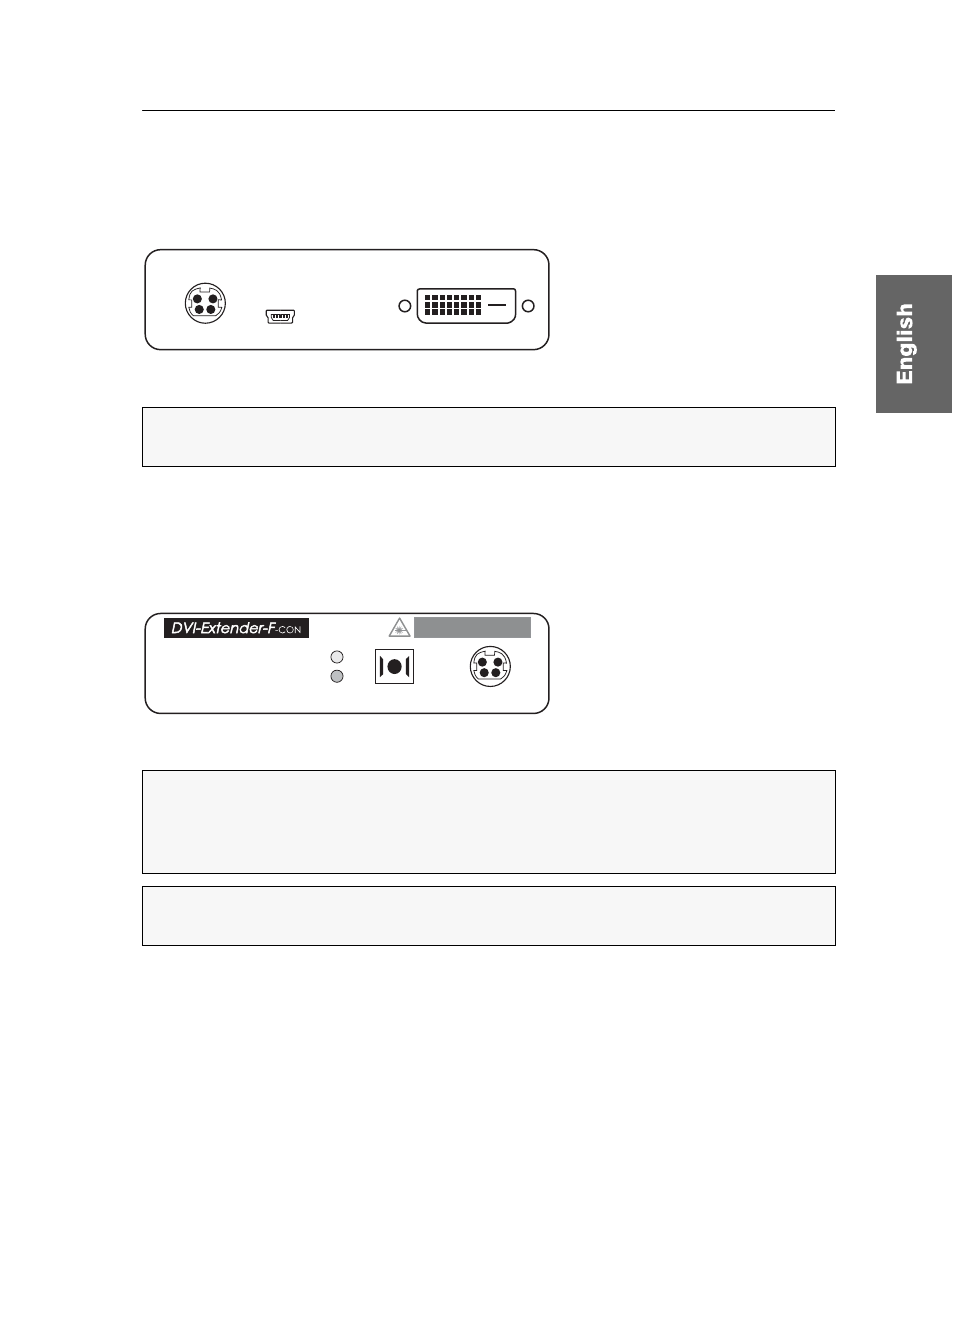
Connecting the interfaces of the back panel
Service:
When asked by the service team, connect the service cable (USB-Service-2) to
this interface.
DVI-D Out:
Connect the monitor.
Connecting the interfaces on the front panel
Transmission:
Insert the SC plug of the fibre optic cable, which is available as acces-
sory, into this interface. Connect the other end of the cable to the Transmission inter-
face of the transmitter.
Power:
Insert the supplied power pack.
Figure 3: Back view of the receiver
NOTE:
Information on how to supply another extender with power using the
Power Loop
interface is given on page 7.
Figure 4: Front view of the receiver
IMPORTANT:
The device uses components with laser technology which comply
with laser class 1M. Although class 1M laser are considered as being nonhazard-
ous, direct eye contact should be avoided. Do not stare into the beam or view
directly with optical instruments.
NOTE:
Remove the protection cap from the Transmission interface and from the
cable plug.
Service
DVI-D Out
Power Loop
Class 1 M Laser Product
Power In
Transmission
Video
Link