Optibox16 – HUBER+SUHNER OTB16 Benutzerhandbuch
Seite 9
Created by: FO R&D
www.fiberinthehome.com
9
DOC
-
0000401065
uncontrolled copy
Rev: A
Assembly Instruction / Montageanleitung
OptiBox16
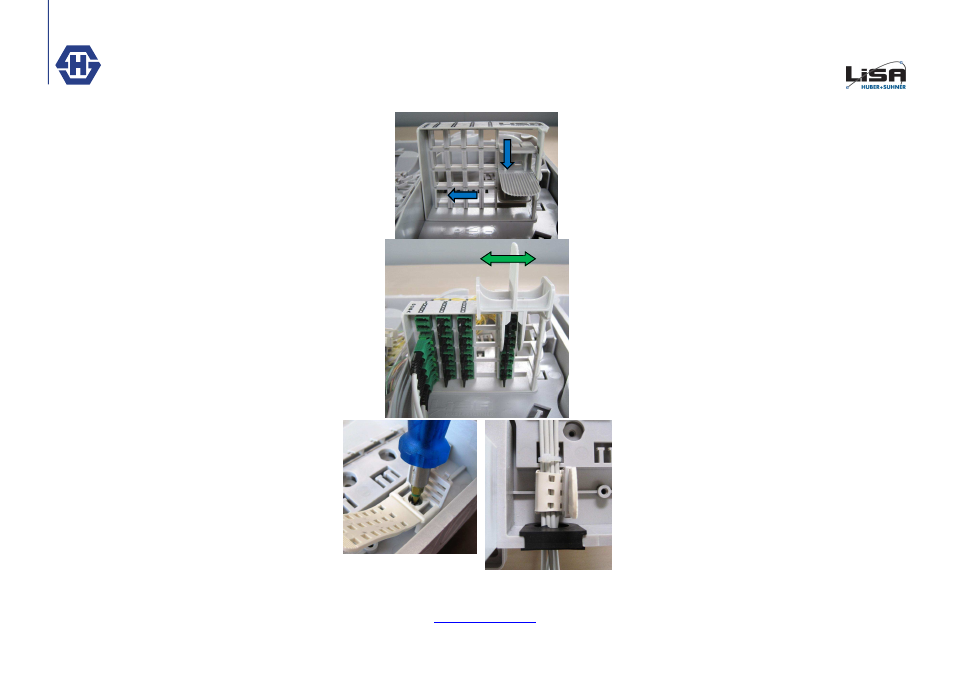
VII. Adapterfeld und Kabelfixierung ein-
bauen
Falls in der Boxenkonfiguration das Adapterfeld vor-
gesehen ist, müssen die Schnapper in die Öffnungen
gesteckt werden. Anschliessend muss es nach unten
und dann nach links gedrückt werden bis es einrastet
(blaue Pfeile).
Mit Hilfe der Fixierung können die bestückten Adap-
terreihen verschoben werden (grüner Pfeil). Hier-
durch sind alle Adapterfeldplätze gut zugänglich.
Assembly of the cable fixing latches:
Picture1: The cable fixing latches can be screwed with
the delivered PT Screws next to the cable exits at the
bottom.
Picture 2: The latches can cover different quantities
and diameters of cables. You can fix the latch accord-
ing to the cables in different positions. In addition, you
can fix the cables with cable ties directly to the inlay.
1
2
Einbau der Kabelfixierung:
Bild 1: Die Kabel Fixierungen können an den unteren
Kabelausgängen mit der mitgelieferten PT Schraube
eingeschraubt werden.
Bild 2: Sie können unterschiedlich dicke und unter-
schiedlich viele Kabel aufnehmen. Je nach Bestü-
ckung kann die Lasche der Fixierung gespannt wer-
den. Ausserdem können die Kabel noch mit Kabelbin-
dern direkt am Inlay fixiert werden.
VII. Mounting of patchfield and cable fixing
latch
If you are using the patchfield you have to snap it into
the inlay. Put the snappers into the cutout of the inlay
and push it to the left according to the blue arrows.
The Fixation can be used to move fully populated
adapter rows (green arrow). This is helpful to get good
access to every Adapter.