Multi-Contact MA253 Benutzerhandbuch
Seite 9
Advanced Contact Technology
www.multi-contact.com
9 / 12
24
25
26
27
A
Variante B:
Wandmontage
Variant B:
Wall mount
RobiFix-B���-MTB in RobiFix-S���-MTB
stecken und fest bis auf Anschlag
zusammendrücken (ill� 22)�
Connect RobiFix-B���-MTB and
RobiFix-S���-MTB together until they
perfectly engage� (ill� 22)�
(ill. 24)
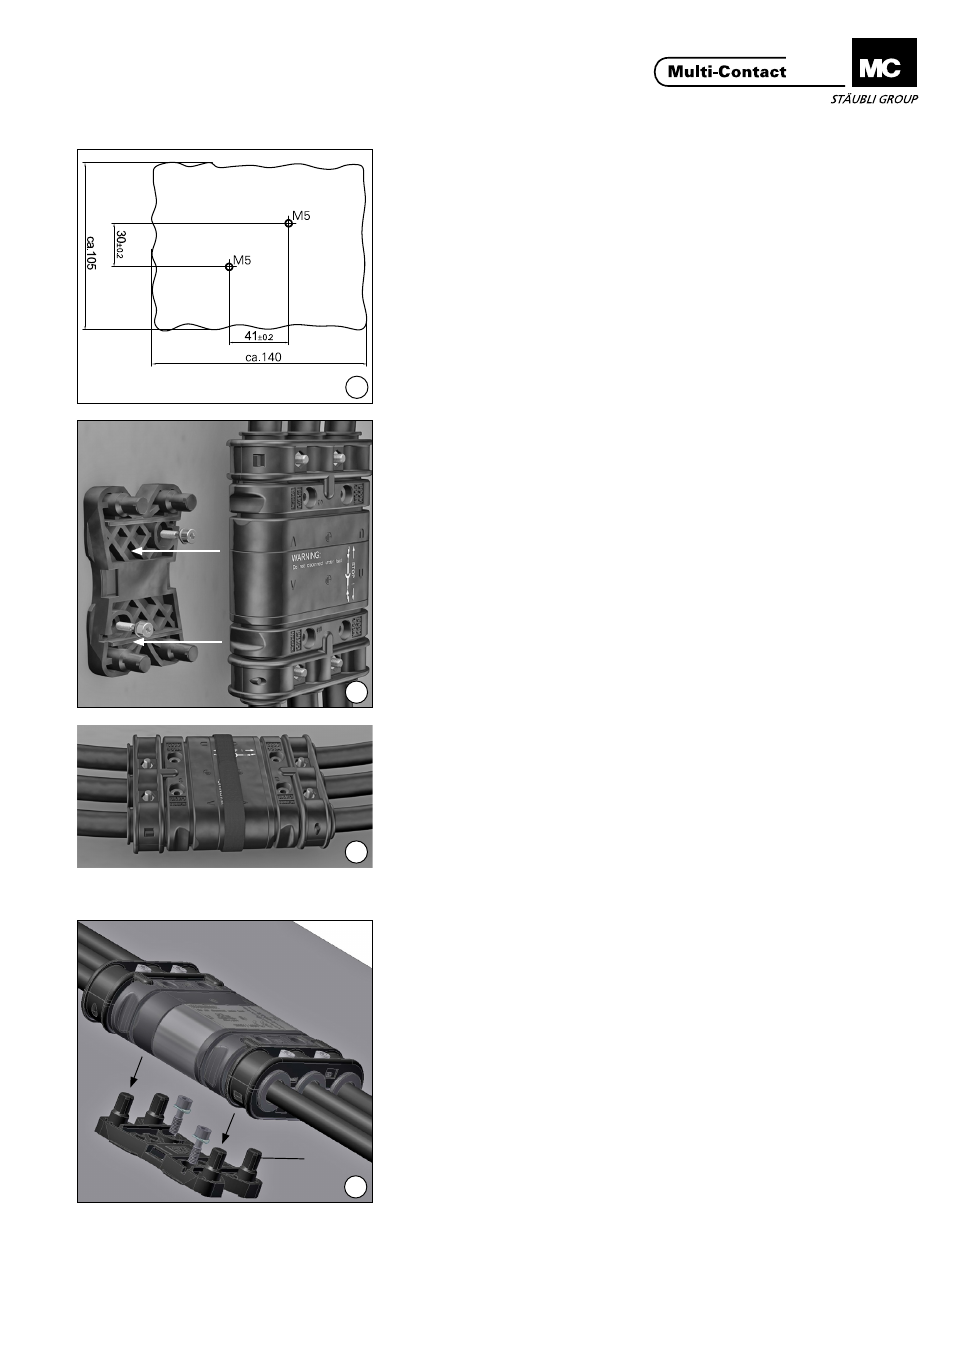
Befestigungslöcher gemäss Bohrplan
bohren�
(ill. 24)
Drill mounting holes according to drill-
ing plan�
(ill. 25)
RobiFix-LOCK mit den 2 Schrauben
auf den Untergrund schrauben�
RobiFix aufstecken�
(ill� 25)
Mount RobiFix-LOCK with both
screws onto a flat surface.
Clip RobiFix on the LOCK�
(ill. 26)
Danach bei Bedarf (Querkräfte) Klett-
band einfädeln und zusätzlich sichern�
Demontage:
Klettband lösen und RobiFix vom
RobiFix-LOCK trennen�
(ill. 26)
Then if required (lateral forces) attach
the enclosed Velcro strip for additional
safety�
Disassembly:
Detach the Velcro and separate Robi-
Fix from the LOCK�
Variante C:
(RobiFix-TwinPower)
Variant C:
(RobiFix-TwinPower)
(ill. 27)
Hierzu wird das Einzelteil RobiFix-
TwinPower-E (A) mit 2 Schrauben auf
den Untergrund geschraubt (gleiches
Bohrbild wie ill� 24)�
RobiFix-B…MTB in RobiFix-S…MTB
stecken und fest bis auf Anschlag
zusammendrücken und danach von
Hand auf das Einzelteil RobiFix-Twin-
Power-E (A) stecken�
(ill. 27)
Mount RobiFix-TwinPower-E (A) onto a
flat surface with two screws (following
the same drilling plan as shown in ill�
24)�
Mate RobiFix-B…-MTB and RobiFix-
S…-MTB together until they perfectly
engage� Then clip them onto RobiFix-
TwinPower-E (A)�