Multi-Contact MA023 Benutzerhandbuch
Seite 4
Advanced Contact Technology
4 / 8
www.multi-contact.com
10
11
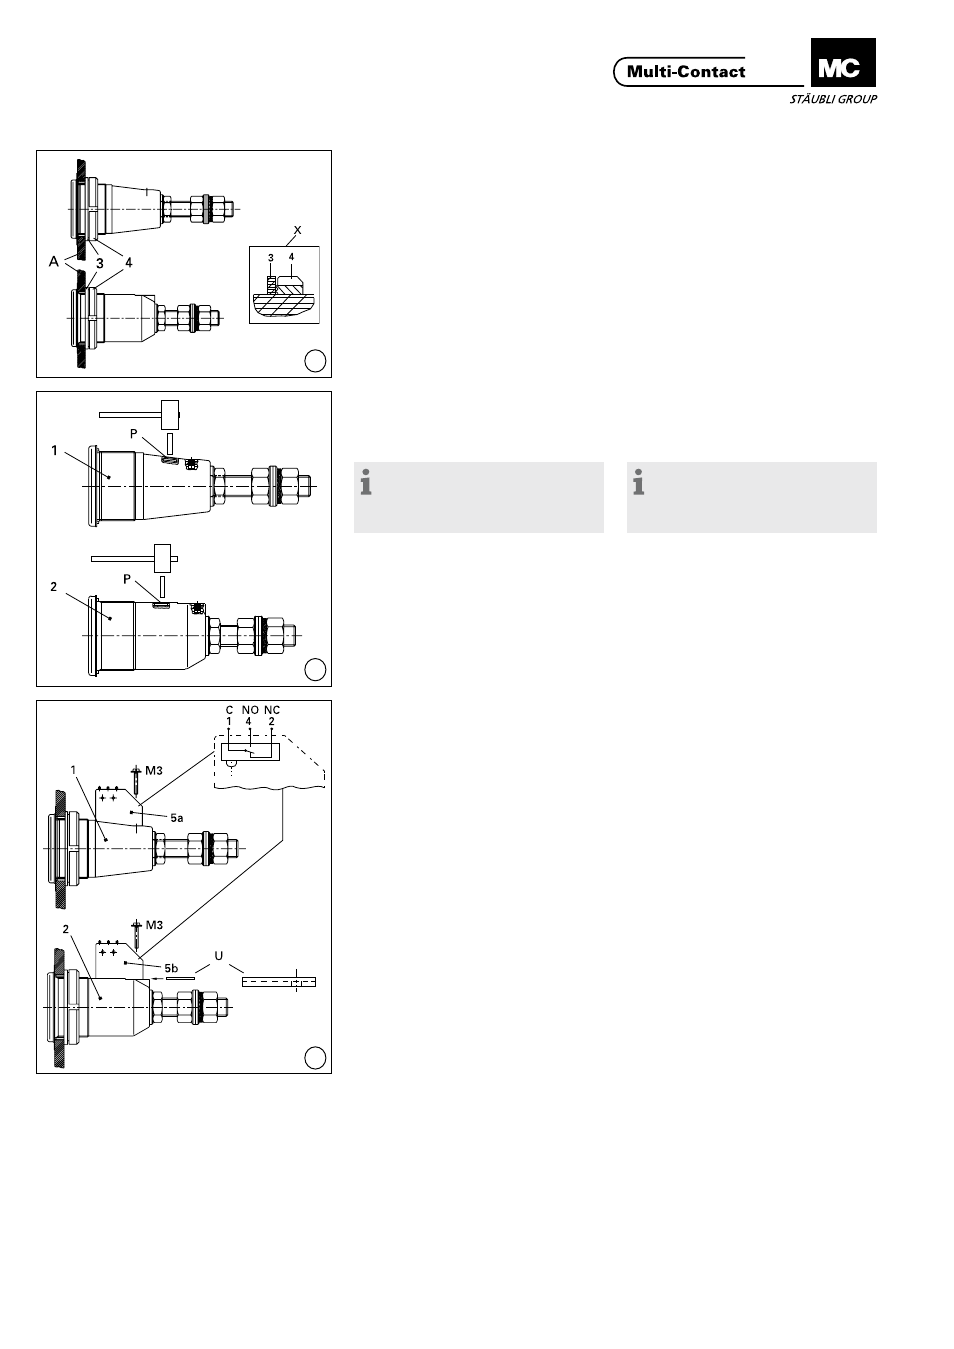
12
(ill. 10)
PUR-Ring (3) und Ringmutter (4)
montieren� Die Rillen der Ringmutter
müssen gegen den PUR-Ring gerich-
tet sein (siehe Detailzeichnung X)�
Ringmutter mit MC-Steckschlüssel
und Drehmomentschlüssel anziehen�
Anzugsdrehmoment: 15Nm�
(ill. 10)
Mount the PUR ring (3) and the ring
nut (4)� Arrange the grooves of the
ring nut toward the PUR-ring (see
detail drawing X)� Tighten the ring
nut with MC-socket wrench and with
torque spanner� Tightening torque:
15Nm�
2. Montage des Schutzde-
ckels
2. Protective cover assembly
siehe separate Montageanleitung
MA036�
see separate assembly instruction
MA036�
3. Montage des Mikroschal-
ters
3. Installation of microswitch
Hinweis:
Mit montiertem Mikroschalter
ist die Wasserdichtheit (IP65) nicht
mehr gewährleistet.
Note:
With the installated microswitch
the watertightness can not be guar-
anteed.
(ill. 11)
Schutzhaut am Durchgangsloch (P)
der Buchse (1) bzw� des Steckers (2)
mit einem Durchschlag durchbrechen�
Darauf achten, dass sich kein Durch-
bruchmaterial im Stecker bzw� in der
Buchse befindet.
(ill. 11)
Break the protection membrane of the
through-hole (P) of the socket (1) or
plug (2) with a punch� Be careful that
the socket resp� the plug is free from
the broken material�
Bevor der Mikroschalter aufge-
schraubt wird, muss die Einbaudose
in die Fronttafel eingebaut werden
(siehe ill� 7 bis ill� 10)�
Before fastening the microswitch, the
panel receptacle has to be assembled
into the front panel (see ill� 7 to ill� 10)�
(ill. 12)
Mikroschalter (5a) auf die Buchse (1)
mit der Schraube M3 anschrauben�
Mikroschalter (5a) auf der Buchse
(1) gut in die Aussparung legen und
mit der Schraube (M3) anschrauben�
Mikroschalter (5b) mit Plättchen (U)
unterlegt, auf den Stecker (2) mit der
Schraube M3 anschrauben� Mikro-
schalter (5b) auf den Stecker (2) gut
in die Aussparung legen und mit der
Schraube (M3) anschrauben� Der
Mikroschalter-Kontakt mit Umschalt-
kontakt hat 3 Steckanschlüsse 2�8x0�5
und eine Schaltleistung von 6A,
250VAC�
(ill. 12)
Fasten microswitch (5a) to socket
(1) with the M3 screw� Firmly insert
the microswitch (5a) in the recess (1)
on the socket and fix in place with
the screw (M3)� Fasten microswitch
(5b) together with mounting plate
(U) to the plug (2)� Fimly insert the
microswitch (5b) in the recess (2)
on the plug and fix in place with the
screw (M3)� The microswitch contact
is a changeover contact� Type of con-
nection: 3 plug connectors 2�8x0�5,
switching capacity 6A, 250VAC�