Multi-Contact MA038 Benutzerhandbuch
Seite 4
Advanced Contact Technology
8
6
7
© b
y
Multi-Contact A
G, Switz
erland – MA038 – 05.2013, Inde
x d
, Global Communications – Änderungen v
orbehalten / Subject to alterations
Hersteller/Producer:
Multi-Contact AG
Stockbrunnenrain 8
CH – 4123 Allschwil
Tel.
+41/61/306 55 55
Fax
+41/61/306 55 56
www.multi-contact.com
(ill. 6)
Buchsenkörper von vorne in die Fron-
tafel stecken und dabei die Nocken an
der Buchse mit den Aussparungen in
der Fronttafel ausrichten.
(ill. 6)
Insert socket into front panel, making
sure that the lugs on the socket mate
with the opening slots.
(ill. 7)
gilt nur für:
ID/B6AR-N-S
ID/S6AR-N-S
ID/S6AR-N-B4S
ID/S6NB
Mutter M18x1 von Hand festschrau-
ben und mit dem Montageschlüssel
SS6 anziehen (max.3Nm).
(ill. 7)
only valid for:
ID/B6AR-N-S
ID/S6AR-N-S
ID/S6AR-N-B4S
ID/S6NB
Screw-on the nut M18x1 and tighten
with the help of the socket spanner
SS6. (max. 3 Nm).
Hinweis:
Adapter für Drehmomentschlüssel
(ill. 2)
Note:
Adapter for torque wrench (ill. 2)
gilt nur für:
ID/B6S
Mutter M12x1 von Hand festschrau-
ben und mit dem Drehmomentschlüs-
sel SW19 anziehen (max. 3Nm).
only valid for:
ID/B6S
Screw-on the nut M12x1 and tighten
with the help of the torque spanner
A/F19 (max. 3Nm).
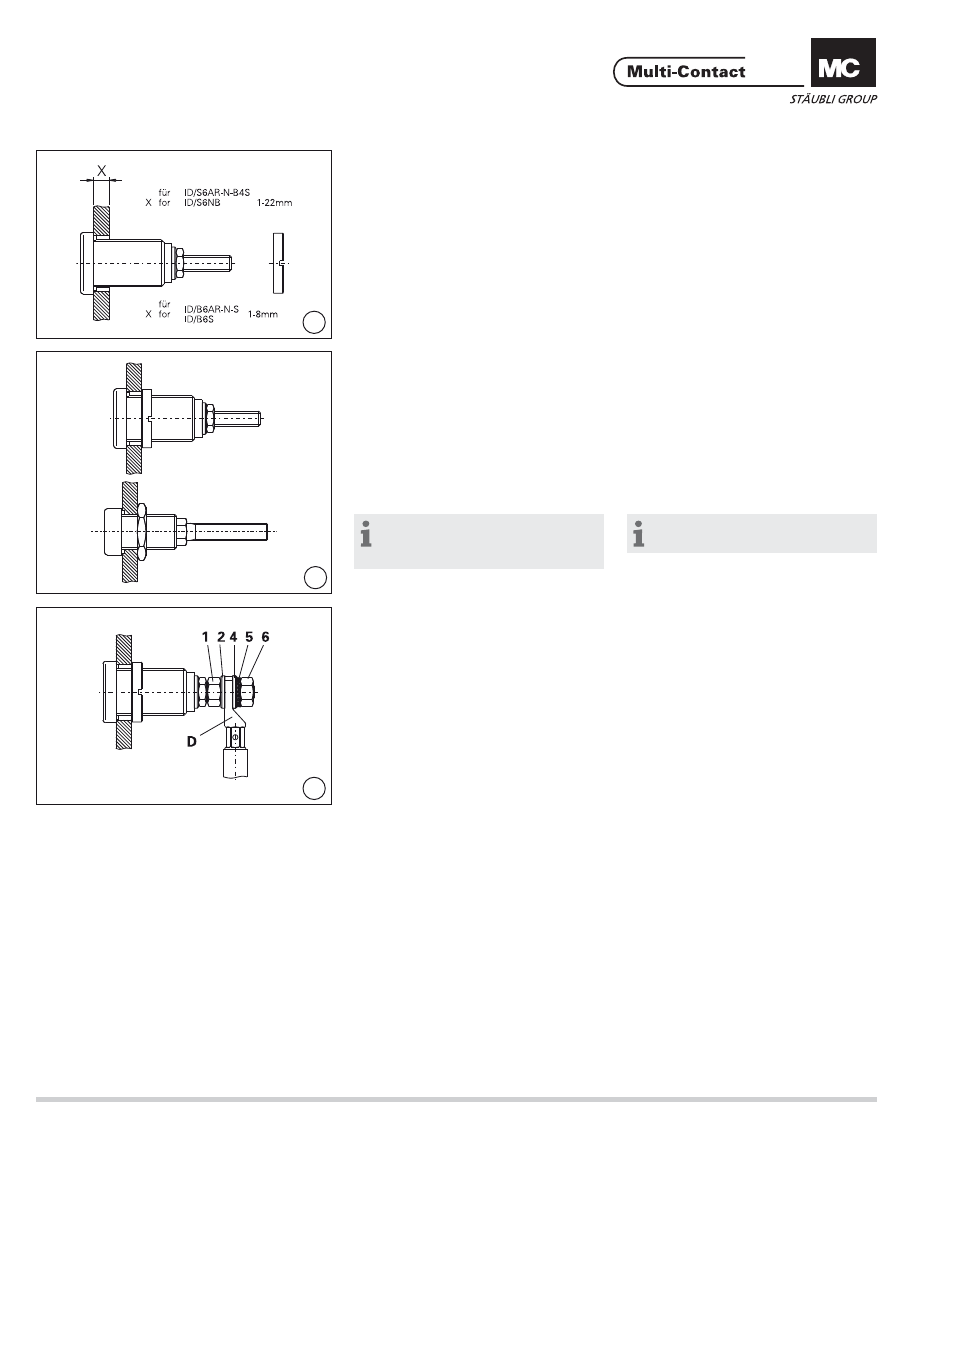
(ill. 8)
Mutter 1 und U-Scheibe 2 montieren.
Kabelschuh D mit angeschlossener
Leitung auf das Gewinde schieben.
U-Scheibe 4, Federscheibe 5 und
Mutter 6 montieren. Mutter 6 mit
Drehmomentschlüssel SW10 anzie-
hen und mit Gabelschlüssel SW10
und Mutter 1 kontern. (3Nm).
(ill. 8)
Screw on the nut 1 and washer 2. Slip
cable lug D with preassembled cable
onto the thread. Install nut 6, washer
4 and lock washer 5. Tighten nut 6
with the torque spanner 10mm A/F
and secure it with nut 1 and the open-
end spanner 10mm A/F. (3Nm).