Multi-Contact MA225 Benutzerhandbuch
Seite 4
Advanced Contact Technology
4 / 8
www.multi-contact.com
7
5
6
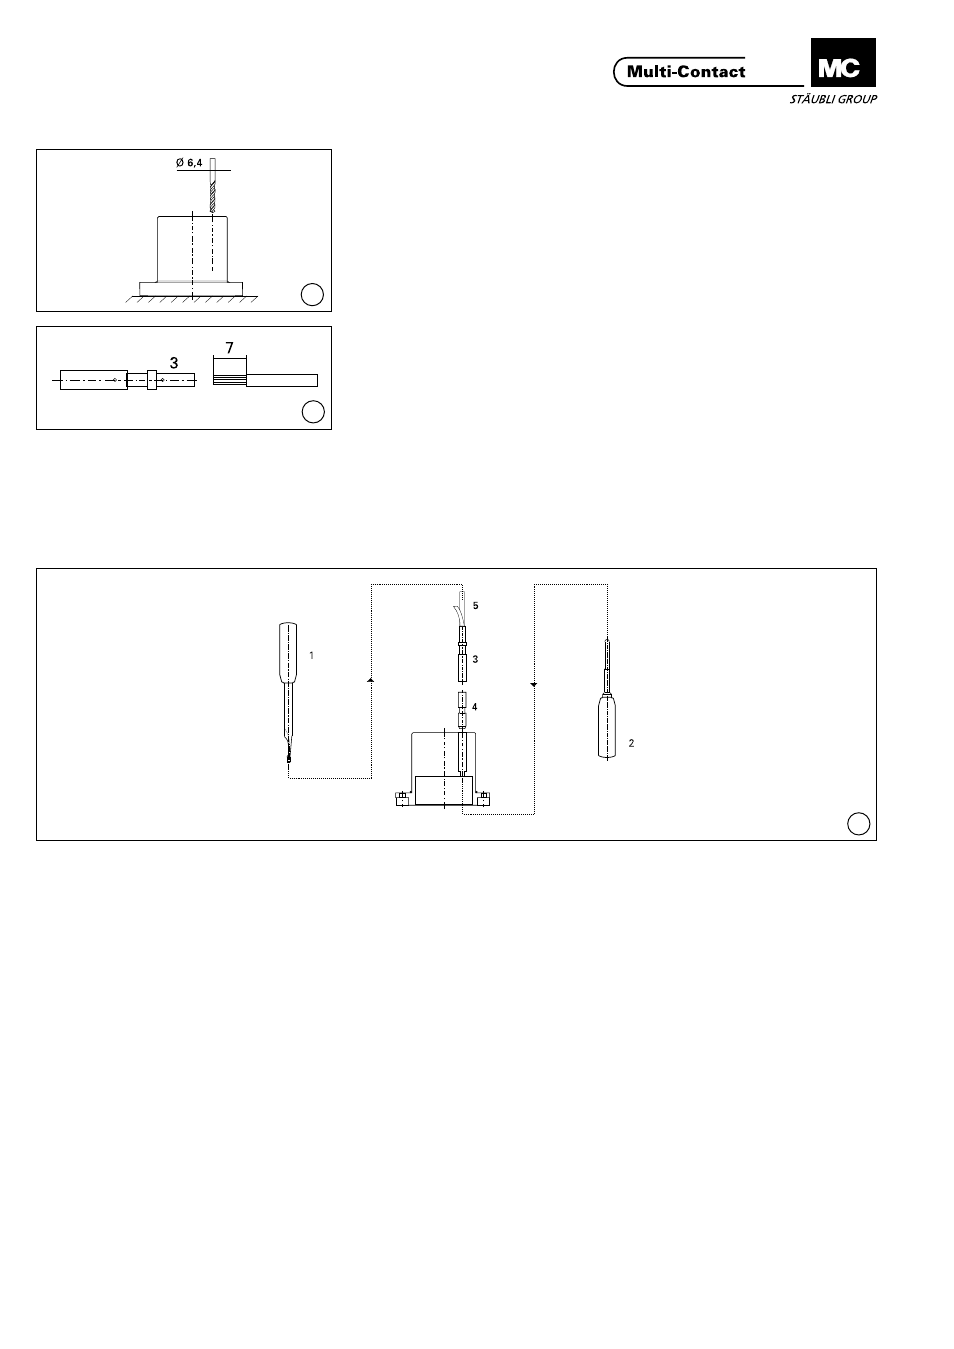
Pilotkontakte montieren
Assembly of pilot contacts
(ill.5)
Die mit einer Schutzhaut verschlosse-
nen Bohrungen (Beschriftung a und b)
mit einem Ø 6,4 mm Bohrer durch-
bohren�
(ill.5)
Drill the protection membrane of the
holes (marked with a and b) with a
Ø 6,4 mm drill.
(ill.6)
Leiter abisolieren und in die Crim-
phülse des Kontaktes einführen�
Angeschlossene Leiter müssen vor-
und nach dem Crimpen im Sichtloch
sichtbar sein�
Mit Crimpzange und Einsatz (ill� 2)
Crimpvorgang ausführen�
Crimpzangeneinstellung (Selektor):
1,5 mm²= Sel. Nr.6 (AWG16)
1,0 mm²= Sel. Nr.5 (AWG18)
0,75 mm²= Sel. Nr.5 (AWG18)
0,5 mm²= Sel. Nr.4 (AWG20)
(ill.6)
Strip the cable and insert cable into
the crimping sleeve of the pilot
c ontact (3)� Wires must be visible in
the sight hole before and after crimp-
ing�
Crimp with crimping pliers and insert
(ill� 2)
Crimping plier (selector):
1,5 mm²= Sel. No.6 (AWG16)
1,0 mm²= Sel. No.5 (AWG18)
0,75 mm²= Sel. No.5 (AWG18)
0,5 mm²= Sel. No.4 (AWG20)
(ill. 7)
Pilotkontaktkammern (4) von der
Anschlußseite her in die aufgebohr-
ten Kammern stecken� Kontakte
(3) mit Einsetzwerkzeug (1) von der
Anschlußseite her bis zum spürbaren
Einrasten in die Kontaktkammern (4)
drücken� Spiritus oder Industriealkohol
erleichtert diesen Vorgang� Evtl� zu
weit eingedrückte Kontakte werden
mit dem Buchsenausbauwerkzeug (2)
in ihre Soll-Lage zurückgedrückt�
(ill. 7)
Press pilot contact supports (4) from
connection side into the drilled holes�
Press contacts (3) from connection
side into pilot contact supports (4)
with the Insertion tool (1) until they
snap into place� To facilitate installa-
tion immerse the contacts in spirits or
industrial alcohol� If the contacts have
been pressed in too far, their position
should be corrected with the socket
extraction tool (2)�