Multi-Contact MA260 Benutzerhandbuch
Seite 5
Advanced Contact Technology
www.multi-contact.com
5 / 8
16
14
15
17
13
(ill. 13)
4. Kontrollieren Sie die Vercrimpung
visuell.
(ill. 13)
4. Visually check the crimp.
Hinweis:
Weitere Hinweise zur Bedienung
der Crimpzange fi nden Sie in der Be-
dienungsanleitung MA251 auf www.
multi-contact.com
Note:
to the operation of the crimping
pliers, see MA251, www.multi-
contact.com
Montage-Prüfung
Assembly control
(ill. 14)
Führen Sie den angecrimpten Kontakt
von hinten in die Stecker- bzw. Buch-
senisolation ein bis zum Einrasten.
Prüfen Sie durch leichtes Ziehen an
der Leitung, dass das Metallteil richtig
eingerastet ist.
(ill. 14)
Insert the crimped-on contact into the
insulator of the male or female coupler
until it clicks into place. Pull gently on
the lead to check that the metal part is
correctly engaged.
(ill. 15)
Stecken Sie den Prüfstift mit der ent-
sprechenden Seite in die Buchse bzw.
in den Stecker bis zum Anschlag. Bei
richtig montiertem Kontakt muss die
weisse Markierung am Prüfstift noch
sichtbar sein.
(ill. 15)
Insert the appropriate end of the test
pin into the male or female coupler as
far as it will go. If the contact is cor-
rectly located, the white mark on the
test pin must still be visible.
(ill. 16)
Ziehen Sie die Leitungsverschraubung
mit den Werkzeugen PV-MS handfest
an
oder
(ill. 16)
Screw up the cable gland hand-tight
with the tools PV-MS
or
(ill. 17)
Ziehen Sie die Leitungsverschraubung
mit den Werkzeugen PVWZ-AD/GWD
und PVSSE-AD4 an.
(ill. 17)
Tighten the cable gland with the tools
PVWZ-AD/GWD and PVSSE-AD4.
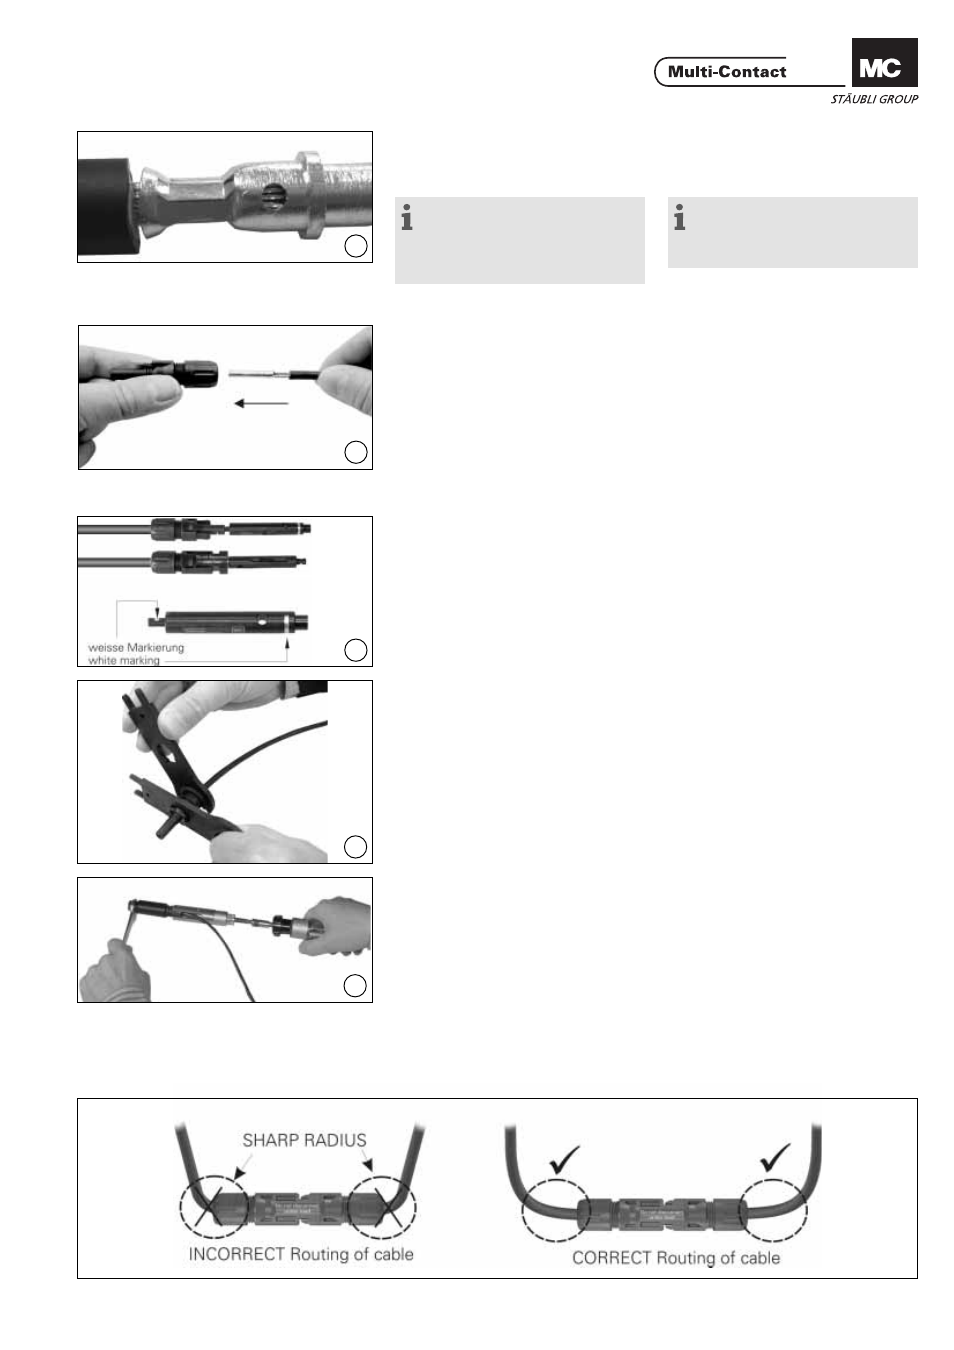
Leitungsführung
Cable routing
Beachten Sie die Spezifi kationen des
Leitungsherstellers betreffend Biege-
radius.
Refer to cable manufactures specifi ca-
ton for minimum bending radius.