Multi-Contact MA091 Benutzerhandbuch
Seite 6
Advanced Contact Technology
6 / 8 www.multi-contact.com
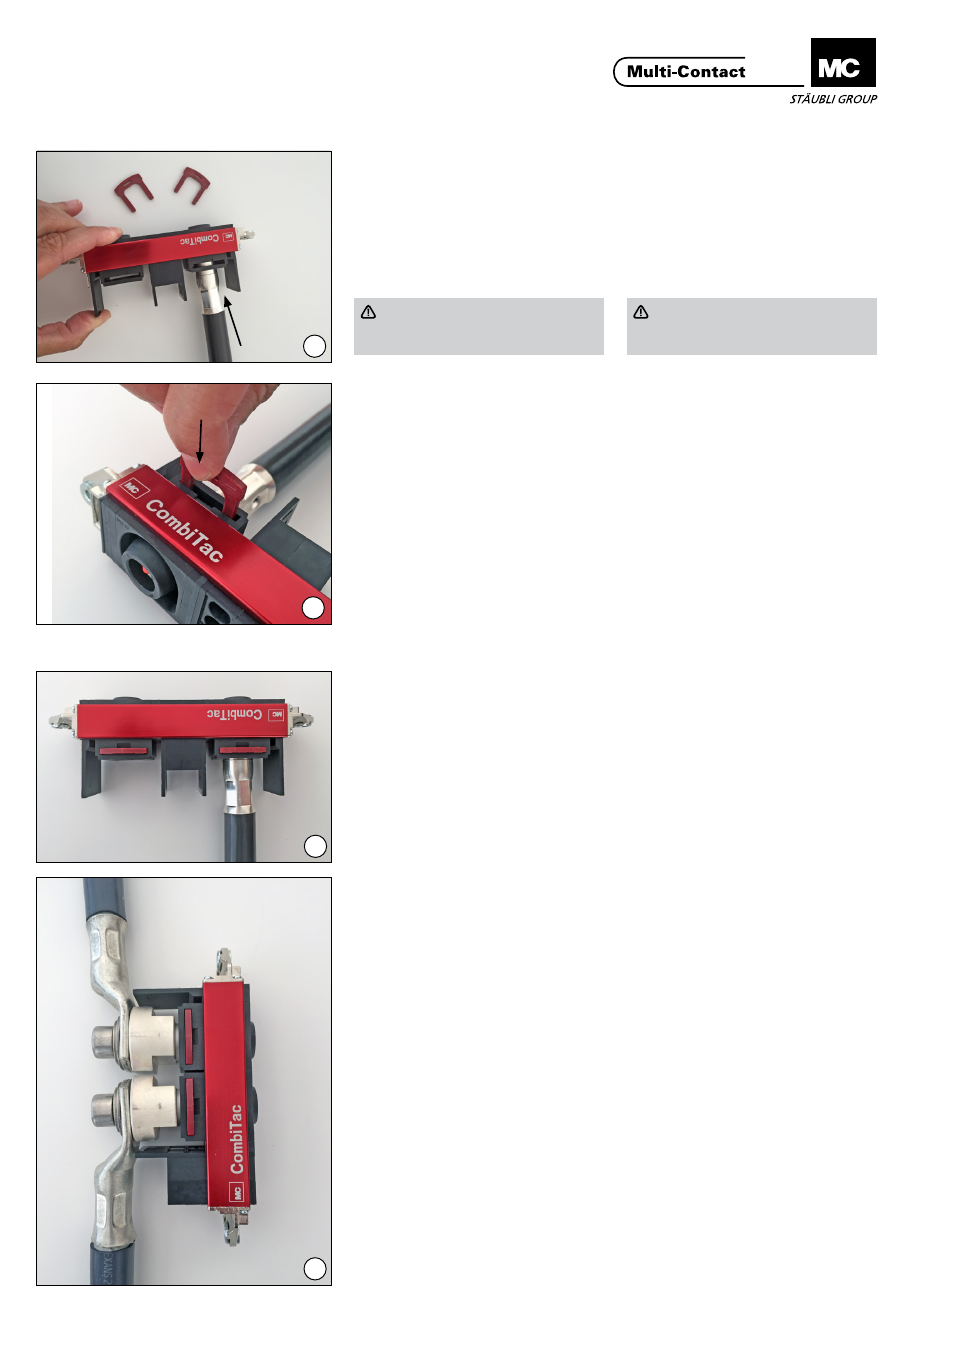
15
16
13
14
Einbau des Buchsenkontakts
12 mm in die Isolierhülse
Positioning of the 12 mm
female contact in insulating
sleeve
(ill. 13)
Den auf das Kabel gecrimpten Kontakt
in den Kontaktträger einführen.
(ill. 13)
Insert contact, which has been
crimped onto the cable, into the con-
tact carrier.
Achtung
Kabelnummern beachten (
1 oder
2, usw...) (ill. 19)
Attention
Observe cable numbers (way
1 or
2, etc...) (ill. 19)
(ill. 14)
Den Sicherungsbügel einsetzen, so
dass der Kontakt in den Verbinder
einrastet.
(ill. 14)
Insert the retaining clip to lock the
contact in the connector.
(ill. 15)
Ein hörbares Klick signalisiert, dass
der Kontakt eingerastet ist.
(ill. 15)
The contact is locked when you hear a
clear click.
Wiederholen Sie den Vorgang für den
zweiten Kontakt.
Repeat the process for the second
contact.
Einbau des Steckerkontakts
in die Isolierhülse
Positioning of male contact in
insulating sleeve
Wiederholen Sie die Schritte der Ab-
bildungen 11 bis 14 für den Stecker-
kontakt und das Konfigurationsgehäu-
se�
Repeat the steps shown in figures 11
to 14 for the female contact and the
configuration body.
Einbau des Schraubanschluss-
kontaktes in die Isolierhülse
Positioning of screw termina-
tion in insulating sleeve
Wiederholen Sie die Schritte der Ab-
bildungen 13 bis 15 für den Schraub-
anschlusskontakt (ill. 16).
Repeat the steps shown in figures 13
to 15 for the female contact and the
configuration body (ill. 16).
Kabelschuh, U-Scheiben und Zylin-
derschraube M10 mit Innensechskant
montieren.
Mit Drehmomentschlüssel die Zylinder
schraube mit einem Innensechskant
anziehen und mit dem Gabelschlüssel
kontern�
Max. Anzugsdrehmoment:
26 bis 30 Nm
Install the cable lug, washers and hex-
agon socket head screw M10. Tighten
the hexagon socket head screw with
the torque wrench and secure it with
the open-end spanner.
Max. tightening torque:
26 to 30 Nm