Multi-Contact MA300 Benutzerhandbuch
Seite 4
Advanced Contact Technology
4 / 8 www.multi-contact.com
4
5
6
7
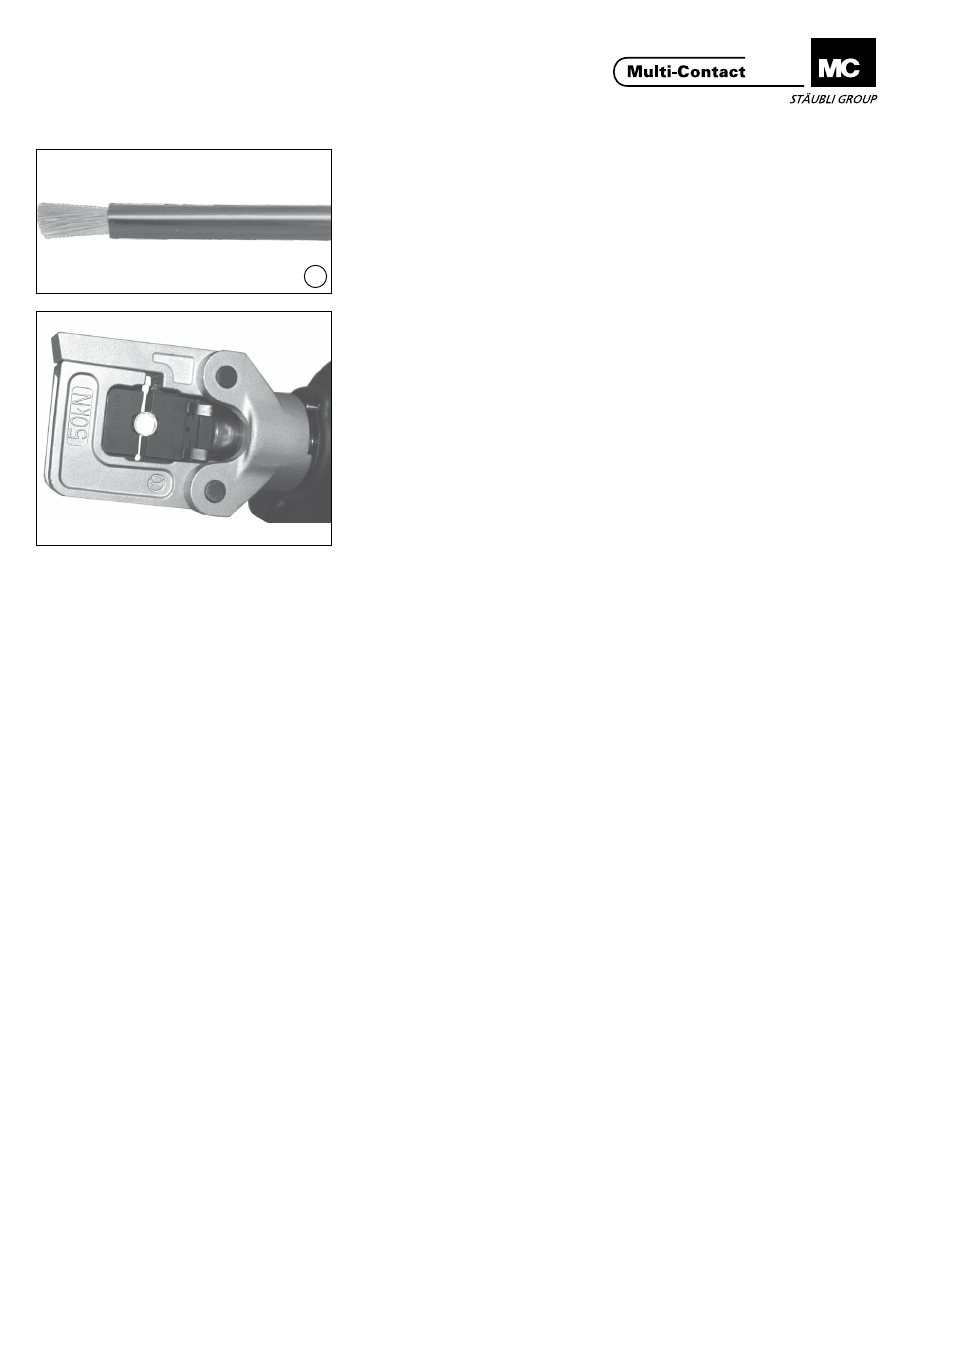
Leitung vorbereiten
Cable preparation
(ill. 4)
Leitung abisolieren� Die Länge richtet
sich nach den Vorgaben für die ent-
sprechenden Crimphülsen, Crimpkon-
takte und Rohrkabelschuhe�
(ill. 4)
Strip cable insulation over the length
specified for the respective crimp-
ing sleeve, crimping connectors and
tubular cable lugs�
Leitung vercrimpen
Cable crimping
(ill. 5)
Crimphülse in die Zange einlegen�
Crimpeinsatz zusammenfahren bis
sich die Crimpeinsätze an die Crim-
phülse anschliessen und diese fixie-
ren� Crimphülse darf sich dabei noch
nicht verformen�
Die Crimpeinsätze können bei Bedarf
zurückgestellt werden (siehe ill� 9)�
(ill. 5)
Insert crimping sleeve in the plier and
close it until the crimping inserts en-
gage with the crimping sleeve and fix
it� This operation must not yet deform
the crimping sleeve�
The crimping inserts can be reset if
necessary (see ill� 9)�
(ill. 6)
Die Position der Crimpung gemäss
Abbildung beachten� Abstand vom
Rand der Crimphülse min. 2 mm.
Position ist abhängig, ob einmal oder
zweimal gecrimpt werden muss�
(siehe Tab� 1)
(ill. 6)
Position the crimp as shown in the
illustration� Distance from edge of
crimping sleeve min. 2 mm. The posi-
tion depends on whether crimping
has to be done once or twice�
(see Tab� 1)
Hinweis:
Litzen müssen vor und nach dem
Crimpen im Sichtloch sichtbar sein.
Remark:
Wire must be visible in the inspec-
tion hole before and after crimping.
(ill. 7)
Leitung mit allen Einzeldrähten in die
Crimphülse einführen�
Es dürfen keine Litzen aus der Crim-
phülse hervorstehen�
Der Zangencrimpkopf ist bei Bedarf
um 180° drehbar� Somit wird ein Ar-
beiten auf engstem Raum möglich�
(ill. 7)
Insert all strands of the wire into the
crimping sleeve�
No wire strands must protrude from
the crimping sleeve�
The plier crimping head can be rotated
through 180° if necessary� This ena-
bles crimping to be carried out even in
a very restricted space�
Crimpzone
Crimping zone