Multi-Contact MA255 Benutzerhandbuch
Seite 7
Advanced Contact Technology
www.multi-contact.com
7 / 12
12
13
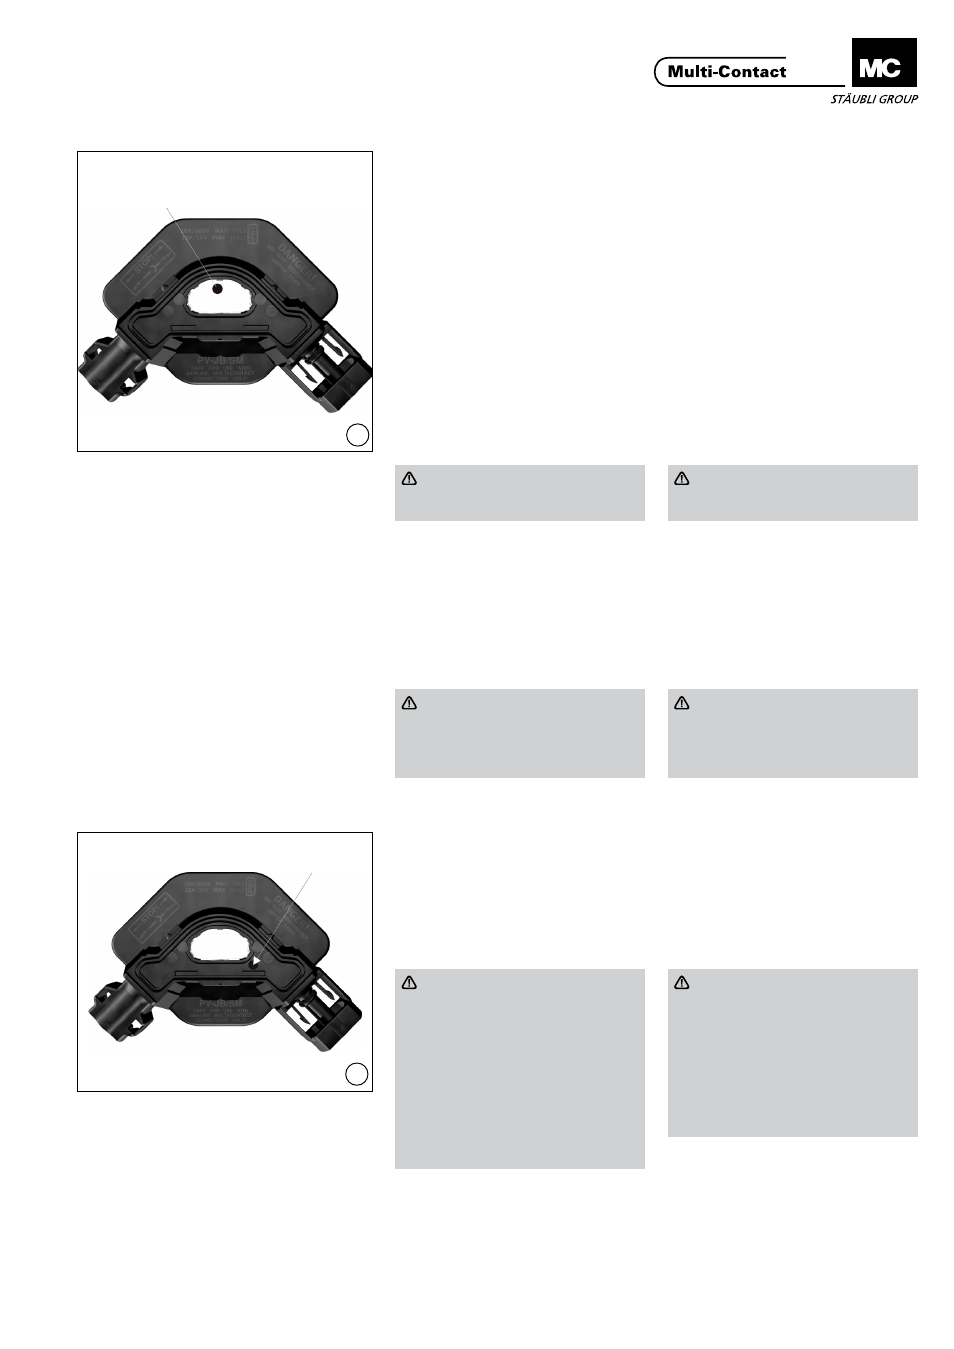
(ill. 12)
Nachdem die Anschlussdose korrekt
ausgerichtet und mit der Rückseite
des PV-Moduls verbunden worden
ist, führen Sie ein speziell entwickelte
Thermode am Ende eines Reflowlöt-
kolbens (Hot Bar) oder eine Lötkol-
benspitze von Ø 4 mm in die Öffnung
der PV-JB/SM Anschlussdose ein
und verlöten Sie beide Lötlaschen
mit den Flachbandleiter unter Einsatz
des benötigen Drucks, der nötigen
Zeit und Temperatur. Für das korrek-
te Anlöten und die Verbindung der
Lötlasche mit der Stromschiene ist es
erforderlich, die Stromschiene vorzu-
verzinnen (Silber-Lötgalvanisation) auf
der Stromschiene ist ausreichend und
führen Sie (no-clean) flux zu.
(ill. 12)
After properly orienting and bonding
the junction box to the back of the PV
module, reach through the opening in
PV-JB/SM with a specially designed
thermode on the end of a reflow sol-
dering (Hot Bar) machine or
Ø 4 mm soldering iron tip and solder
both solder flaps to the bus ribbons
using the appropriate pressure, time,
and temperature. For proper solder-
ing and adhesion of the solder tabs to
the busbar it is required to pre-tin the
busbar, (silver solder plating on the
busbar is sufficient), and apply a (no
clean) flux.
Vorsicht
Gebrauch eines Aluminium Flach-
bandleiter wird nicht empfohlen�
Caution
Use with an aluminium bus rib-
bon is not recommended�
Nachdem der Lötvorgang abgeschlos-
sen ist, entfernen Sie die Hitze und
halten Sie den Druck weiter, bis sich
die Lötstelle verfestigt hat.
Die Lötverbindungsmethode sollte
nach dem IPC J-STD-001D oder ent-
sprechend getest sein�
After the soldering operation is
complete, remove heat and maintain
pressure until the solder area has
solidified.
The solder connection method should
be evaluated according to the stand-
ard IPC J-STD-001D or equivalent�
Achtung
Achten Sie besonders darauf,
während des Lötvorgangs nicht
mit irgendwelchen Plastikteilen in
Berührung zu kommen�
Attention
Take special care not to come in
contact with any plastic com-
ponents during the soldering
operation�
Verkapselung der Anschluss-
dose
Potting of the junction box
(ill. 13)
Füllen Sie die Anschlussdose bis zur
Oberkante der Öffnung in der PV-JB/
SM mit Vergussmasse so dass eine
kleine Menge Vergussmasse (ca� 1 cc)
in die Überlaufbereich eintritt.
(ill. 13)
Fill the junction box with potting
material to the top of the opening in
the PV-JB/SM so that a small amount
of pottant (approx� 1 cc) spills in to the
overflow well.
Vorsicht
NICHT zu schnell giessen, sonst
entstehen Luftblasen in der
Vergussmasse oder Luft wird im
Innern der Anschlussdose einge-
schlossen�
Bei manuellem Einfüllen wird
empfohlen, die Anschlussdose zu
2/3 zu füllen, dann die Luftblasen
ca� 10Sek� aufsteigen zu lassen
und danach die restliche Menge
einzufüllen�
Caution
DO NOT pour abruptly as to crea-
te air pockets in the pottant or to
trap any air inside of the junction
box�
It is recommended if dispensing
manually to fill the junction box
2/3 full, let air bubbles surface for
approx. 10 seconds, then fill the
remaining volume�
Öffnung in PV-JB/SM
Opening in PV-JB/SM
Überlaufbereich
Overflow well