First steps – Xoro TelePAD 830 Benutzerhandbuch
Seite 45
TelePAD 830
15
E
n
g
lis
h
First Steps
Camera
The Xoro TelePAD features on the front and on the back each have a camera, the front camera is
mainly used for video calling and the back camera for Picture & Video recordings.
To start the camera press the icon in the program overview. With video telephony applications,
the front camera will start automatically.
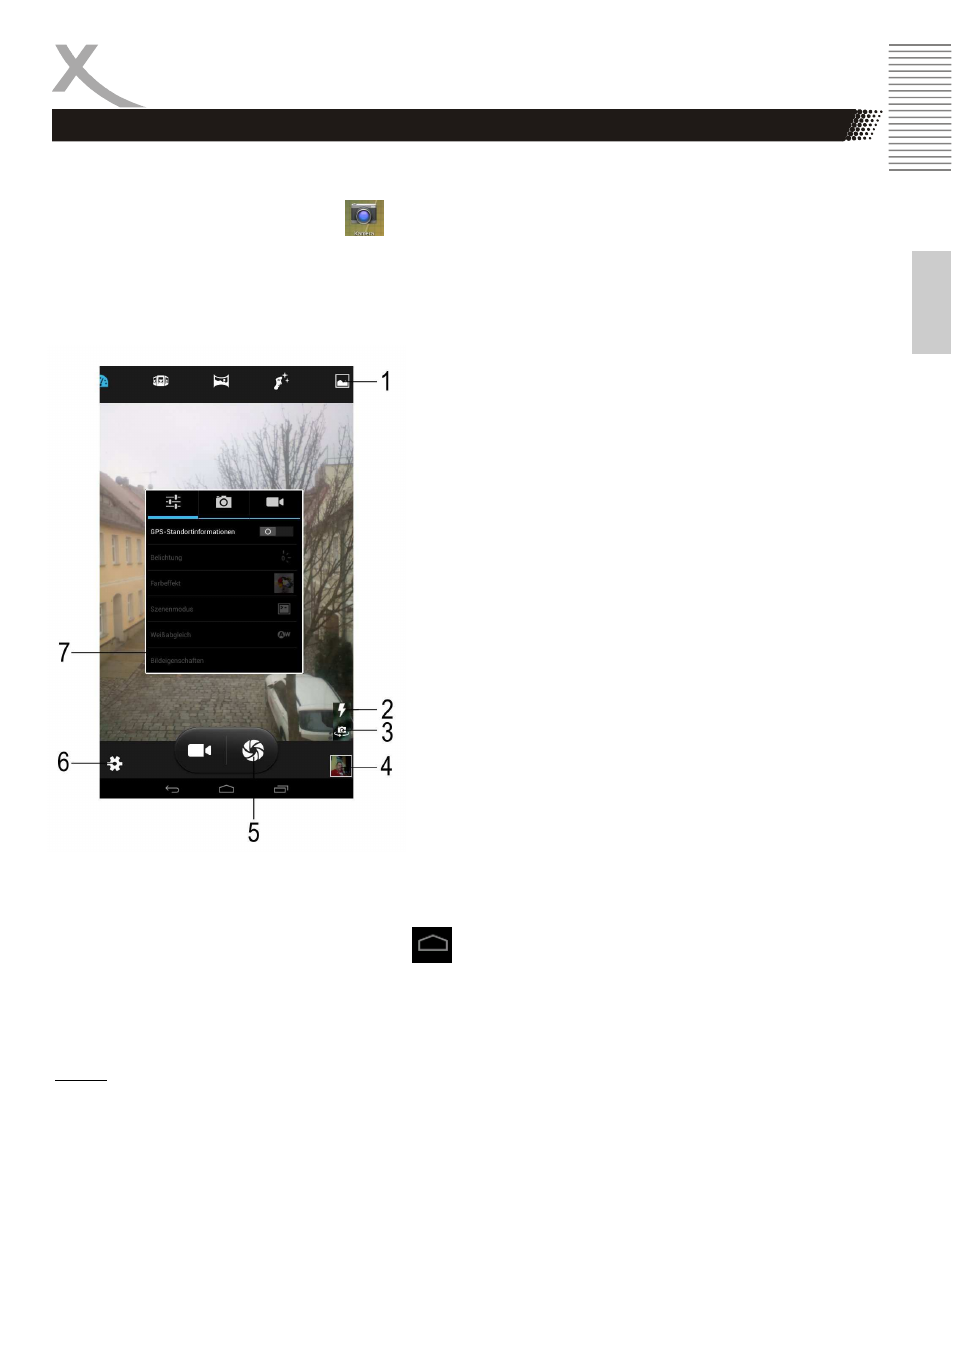
The following settings can be made in the camera application:
1
In the top bar you can select by tapping from
several predefined camera settings and
functions,
for
example,
take
pictures,
panoramic images, or the "smileshoot" can be
activated.
2
De / Activate the rear LED flash or photo light
and auto flash.
3
Switches between the front / back camera
4
Changes in the gallery and displays the last
recordings / photos
5
Trigger for the photo & video mode
6
Displays the camera settings (7)
7
In the Camera Settings You can customize
various parameters of the camera in general or
the photo and video recording, for example,
add the white balance, exposure, or color
effect.
When you have made all the settings for your recording, you can record your shot by tapping the
trigger (5).
To exit the Camera application, tap the icon in the bottom toolbar.
All photos and videos will be available immediately in the gallery application are available (page 25)
and can be edited, forwarded or deleted from there.
Notes:
•
By divergence or contraction of two fingers the image can be digitally zoom.
The best shots you can achieve by holding the TelePAD with both hands to the recording
from being blurred.
•
The camera focuses and exposes the image in most shooting situations automatically. For
this purpose, the device requires possibly a little moment, before you press the shutter button.