Connecting the console devices, Interfaces of the mc variant – Guntermann & Drunck DVIMUX4-DL-USB Benutzerhandbuch
Seite 50
Installation
4 · G&D DVIMUX4-DL-USB
Connecting the console devices
Keyb.:
Insert the connection cable of the USB keyboard to this interface.
Mouse:
Insert the connection cable of the USB mouse to this interface
Line In:
If desired, connect a microphone or headset to this interface.
Speaker:
Connect the speaker for the output of the audio signals of the active com-
puter to this interface.
Monitor 1:
Connect the DVI cable of the monitor to this interface.
USB 2.0 Devices:
If you want USB devices to be available to the connected computers
(e.g. a printer or a mass storage device), connect these devices to the interfaces on
the front panel (see figure 1 on page 3).
NOTE:
Connect the cables of the console and the computers preferably block by
block and from the bottom up. By doing so, you will avoid already connected
cables blocking your view of the interfaces.
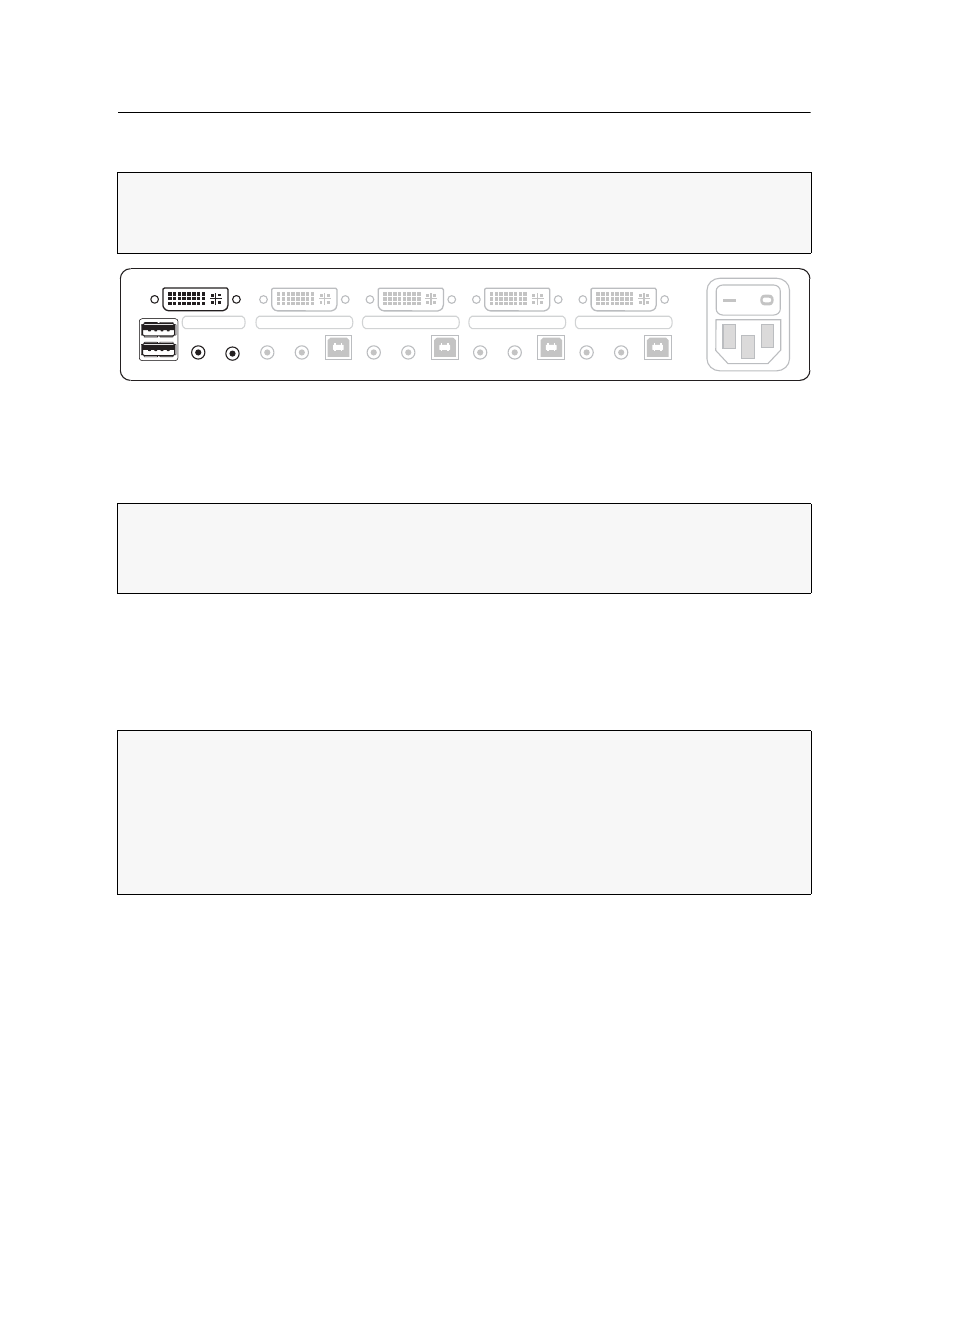
Figure 2: Interfaces to connect the console devices
IMPORTANT:
You can also connect both input devices to the
USB2.0 Devices
interfaces
on the front panel of the device.
In this case, switching of the channels is not possible via keyboard!
NOTE:
When deploying a multi-channel variant of the KVM switch, the separate
video signals of computers in a multi-monitor installation can be transmitted to
two (MC2), three (MC3), or four (MC4) monitors.
The device provides up to four video inputs (
DVI-I CPU 1.x
to
4.x
) for each monitor
you want to connect.
If required, connect the other monitors to the
Monitor x
interfaces of the MC variant.
Power
Line In
USB 2.0
Line Out
CPU 3
DVI-I CPU 3.1
Line In
USB 2.0
Line Out
Line In
USB 2.0
Line Out
CPU 4
DVI-I CPU 4.1
CPU 1
DVI-I CPU 1.1
Line In
USB 2.0
Line Out
CPU 2
DVI-I CPU 2.1
Monitor 1
Keyb./Mouse
Speaker
CON
Line In