Multi-Contact MA048 Benutzerhandbuch
Seite 4
Advanced Contact Technology
4 / 8
www.multi-contact.com
7
8
9
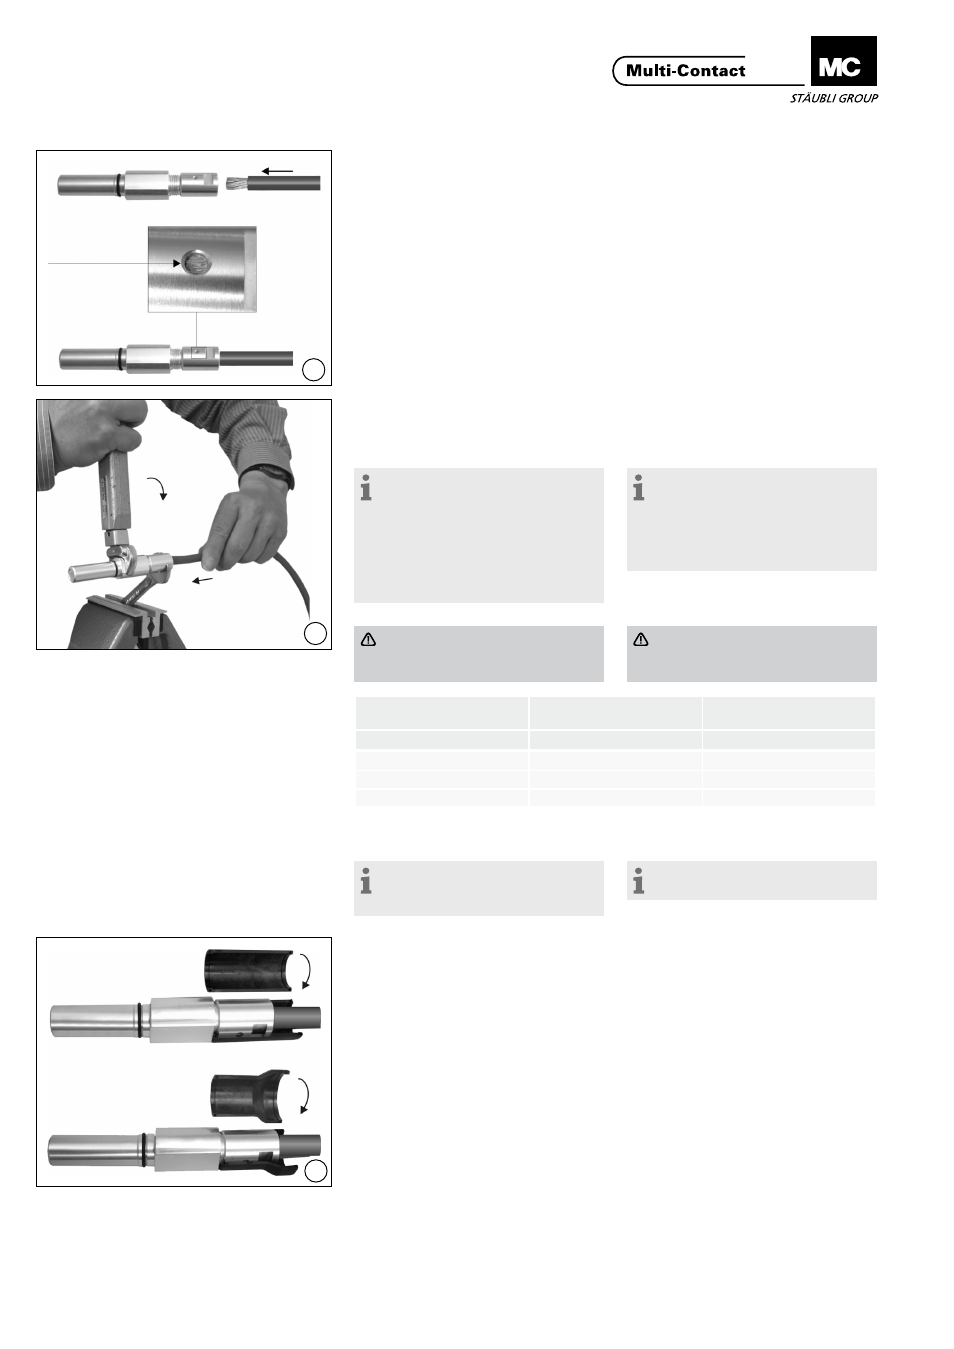
(ill. 7)
Leitung mit Kraft in die AxiClamp-Hül-
se einschieben, bis die Leiterisolation
an der AxiClamp-Hülse anschlägt und
die Einzeldrähte im Sichtloch sichtbar
sind�
(ill. 7)
Firmly push lead into the AxiClamp
sleeve until the lead insulation comes
up against the AxiClamp sleeve and
the individual wire strands can be
seen in the sight hole�
(ill. 8)
Die AxiClamp mit Drehmomentschlüs-
sel SW19 festschrauben und mit
Gabelschlüssel
1)
kontern�
Hinweis:
Den Gabelschlüssel in einen
Schraubstock klemmen, die
AxiClamp mit eingeschobener Lei-
tung in den festgeklemmten Gabel-
schlüssel einführen und mit dem
Drehmomentschlüssel anziehen.
(Drehmoment gemäss Tabelle unten).
(ill. 8)
Screw up the AxiClamp with the
torque wrench A/F19 and counter-
tighten with open-ended wrench
1)
�
Note:
Clamp the open-ended wrench in
a vice, fit the Axi-Clamp with the in-
serted lead into the clamped wrench,
and tighten with the torque wrench.
(See table below for correct torque).
Achtung
Beim Anziehen Leitung nachdrü-
cken�
Attention
Keep lead pressed into sleeve
while tightening�
1)
gem� Tabelle oben�
1)
according to the list below�
Hinweis:
Leitung nicht anlöten oder an-
schweissen!
Note:
Do not solder or weld the câble!
(ill. 9)
Distanzhülsen-Hälften über der Axi-
Clamp-Hülse zusammenstecken� Bei
Verwendung des Verriegelungsrings
muss dieser jetzt montiert werden,
siehe Montageanleitung MA049�
(ill. 9)
Push together the halfshells of dis-
tance tube over the AxiClamp sleeve�
When the locking ring is used then it
must be installed now, see assembly
instruction MA049�
Leiterquerschnitt
Conductor cross section
Anzugsdrehmoment
Tightening torque
Schlüsselweite SW
Key size
mm²
Nm
mm
...AX 6 / 10 / 16
9
9
...AX 25 / 35
24
12
...AX 50 / 70
45
16
Sichtloch
Sight hole
für
for K...T10BV/M25...
für
for K...T10BV/M32...