Multi-Contact MA075 Benutzerhandbuch
Seite 5
Advanced Contact Technology
www.multi-contact.com
5 / 8
10
W
A
12
11
Druckpunkt
Actuator
P
oint de pr
ession
(ill.10)
Stecker von vorne in den Winkelad-
apter stecken� Stecker so ausrichten,
dass die Markierung W beim Steck-
vorgang gut sichtbar ist�
Kreuzschlitzschrauben M6 und Mutter
M6 anziehen. Drehmoment 4 Nm.
Anschluss siehe ill� 7, 8 Seite 4/8
(ill.10)
Insert plug into angle adapter�
Align plug so that marking W is visible
during plugging�
Tighten Philips screws M6 and nuts
M6. Torque 4 Nm.
Connection see ill� 7, 8 page 4/8
Montage des Schutzdeckels
Protective cover assembly
siehe Montageanleitung MA036 unter
www�multi-contact�com
see assembly instructions MA036
under www�multi-contact�com
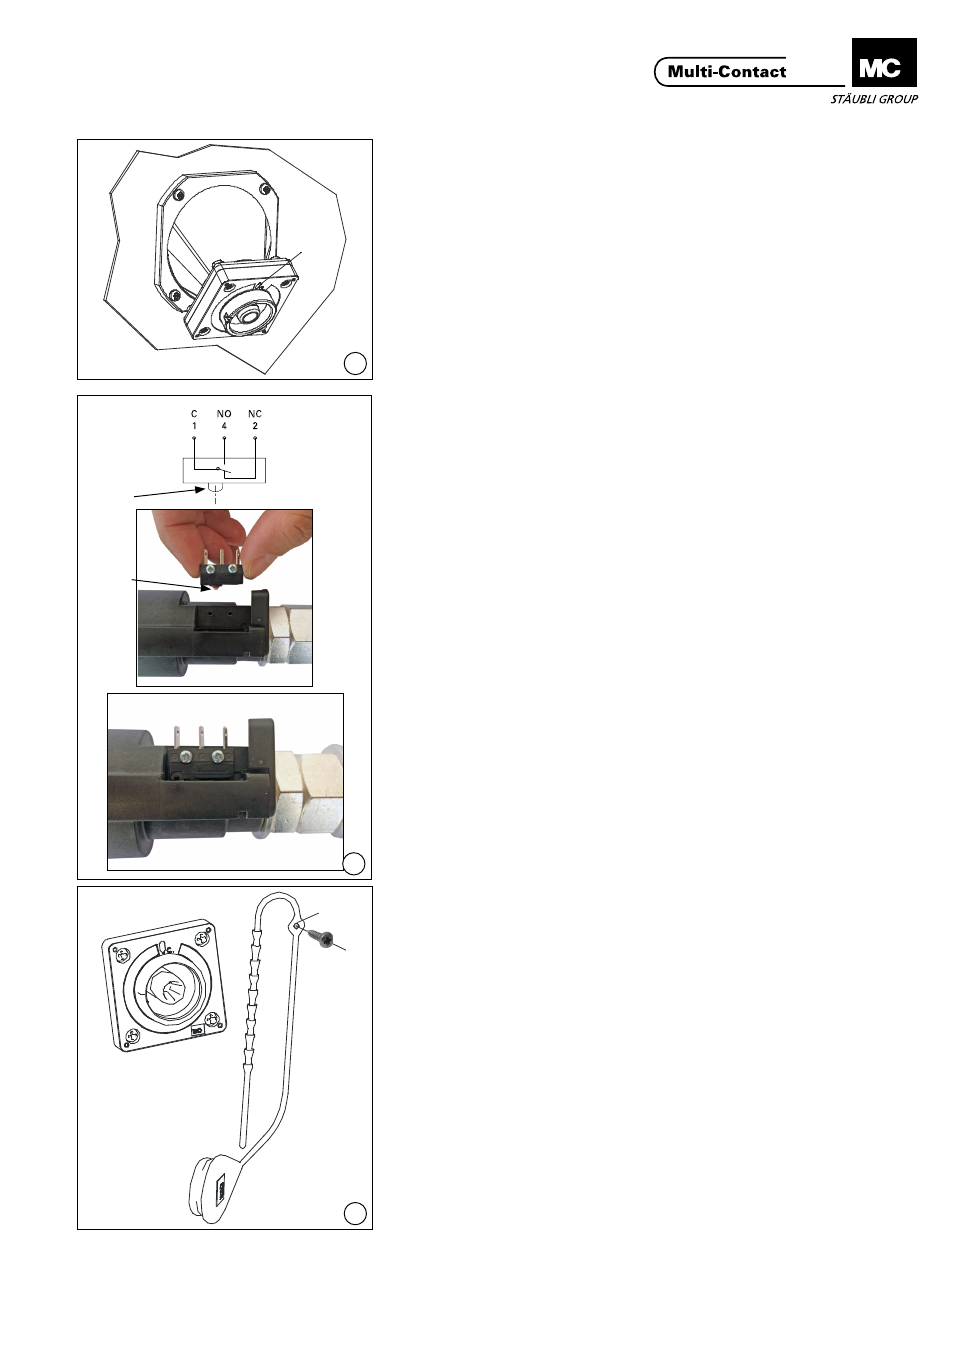
Montage des Mikroschalters
Installation of microswitch
(ill. 11)
Mikroschalter auf den Stecker mit PT-
Schrauben anschrauben�
Der Mikroschalter-Kontakt mit Um-
schaltkontakt hat 3 Steckanschlüsse
2�8 x 0�5 und eine Schaltleistung von
6 A, 250VAC.
Hinweis:
Montagerichtung des Mikroschal-
ters beachten!
(ill. 11)
Fasten microswitch to plug with PT-
screw� The microswitch contact is a
changeover contact� Type of con-
nection: 3 plug connectors 2�8 x 0�5,
switching capacity 6 A, 250VAC.
Note:
Observe the orientation when
assembling the microswitch!
Funktionskontrolle des
Mikroschalters
Functional check of micro-
switch
Der Mikroschalter schaltet unmittelbar
bevor die Verriegelung einrastet und
zeigt damit an, dass die Steckverbin-
dung verriegelt ist�
Hinweis:
Die korrekte Verriegelung ist erst
nach dem Einrasten sichergestellt.
By switching immediately prior to
engagement of the interlock, the
microswitch indicates that the plug
connection is engaged�
Note:
Correct interlocking is achieved
only after engagement.
Montage der Verschluss-
kappe
Fitting the protective cap
(ill. 12)
Die Verschlusskappe wird von vorne
in den Stecker gesteckt bis zum An-
schlag� Die Gummischlaufe kann über
die Öse (A) festgeschraubt werden�
(ill. 12)
The protective cap is pushed into the
plug from the front as far as it will go�
The cord lanyard can be screwed to
the eyelet (A)�