Multi-Contact MA303 Benutzerhandbuch
Seite 5
Advanced Contact Technology
www.multi-contact.com
5 / 8
13
12
15
16
14
Crimpen
Crimping
Achtung
Vor dem Crimpen, Kabelver-
schraubung und Gehäuse auf das
Kabel schieben�
Attention
Slip the cable gland and back
section of housing on the cable
before crimping�
(ill. 12)
Crimpzone (C) beachten!
Leitung in die Crimphülse bis zum
Anschlag einführen�
Litzen müssen im Sichtloch sichtbar
sein�
(ill. 12)
After inserting the crimping sleeve in
the tool, use crimp zone (C)�
Fully insert lead into the crimping
sleeve� Wire must be visible in the
control hole�
Hinweis:
Passende Crimpzange und Ein-
sätze, siehe Tab. 3, Seite 4/8
Note:
Adequate crimping pliers and dies,
see Tab. 3, page 4/8
(ill. 13)
Während des Crimpens, Leitung leicht
in axialer Richtung in Crimphülse
drücken� Litzen müssen nach und vor
dem Crimpen im Sichtloch sichtbar
sein�
(ill. 13)
Crimp the wire, pushing it gently into
the sleeve while doing so� Wire must
be visible in the control hole before
and after the crimping�
Montage
Assembly
(ill. 14)
Für Kontakte Ø 1 / 3 und 6 mm
Kontakt von Hand in den Kontaktträ-
ger bis zum Einclipsen einführen�
(ill. 14)
For contacts Ø 1 / 3 and 6 mm
Insert the contact by hand in the con-
tact carrier until it engages�
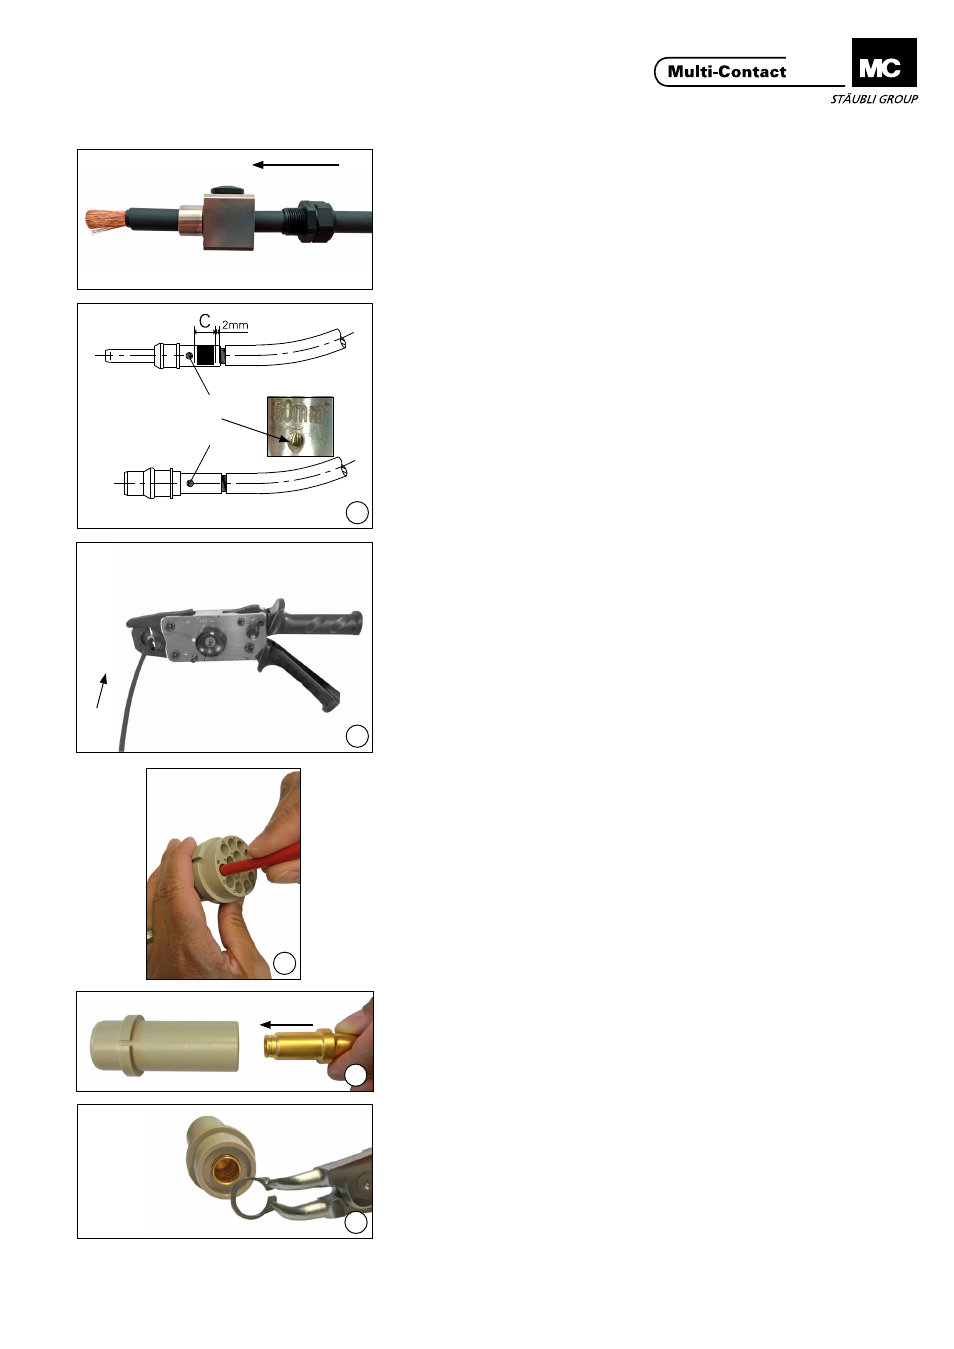
Für Kontakte Ø 1,6 mm:
Kontakt mittels Einsetzwerkzeug
ME-WZ1,6 in den Kontaktträger bis
zum Einclipsen einführen�
For contacts Ø 1,6 mm:
Insert the contact with the insertion
tool ME-WZ1,6 in the contact carrier
until it engages�
(ill. 15)
Fьr Ш 10 mm Kontakte
Kontakt in Kontaktträger einführen�
(ill. 15)
For Ø 10 mm contacts
Insert the contact in the contact
carrier�
(ill. 16)
Kontakt mit dem Sicherungsring
befestigen�
(ill. 16)
Lock the contact in the front with the
circlip�
Sichtloch
Control hole
Beispiel mit der Crimpzange für
Leitungen 6 bis 35 mm
2
Example with crimping pliers for 6 to
35 mm
2
cables