Delay setup menu, Balance setup menu – ROTEL RSP985 Benutzerhandbuch
Seite 22
22
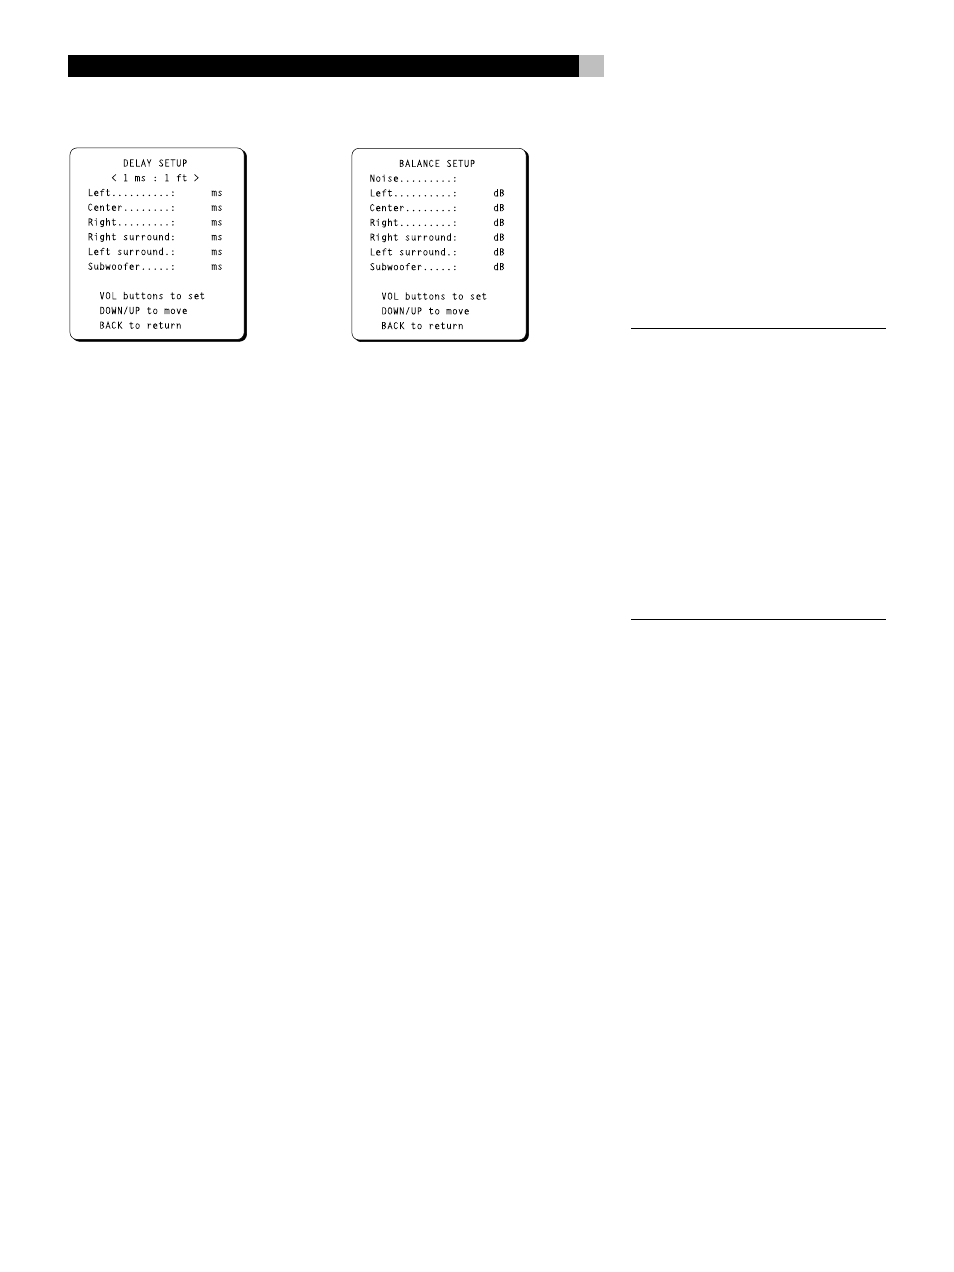
Delay Setup Menu
This menu, which is reached from the MAIN
menu, allows you to set the delay time for each
individual speaker. This is an important fea-
ture as it enables the sound from each speaker
to arrive at the listening position at the same
time, even when they are not all placed at equal
distances from the listener. This preserves ac-
curate sound imaging even with irregular
speaker placements.
As a rule of thumb, increase the relative de-
lay to speakers located closer to the seating
area and decrease the relative delay to speak-
ers located farther from the seating area. Start
by measuring the distance from your seating
position to each speaker. The speaker farthest
away should receive no additional delay. Each
of the other speakers will receive one millisec-
ond of delay for each foot (30 cm) closer to
you than the farthest speaker. For example,
if the left front speaker is farthest away at 13
feet and the left rear speaker is 7 feet away,
you should add 6 milliseconds of delay to the
left rear speaker. Continue setting delays for
each speaker until you have compensated for
each speaker that is closer to you than the
farthest speaker.
Once you have completed the delay settings
for all of your speakers, return to the MAIN
menu by pressing the BACK button.
Balance Setup Menu
This menu, also reached from the MAIN screen,
adjusts the relative volume level of all six speak-
ers. Just as you set the delays in the previous
step to ensure that the sound from all of the
speakers arrives at the same time, you also
need to ensure that the volume of the sound
from all speakers is the same.
To calibrate levels, turn on the built-in noise
generator by highlighting the NOISE line of
the BALANCE SETUP menu and use the VOL
DOWN/UP buttons to choose the AUTO po-
sition. You will hear noise coming from the first
speaker. After three seconds with no adjust-
ment , the test signal will automatically shift
to the next speaker, continuing through all of
the speakers in sequence.
While seated in the normal listening location,
listen to hear if one speaker is significantly
louder or quieter than the others. It is best to
identify a speaker that is in the middle range
(neither the loudest nor the quietest) to use as
a reference.
Leaving the volume level of the reference
speaker unchanged, cycle through the other
speakers, this time adjusting each of their
volume levels up or down to match the refer-
ence speaker, using the VOLUME DOWN/
UP buttons to change the volume of the high-
lighted speaker while the test noise is coming
from it. Alternatively, you can switch to the
MANUAL noise setting which will send the noise
signal to the speaker you highlight on the menu.
Continue through all of the speakers until they
produce the same output level. It may be nec-
essary to cycle through the speakers, adjust-
ing volumes several times to get the desired
result.
It is also possible to adjust the balance with an
external signal, such as a test signal disc. In
this case, turn the noise setting to OFF and
proceed directly to volume settings of individual
speakers.
NOTE
: This calibration will be more accurate
using a sound pressure level (SPL) meter to
measure the output of each speaker. SPL
meters are available from electronics stores,
or your authorized Rotel dealer may loan you
one. Set the meter to its SLOW response with
C-weighting and hold it away from your body.
Adjust each speaker so that the meter pro-
vides the same reading for each of the speak-
ers in your system. Use the MANUAL noise
setting. For the most accurate calibration of
a surround system, an SPL meter must be used
and all speakers must be calibrated to pro-
duce a 75 dB reading at the listening posi-
tion.
Once you have completed the balance settings
for all of your speakers, return to the MAIN
menu by pressing the BACK button.
RSP-985 Surround Sound Processor