Audio-transceiver-fiber, Connecting a signal extender at a console – Guntermann & Drunck Audio-Transceiver-Fiber Benutzerhandbuch
Seite 26
Installation
5 · Audio-Transceiver-Fiber
Digital Audio – In:
Use an optional RCA (Cinch) audio cable to connect the com-
puter’s SPDIF-Out interface to this interface.
Line In/Micro In:
Use the supplied audio cable to connect the computer’s Line-Out
interface to this interface.
You can also connect a microphone to this interface.
Line Out/Speaker:
Use the supplied audio cable to connect the computer’s Line-In
interface to this interface.
You can also connect speakers or a headset to this interface.
Power:
Connect the portable power pack to this interface.
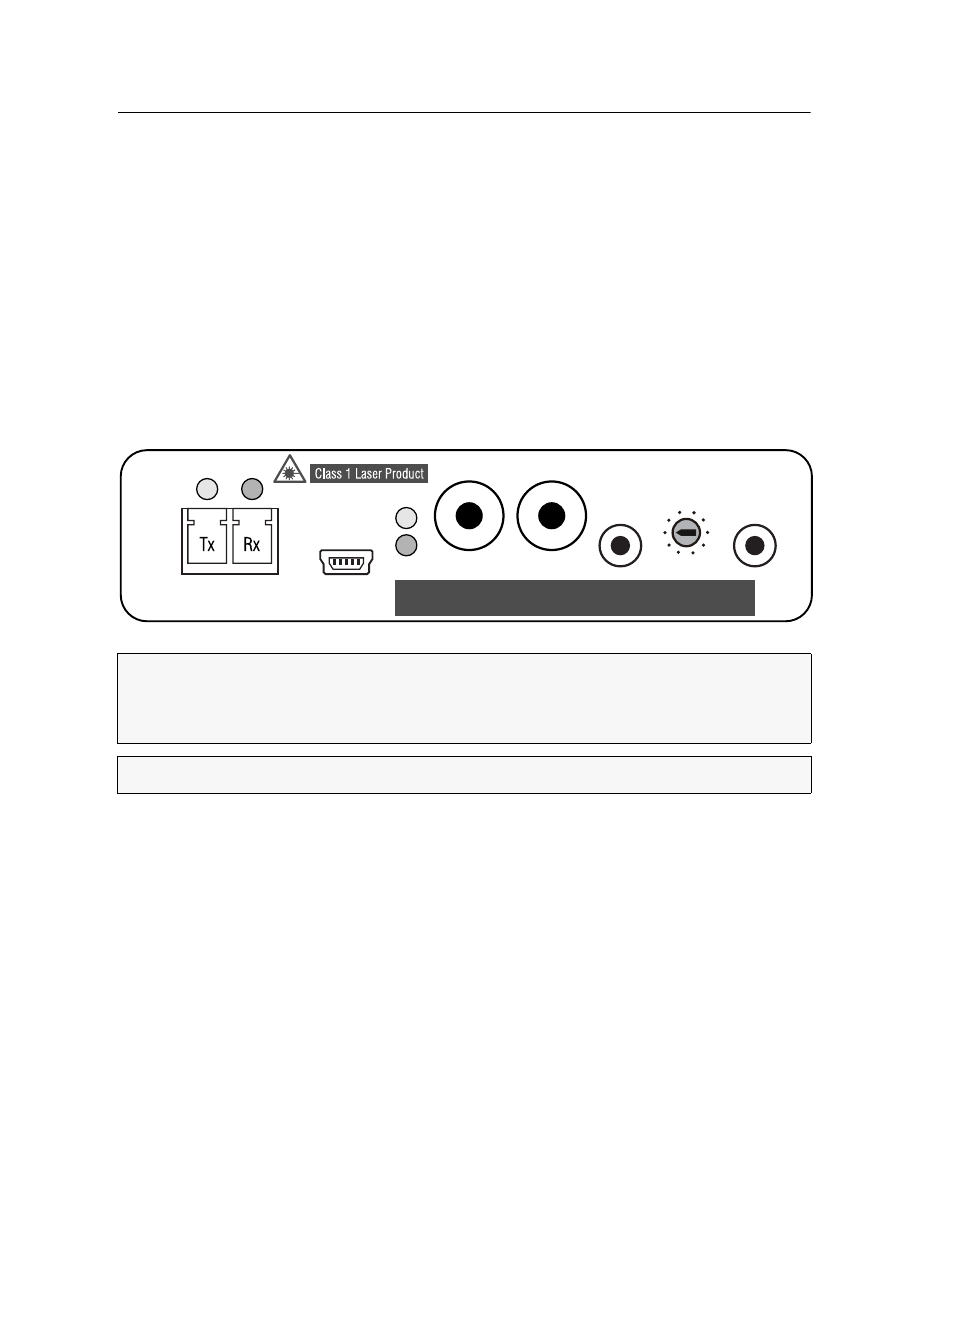
Connecting a signal extender at a console
Transmission – Tx:
Insert the LC plug of a fibre optic cable. Connect the other end of
the cable to the
Transmission – Rx
interface of the signal extender connected to a com-
puter.
Transmission – Rx:
Insert the LC plug of a fibre optic cable. Connect the other end of
the cable to the
Transmission – Tx
interface of the signal extender connected to a com-
puter.
Digital Audio – Out:
Use an optional RCA (Cinch) audio cable to connect the com-
puter’s SPDIF-In interface to this interface.
Digital Audio – In:
Use an optional RCA (Cinch) audio cable to connect the com-
puter’s SPDIF-Out interface to this interface.
Line In/Micro In:
Connect the console microphone or a Line-Out source to this inter-
face.
Line Out/Speaker:
Connect the console speakers or a headset to this interface.
Power:
Connect the portable power pack to this interface.
IMPORTANT:
The devices use components with laser technology complying with
laser class 1.
Do not use optical instruments to look into the beam!
NOTE:
Remove the protection caps from the Transmission interface and cable plugs.
Transmission
Link Status
Audio
Power
Service
Audio-Transceiver-Fiber
0
1
3
7
2
4
6
8
5
9
Line In/
Micro In
Speaker
Line Out/
Digital Audio
Out
In