Montage des 3. pols, Montage der pilotkontakte pilot contact assembly – Multi-Contact MA206 Benutzerhandbuch
Seite 8
Advanced Contact Technology
8 / 12
www.multi-contact.com
15
16
17
19
20
18
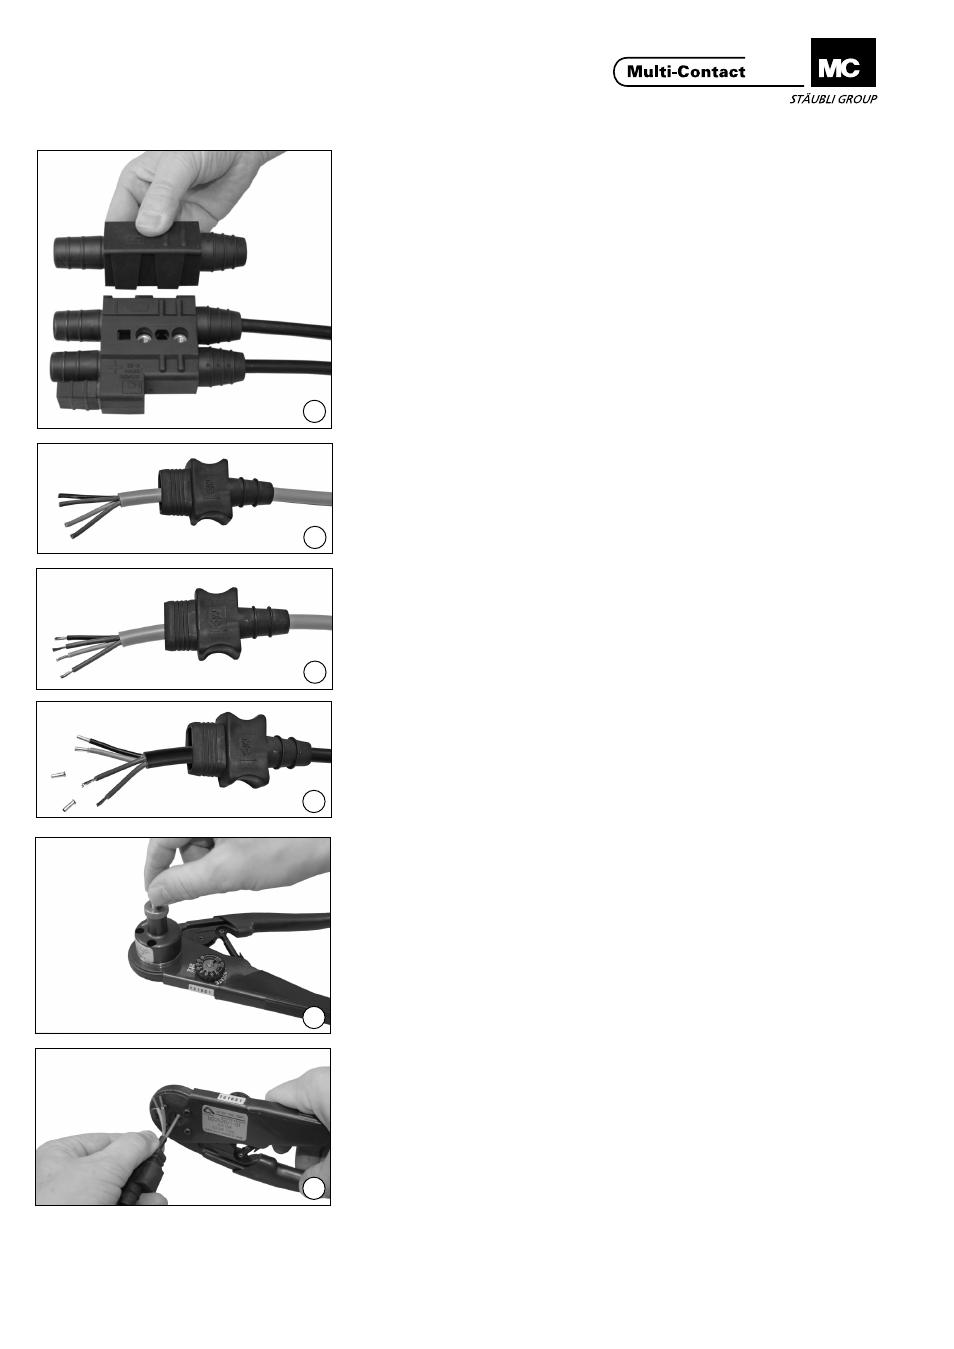
Montage des 3. Pols
(ill. 15)
Der 2-polige Steckverbinder kann
durch seitliches Anflanschen eines
Zusatzpoles zum 3-poligen Steckver-
binder erweitert werden.
Mit dem Schwalbenschwanz kann der
Zusatzpol am 2-poligen Stecker fixiert
werden.
Assembly of 3. pole
(ill. 15)
The 2-pole connector can be conver-
ted to a 3-pole connector by mounting
an additional pole on its side.
With the dovetail the additional pole
can be fixed to the 2 pole connector.
Montage der Pilotkontakte
Pilot contact assembly
Vorbereitung der Leitungen
Preparation of the cables
(ill. 16)
Leitungstülle (14) auf Leitung auffä-
deln und Leitung auf Mass 41
+2
-0
mm
abisolieren.
(ill. 16)
Slip a cable grommet for pilot con-
tacts (14) onto the cable and strip the
cable insulation to the dimension
41
+2
-0
mm.
(ill. 17)
Einzelleiter auf Mass 7
+1
mm abisolie-
ren
(ill. 17)
Strip the insulation of the individual
wires to the dimension 7
+1
mm.
(ill. 18)
Bei Querschnitten kleiner als 2.5 mm
2
werden die Aderendhülsen benötigt.
(ill. 18)
For cross sections less than 2.5 mm
2
,
ferrules are required.
(ill. 19)
Crimpzange für 2,5 mm
2
einstellen:
AWG 12 / Sel. Nr. 8.
Axiallage der Crimpstelle mittels der
Stellschraube am Locator einstellen.
(ill. 19)
Set the crimping tool for 2,5 mm
2
:
AWG12 / Sel. No. 8. Using the posi-
tioning screw on the locator, set the
axial position of the crimp.
(ill. 20)
Leiter dabei leicht in axialer Richtung
in Crimphülse drücken bis diese im
Sichtloch erscheinen. Crimpvorgang
nach MA085 ausführen.
Angeschlossene Leiter müssen nach
dem Crimpen noch im Sichtloch
sichtbar sein. Der Leiter darf sich
nach dem Crimpvorgang nicht aus
der Crimphülse herausziehen lassen
(Kontrolle!).
(ill. 20)
When doing so, press the wire lightly
into the crimping sleeve until it ap-
pears in the sight hole. Make the
crimp according to MA085.
Connected wires should also remain
visible in the sight hole after crimp-
ing. It should not be possible to pull
the wire out of the crimping sleeve.
(Control!).