Multi-Contact MA251 Benutzerhandbuch
Seite 7
Advanced Contact Technology
www.multi-contact.com
7 / 12
21
22
19
20
17
18
Crimp-Einsatz einbauen
Fitting the crimping insert
(ill. 21)
Öffnen Sie die Crimpzange (ganz zu-
sammendrücken und loslassen).
Führen Sie beide Crimp-Einsätze ein.
Die Beschriftung muss auf der glei-
chen Seite sein wie die Beschriftung
der Crimpzange.
Schliessen Sie die Crimpzange und
schrauben Sie beide Crimp-Einsätze
fest.
(ill. 21)
Open the crimping tool (press com-
pletely together and release). Insert
both crimping inserts. The markings
must be on the same side as the
marking on the crimping tool.
Close crimping tool and screw both
crimping inserts tight.
(ill. 22)
Legen Sie den Locator in den Füh-
rungsstift ein.
(ill. 22)
Insert locator into the guide pin.
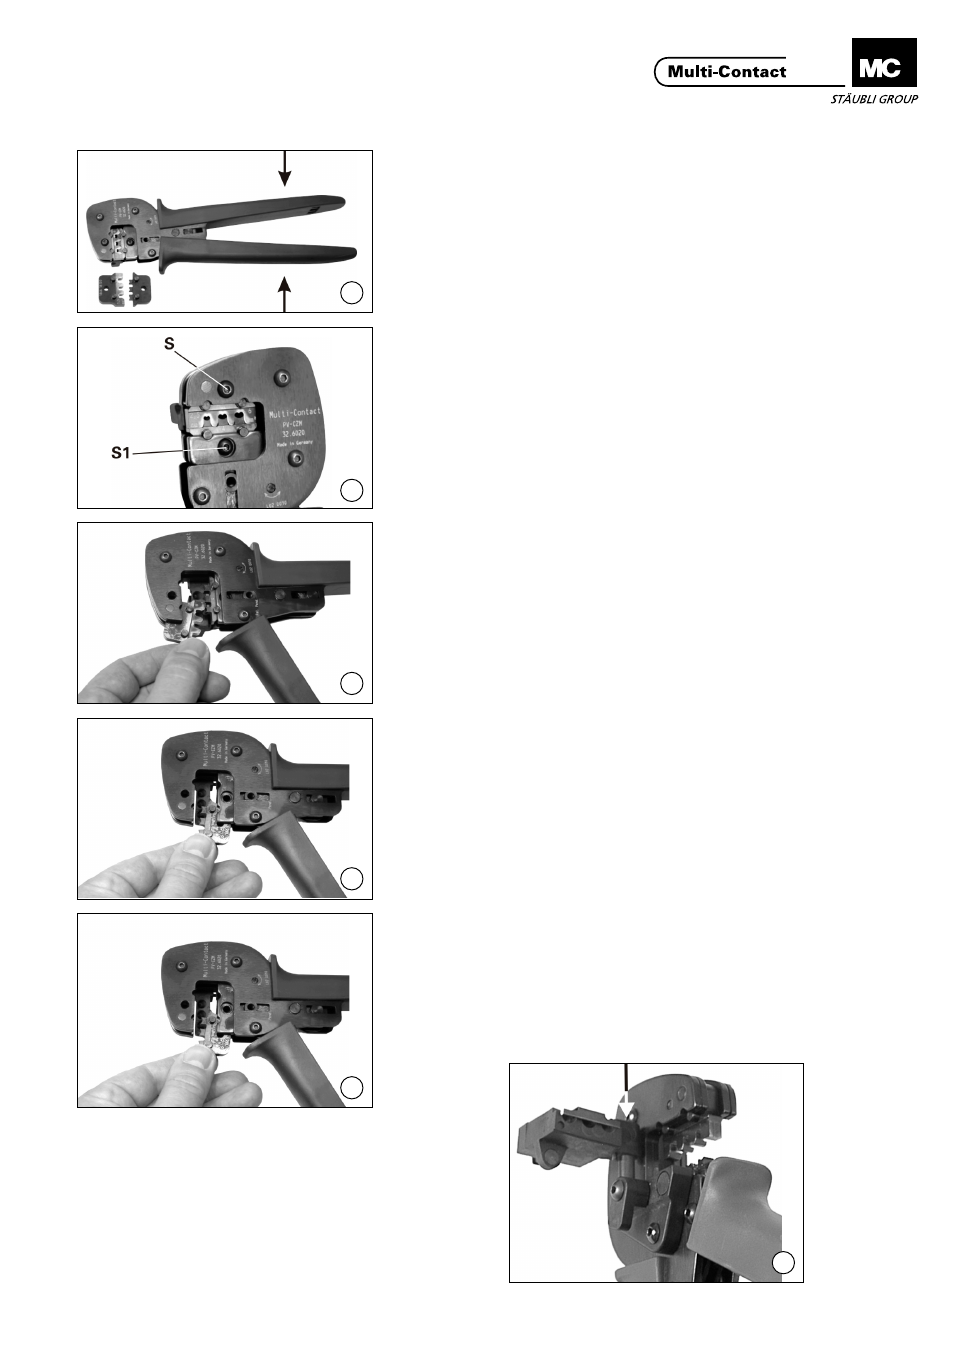
Crimp-Einsatz auswechseln
Exchanging the crimping
inserts
Crimp-Einsatz ausbauen
Removing the crimping insert
(ill. 17)
Schliessen Sie die Crimpzange
(ill. 17)
Close the crimping tool
(ill. 18)
Drehen Sie die Schraube S (lang)
und S1 (kurz) heraus. Öffnen Sie die
Crimpzange (ganz zusammendrücken
und loslassen).
(ill. 18)
Unscrew both the long S and the
short S1 screw. Open the crimping
tool (press completely together and
release).
(ill. 19)
Oberen Crimp-Einsatz herausnehmen.
(ill. 19)
Remove the upper crimping insert.
(ill. 20)
Unteren Crimp-Einsatz herausneh-
men.
(ill. 20)
Remove the lower crimping insert.