Multi-Contact MA063 Benutzerhandbuch
Seite 5
Advanced Contact Technology
www.multi-contact.com
5 / 8
9
10
11
12
Montage
Assembly
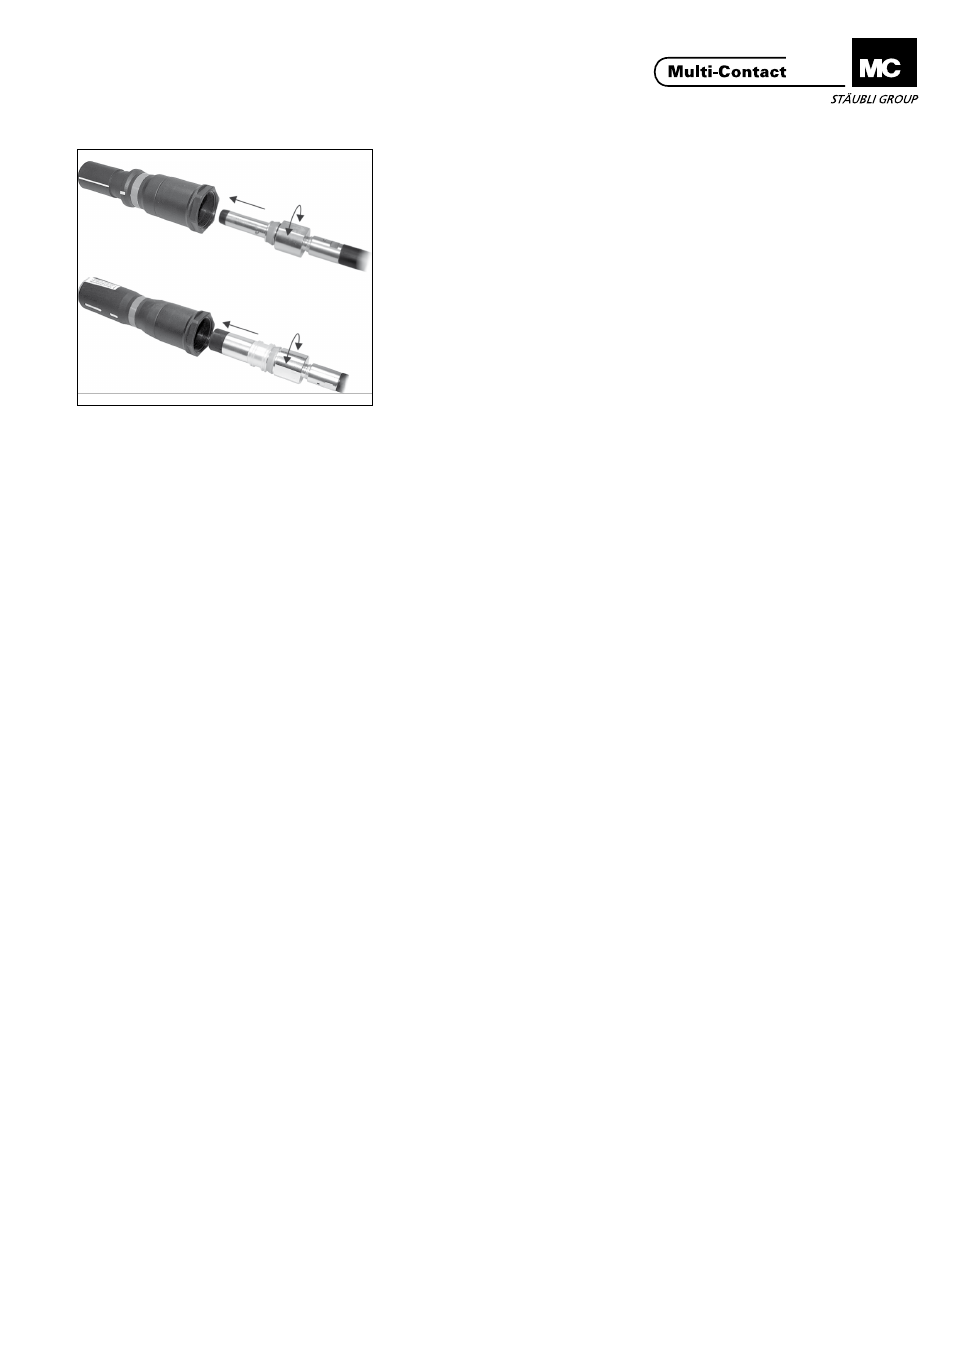
(ill. 9)
Den Kontakteinsatz in das Isolations-
teil einführen, drehen und gleichzeitig
drücken bis der Kontakteinsatz hörbar
einrastet� Durch Ziehen an der Leitung
das Einrasten prüfen�
(ill. 9)
Slip the contact insert into the insula-
tion� Turn and at the same time push
until the contact insert engages�
Check the correct engagement by
pulling on the cable�
(ill. 10)
Zur Montage der Buchse ist eine
Zentrierhülse notwendig, die bei der
Lieferung mit einer gelben Klebeeti-
kette fixiert ist. Nach dem Einrasten
die gelbe Etikette entfernen und die
Zentrierhülse herausnehmen� Die
Zentrierhülse aufbewahren für weitere
Montagen�
(ill. 10)
For assembling the socket insert a
centering sleeve is required (secured
with a yellow label)� After engaging
the socket insert, remove the yellow
label and the centering sleeve� Keep
the centering sleeve for further as-
semblies�
(ill. 11)
Kabelverschraubung festschrauben�
Zum Anziehen und Kontern emp-
fiehlt MC zwei identische Werkzeuge
GS��� siehe ill� 3 zu benützen um
einem Überdrehen der Gewinde
vorzubeuge n
(ill. 11)
Tighten the cable gland� For tightening
and fixing with the locknut, MC rec-
ommend using two identical GS��� see
ill� 3 tools to prevent over-tightening
of the thread�
Austauch des
Kontakteinsatzes
Replacement of the contact
insert
(z�B� bei Leitungsbruch etc�)
(e�g� in the event of cable damage)
Hinweis:
Zum Austausch ist ein Spezial-
werkzeug und eine Montageanlei-
tung erforderlich, siehe MA 064.
(www.multi-contact.com).
Note:
For replacement a special tool and
assembly instructions ar required,
see MA064.
(www.multi-contact.com).
Montage der Schutzkappe
(KST...)
Fitting the protective cap
(KST...)
(ill. 12)
Schutzkappe (DST16-NS) über Stecker 2
ziehen� Schlaufe über Stecker bei Po-
sition P legen und das Seil festziehen�
Zum Fixieren des Knotens den einge-
fügten Schrumpfschlauch erwärmen�
(ill. 12)
Push protective cap (DST16-NS) over
plug� Pull loop over plug 2 and fasten
cord at position P� Warm the supplied
heat-shrinkable tubing to lock the
knot�