Multi-Contact MA096 Benutzerhandbuch
Seite 12
Advanced Contact Technology
12 / 16
www.multi-contact.com
37
X
34
1
35
36
38
39
Schutzkappe für Stecker montie-
ren
Fittig protective cap for plug
(ill. 34)
Die Schutzkappe wird lose beigelegt
geliefert�
(ill. 34)
The protective cap is separately in-
cluded in the package�
(ill. 35)
Schutzkappe mit Schraube 1 (ill� 34)
in Gewinde 2 am Befestigungsflansch
mit einem Innensechskantschlüssel
Gr�4 handfest anschrauben�
(ill. 35)
Using a size 4 Allen key, fix protec-
tive cap by turning screw 1 (ill� 34) in
threaded hole 2 on the fixing collar
until it is hand tight�
Anbringen des Mikroschal-
ters zur Steckabfrage
Fitting the mating indicator
microswitch
(ill. 36)
Verschlussschraube 1 mit einem
Schlitzschraubendreher, durch drehen
entgegen den Uhrzeigersinn, heraus-
schrauben�
(ill. 36)
Unscrew locking screw 1 with a slot
screwdriver by turning anticlockwise�
Achtung
Bei Bestellungen mit Mikroschal-
ter wird die Verschlussschraube
1 (Bestell-Nr� 31009552) nicht
mitgeliefert�
Attention
If ordered with microswitch,
the locking screw 1 (Order No�
31009552) is not included�
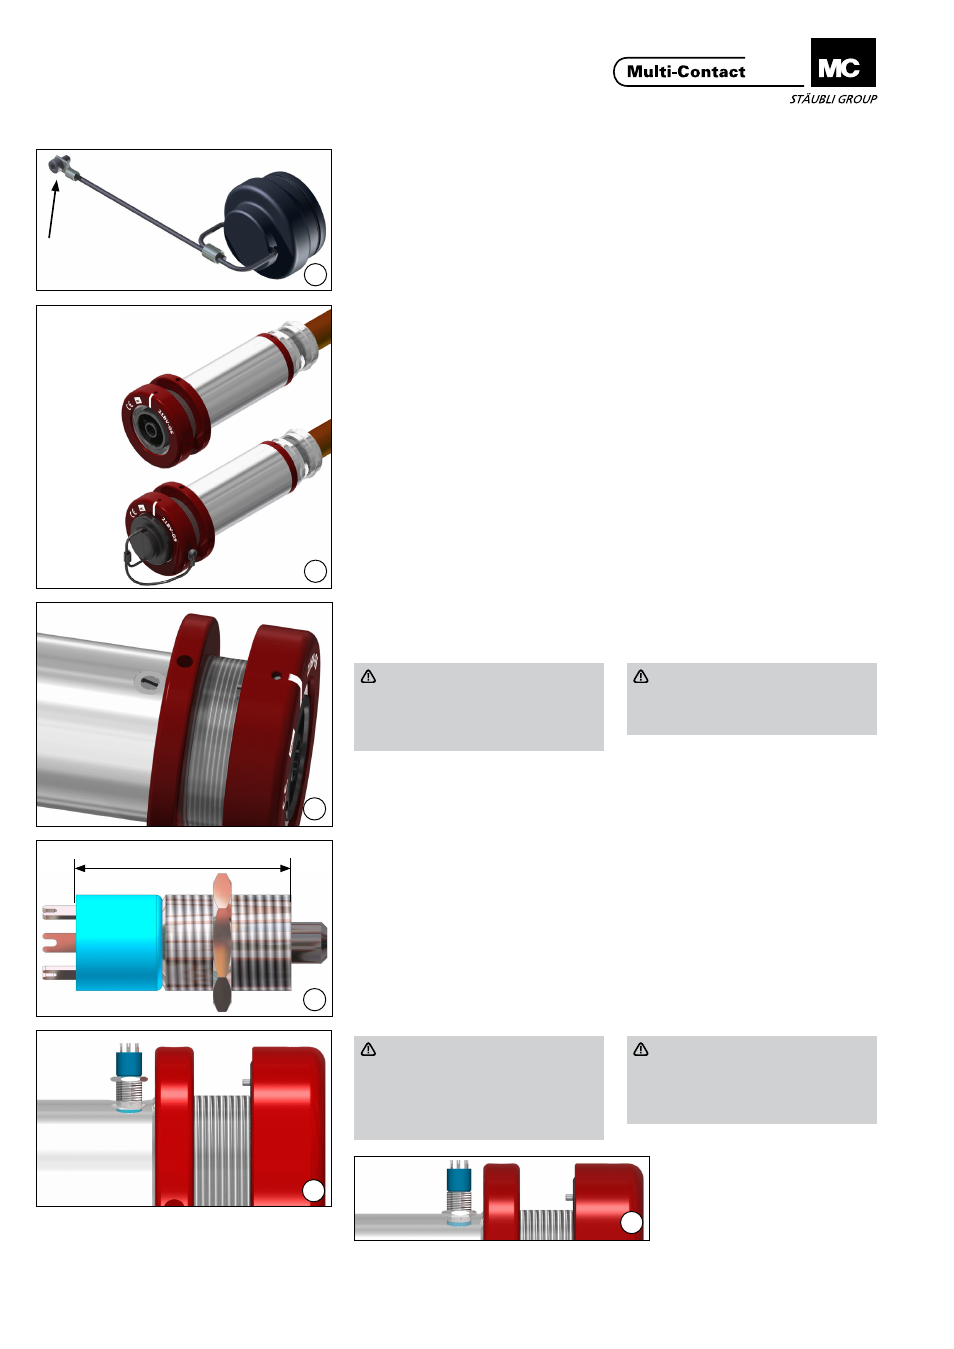
(ill. 37)
Länge X des Mikroschalters
(ca� 18mm) mit einem Messschieber
messen�
(ill. 37)
Measure length X of the microswitch
(approx. 18mm) with a caliper gauge.
(ill. 38)
Mikroschalter 2+0,5mm tief ein-
schrauben� Mass Y mit einem Mess-
schieber kontrollieren�
(ill. 38)
Screw in microswitch to a depth of
2+0�5mm�
Check dimension Y with a caliper
gauge�
(ill. 39)
Mikroschalter mit der Kontermutter si-
chern� Anschliessend nochmals Tiefe
kontrollieren�
(ill. 39)
Secure microswitch with the locknut�
Then check depth once more�
Achtung
Wird der Mikroschalter nicht
verwendet, muss die Verschluss-
schraube 1 (ill� 36) eingeschraubt
sein, da sonst die Schirmung
unterbrochen ist�
Attention
If the microswitch is not used,
the locking screw (ill� 36) must be
screwed in, since otherwise the
shielding will be interrupted�