Multi-Contact MA096 Benutzerhandbuch
Seite 6
Advanced Contact Technology
6 / 16
www.multi-contact.com
14
18
Tab. 3
>2mm
1 2
3
Y
17
A
15
16
22
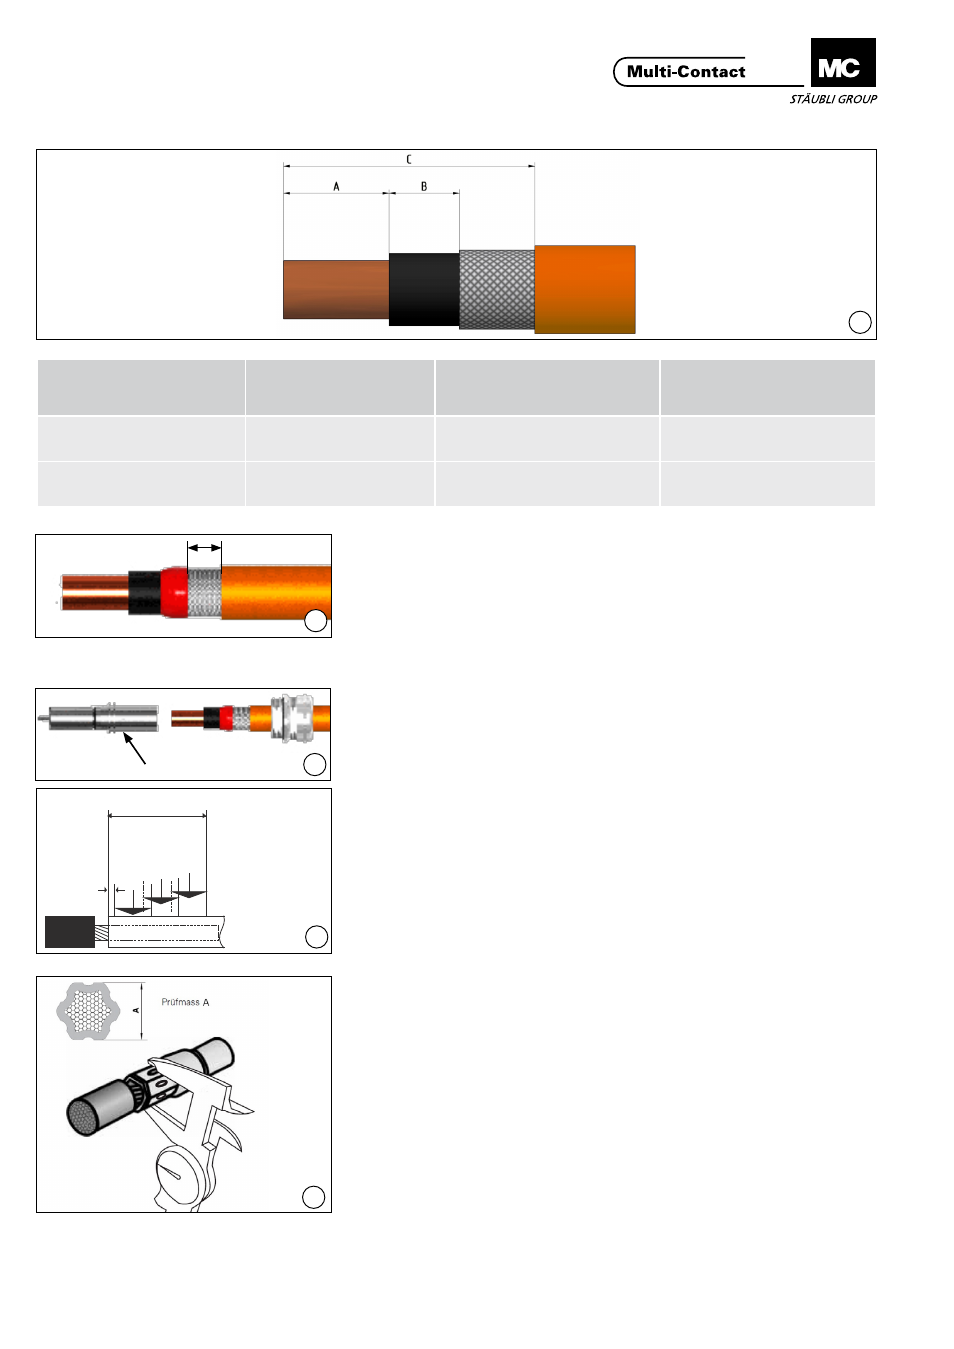
Querschnitt
Cross section
(mm
2
)
Mass A
Dimension A
Mass B
Dimenstion B
Mass C
Dimension C
240
42
48
118
300
44
40
112
(ill. 15)
Das Schirmgeflecht mit Isolierband
(hier rot dargestellt) gegen ein Ver-
schieben sichern�
(ill. 15)
Fix the shield
mesh with insulating
tape (shown in red here) to prevent it
from shifting�
Leitung vorcrimpen
Crimping the lead
(ill. 16)
Leitung mit allen Einzeldrähten in die
Crimphülse einführen bis zum An-
schlag� Die Leitung muss im Sichtloch
(A) sichtbar sein�
(ill. 16)
Insert all wires into the crimping
sleeve until it engages� Cable must be
visible in the sight hole (A)�
(ill. 17)
Crimphülse crimpen mit Crimpzange
Elpress V 1311 und dem richtigen
Einsatz� Crimpzone “Y” und Anzahl
Crimpstellen beachten!
(siehe Tab� 4 Seite 7/16)�
(ill. 17)
Crimp the cable with the Elpress
crimping tool V 1311 and the correct
insert� Observe the crimping zone “Y”
and the number of crimping points!
(see Tab� 4 page 7/16)�
Hinweis:
Gilt für Kabel Klasse 6. MC
empfielt pro Crimpstelle 3 mal zu
Crimpen. D.h. jeweils nach einer
Crimpung die Crimphülse um 60° zu
drehen, das ergibt dann pro Crimps-
telle 6 Druckstempelabdrücke.
Note:
Applies to cable class 6. MC
recommends crimping 3 times per
crimping point. i.e. rotating the crimp
sleeve by 60°. After each crimping
operation so as to give 6 crimp die
impressions at each crimping point.
(ill. 18)
Crimpung anhand des Prüfmasses „A“
kontrollieren (siehe Tab� 4 Seite 7/16)�
(ill. 18)
Check crimping according to control
dimension “A” (see Tab� 4 page 7/16)�
Hinweis:
Beachten Sie auch die Anleitung
MA077, Leitung nicht anlöten oder
anschweissen!
Note:
Observe also the assembly instruc-
tions MA077. Do not solder or weld
the cable!