Multi-Contact MA202 Benutzerhandbuch
Seite 7
Advanced Contact Technology
www.multi-contact.com
7 / 8
13
14
Einbau der Kontakte
Installation of the contacts
Hinweis:
Der Einpressvorgang kann erleich-
tert werden, wenn die Stift- bzw.
Buchsenträger vor dem Einsetzen
der Kontakte in Spiritus oder Indus-
triealkohol getaucht werden. Keine
fetthaltigen Medien (kein Talkum)
benutzen. Nichtbelegte Kontakt-kam-
mern müssen mit Verschlussstopfen
versehen werden.
Note:
To facilitate installation, immerse
the pin or socket carrier in spirits or
industrial alcohol before inserting
the contacts. Do not use any greasy
media (no talc).
Plug any unoccupied contact holes
with blind plugs.
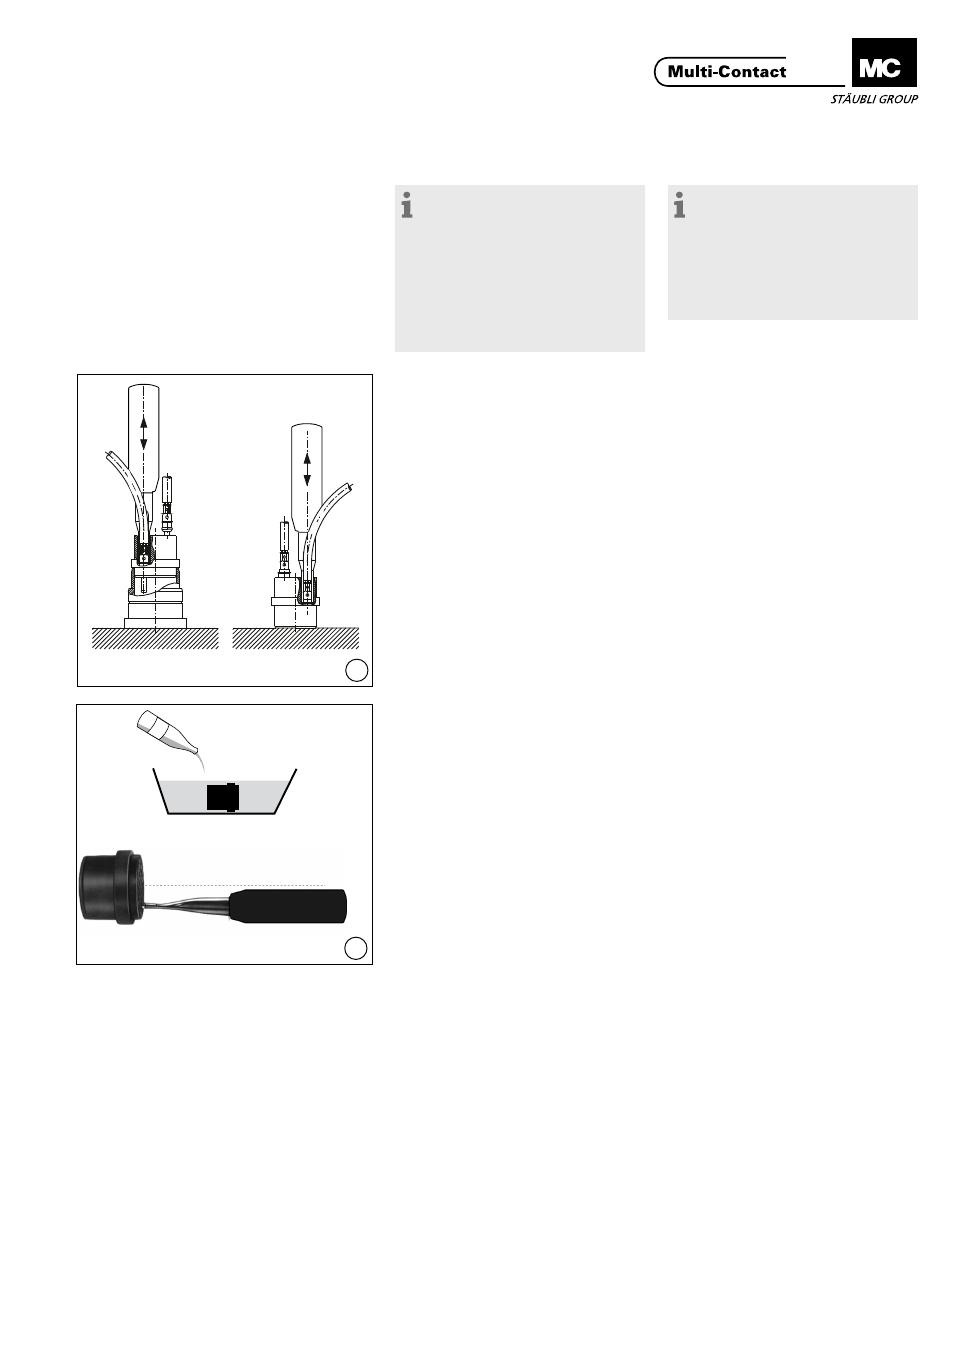
(ill. 13)
Kontakte in die Kontaktkammern der
Stift- bzw� Buchsenträger von der
Anschlußseite her (grösserer Ø der
Kontaktkammern) mit normaler Hand-
kraft vorstecken�
Kontakte mit Kontakteinsatzwerkzeug
(siehe Seite 4) eindrücken�
Beim Stifteinbau wird als Montage-
hilfe ein Stiftgehäusevorderteil
empfohlen� Beim Buchseneinbau wird
der Buchsenträger auf eine ebene
Unterlage gestellt�
(ill. 13)
Insert contacts by hand into the con-
tact holes of the pin or socket carrier
from the connection side (larger hole
diameter)�
Press in the contacts with the inser-
tion tool (see page 4)�
For pin installation, it is advisable to
use a front section of the right size
housing as assembly jig� For socket
installation, simply place socket carrier
directly onto a flat bench.
(ill. 14)
Werkzeug beim Eindrücken und Her-
ausziehen parallel zur Achse führen�
(ill. 14)
Be sure to keep tool straight when
installing or removing contacts�