Multi-Contact MA202 Benutzerhandbuch
Seite 8
Advanced Contact Technology
15
16
17
Hersteller/Producer:
Multi-Contact AG
Stockbrunnenrain 8
CH – 4123 Allschwil
Tel.
+41/61/306 55 55
Fax
+41/61/306 55 56
www.multi-contact.com
© b
y Multi-Contact A
G, Switz
erland – MA202 – 03.2015, Inde
x n
, Global Communications – Änderungen v
orbehalten / Subject to alterations
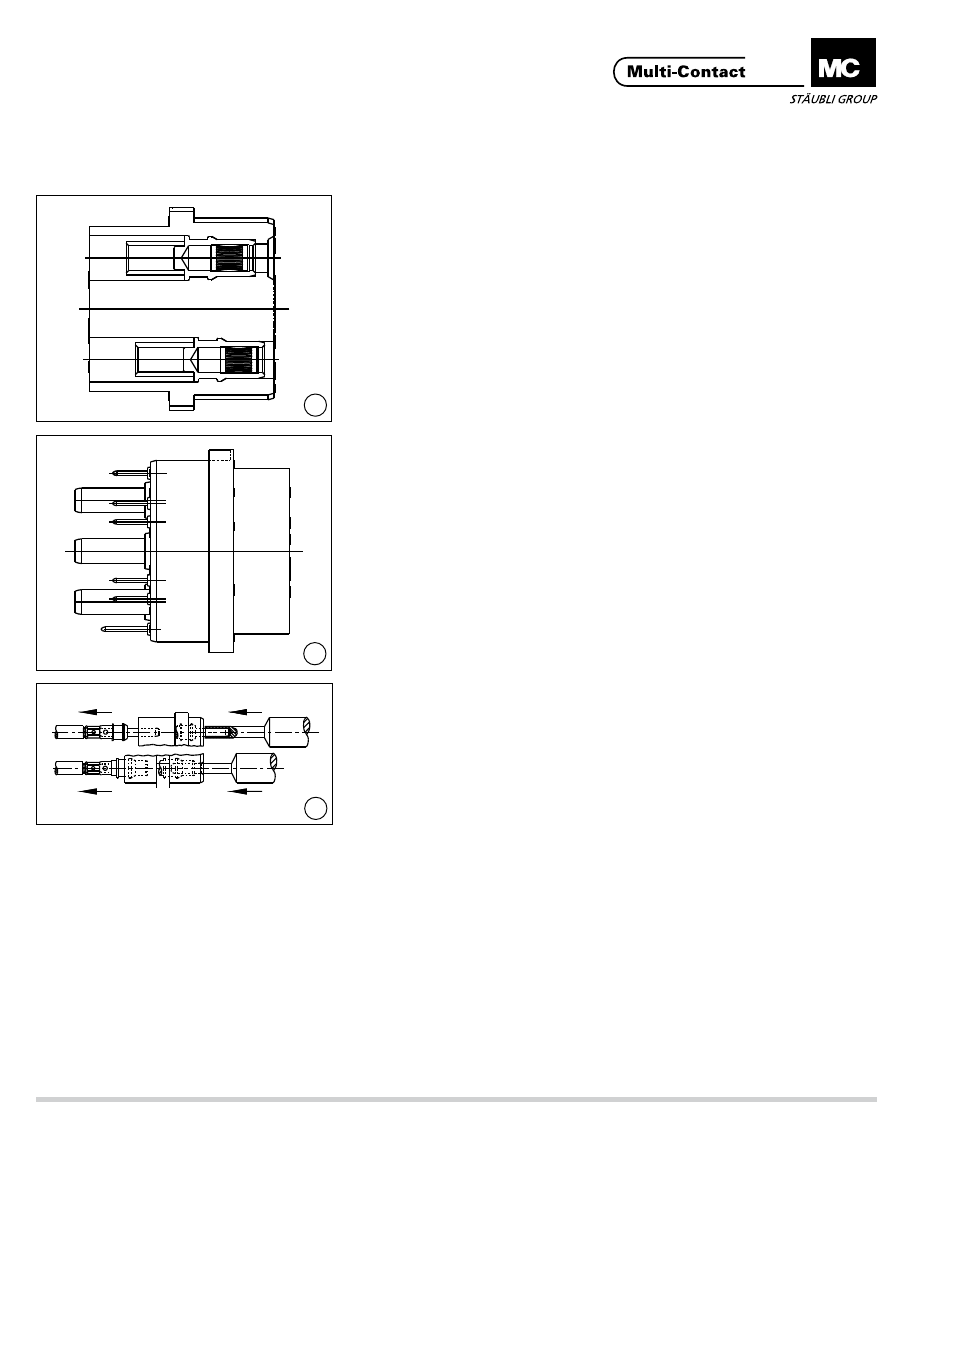
Überprüfung auf einwand-
freie Konfektionierung
Control of correct assembly
(ill. 15 + 16)
ME1.../ME2...
Beim Stifteinsatz ME1��� und ME2���
sind alle PE-Stiftkontake zur Standard-
kontaktebene voreilend�
ME3.../ME4...
Beim Stifteinsatz ME3���/ME4��� sind
nur die PE-Stiftkontakte bis Kontakt-
Ø 2 mm voreilend. Stiftkontakte ab
Ø 3 mm müssen steckseitig gleich
weit aus dem Stiftträger stehen, kein
voreilender Stiftkontakt� Bei Buchsen
ab Ø 3 mm eilt die PE-Buchse im
Buchsenträger vor� Kontaktträger (z�B�
Hybridträger) mit Schirmkontakt (S) ist
der Schirmkontakt zu den Steuerkon-
takten voreilend, zum PE jedoch
nacheilend�
Die Details hierzu finden Sie auf den
Produktezeichnungen�
(ill. 15 + 16)
ME1.../ME2...
all types of PE pins are in advanced
position (mating first, braking last)
compared to the other contacts�
ME3.../ME4...
In male inserts ME3��� and ME4���only
PE pin contacts up to Ø 2 mm are in
advanced position� PE contacts of
Ø 3 mm and above are on the same
level as the other pins (no leading
contact)� Regarding female inserts, for
sockets of Ø 3 mm or larger, the PE
socket is in advanced positon�
In contact carriers (e�g� hybrid car-
riers) with a shield contact (S) the
shield contact is in advanced position
compared to the control contacts, but
lagging behind the PE contact�
You will find the relevant details on the
product drawings�
(ill. 17)
Zu weit eingedrückte Buchsen werden
mit dem Buchsenausbauwerkzeug
(Seite 4) bis zu ihrer Einrastlage zu-
rückgedrückt�
Bei Belegungsfehlern und Repara-
turen werden die Kontakte mit den
entsprechenden Ausbauwerkzeugen
(siehe Seite 4) aus den Kontaktträgern
gedrückt und neu eingesetzt�
(ill. 17)
Sockets pressed in too far can be
turned back to their proper seating
position with the socket extraction
tool (page 4)�
By repairs or installation errors, re-
move the contacts from the contact
carrier with the respective extraction
tool (see page 4) and then reinstall
them correctly�