Multi-Contact MA213-01 Benutzerhandbuch
Seite 10
Advanced Contact Technology
10 / 12
www.multi-contact.com
42
43
41a
41b
D
D
(ill. 41a)
Einbau CT-0,6
Kontakte von der nummerierten
Rückseite her bis zum Anschlag in die
Kontakteinsätze mit dem Montage-
werkzeug CT-E-WZ0,6 einpressen�
(ill. 41a)
Installation CT-0.6
Using the assembly tool CT-E-WZ0�6,
press the contacts into the contact
inserts from the numbered back side
as far as the stop�
(ill. 41b)
Ausbau CT-0,6
Demontagewerkzeug CT-A-WZ0,6 von
vorne in den Kontakteinsatz stecken
bis zum hörbaren Klicken� Wenn nötig
danach mit dem Dorn D den Kontakt
aus dem Träger stossen�
(ill. 41b)
Removal of CT-0.6
Insert dismantling tool CTA WZ0,6
into the contact insert from the front
until a click is heard� Then, if neces-
sary, push the pin (D) to extract the
contact from the carrier�
Hinweis:
Um einen sicheren Halt der
Kontakte in den Kontaktträgern zu
gewährleisten, dürfen die Kontakte
maximal 2mal ausgebaut und maxi-
mal 3mal wieder eingebaut werden.
Note:
In order to quarantee a firm
fixation of the contacts in the contact
carriers, the contacts may not be
extracted more than 2 times and
inserted more than 3 times.
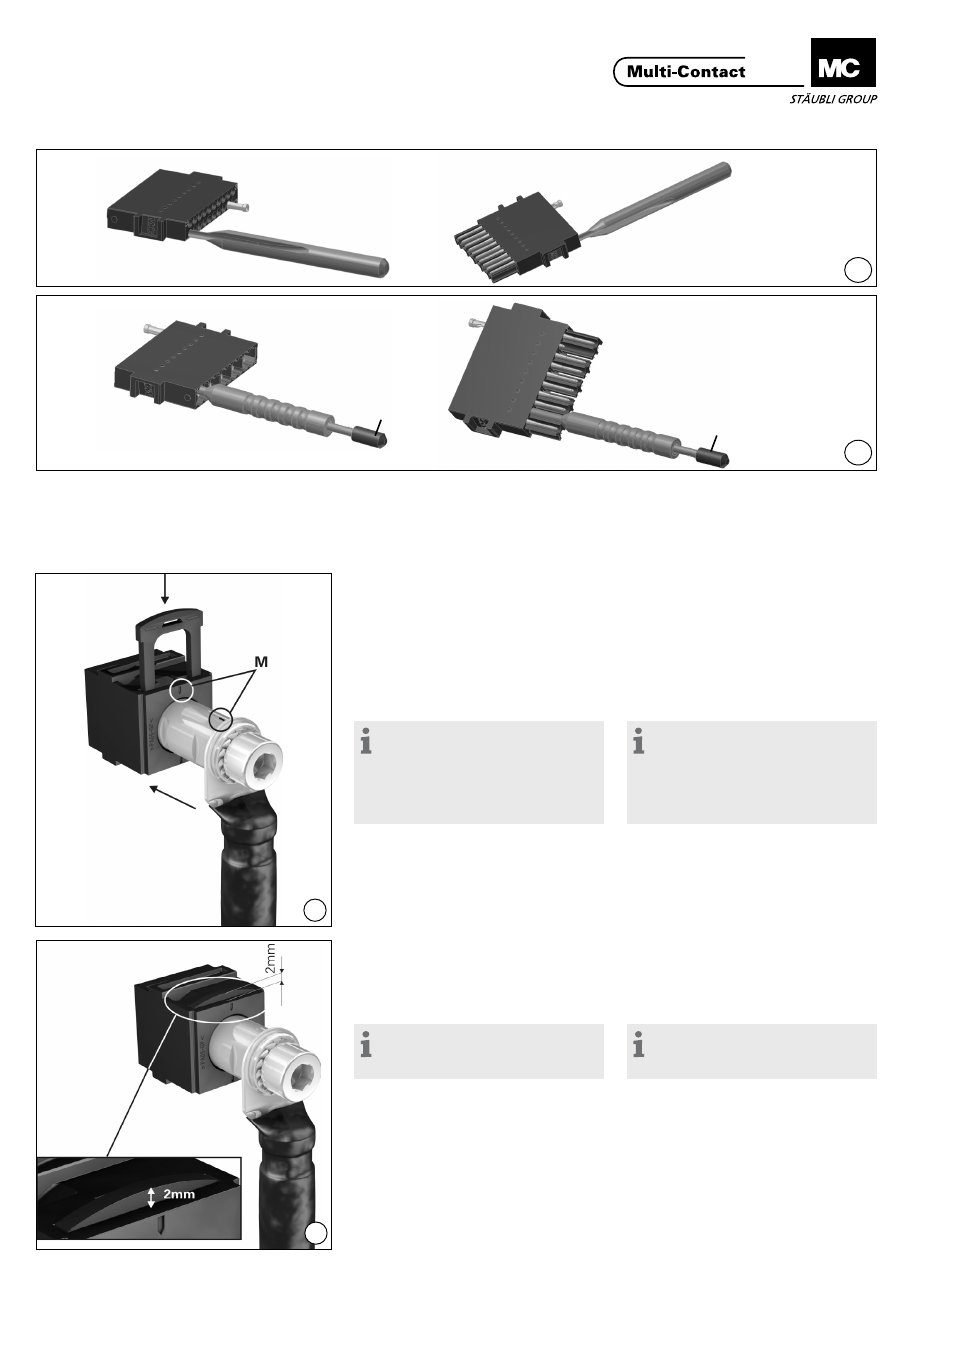
(ill. 42)
Beim Einbau der 12 mm Kontakte mit
Aussengewinde muss die Markierung
(M) auf Träger und Kontakt aufein-
ander passen� Anschliessend den
Kontakt bis zum Anschlag einführen
und mit dem Sicherungsbügel (kann
von beiden Seiten her montiert wer-
den) sichern� Dieser muss mit einem
hörbaren Click einrasten�
(ill. 42)
When mounting the 12 mm contact
with external thread, the markings on
both the carrier and the contact must
be aligned� The contact is then insert-
ed to the end position (can be inserted
in both side) and secured with retain-
ing clip� Engaging by audible clic�
Hinweis:
Höhe im eingebautem Zustand:
2 mm (ill. 43)
Note:
Height in inserted condition: 2 mm
(ill. 43)
Der Sicherungsbügel kann mit einem
handelsüblichen Schraubendreher
(Gr� 2) wieder entfernt werden�
The retaining clip can be removed
with a commercial screwdriver
(size 2)�