Multi-Contact MA095 Benutzerhandbuch
Seite 16
Advanced Contact Technology
16 / 20
www.multi-contact.com
55
56
X
X - 2mm
57
58
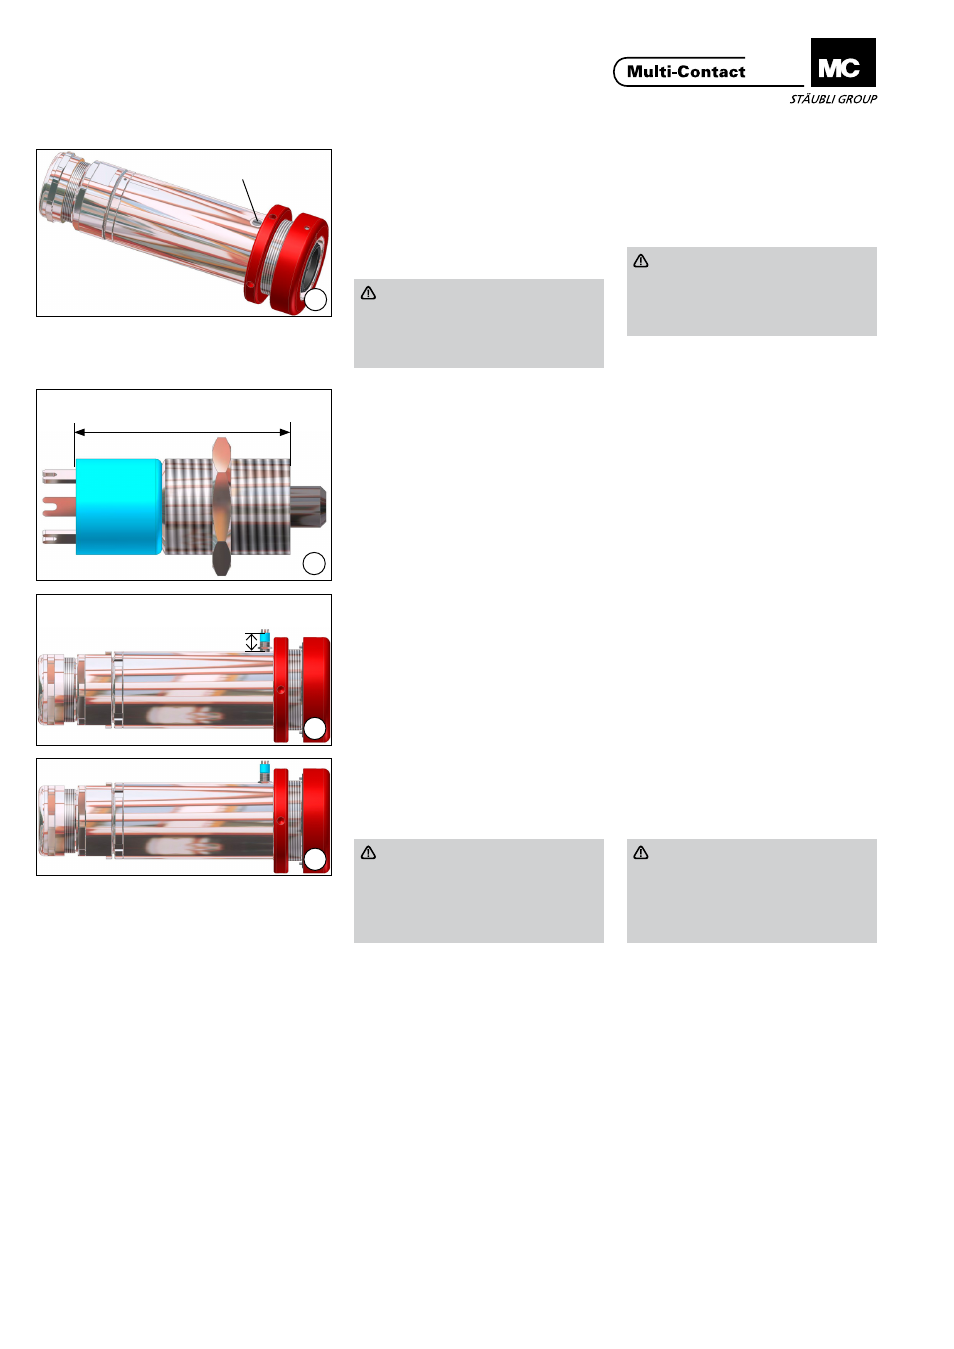
1
Anbringen des Mikroschal-
ters zur Steckabfrage
Fitting the mating indicator
microswitch
(ill. 55)
Verschlussschraube 1 mit einem
Schlitzschraubendreher, durch drehen
entgegen den Uhrzeigersinn, heraus-
schrauben�
Achtung
Bei Bestellungen mit Mikroschal-
ter wird die Verschlussschraube
nicht vormontiert und ist auch
nicht im Lieferumfang enthalten�
(ill. 55)
Unscrew locking screw 1 with a slot
screwdriver by turning anticlockwise�
Attention
If receptacles are ordered with
the microswitch, the locking
screw is not pre-fitted and is not
included in the delivery�
(ill. 56)
Länge X des Mikroschalters
(ca� 18mm) mit einem Messschieber
messen�
(ill. 56)
Measure length X of the microswitch
(approx. 18mm) with a caliper gauge.
(ill. 57)
Mikroschalter 2+0,5mm tief ein-
schrauben� Mass mit einem Mess-
schieber kontrollieren�
(ill. 57)
Screw in microswitch to a depth of
2+0,5mm�
Check dimension with a caliper
gauge�
(ill. 58)
Mikroschalter mit der Kontermutter si-
chern� Anschliessend nochmals Tiefe
kontrollieren�
(ill. 58)
Secure microswitch with the locknut�
Then check depth once more�
Achtung
Wird der Mikroschalter nicht
verwendet, muss die Verschluss-
schraube 1 (Bestell-Nr� 31009552)
eingeschraubt sein, da sonst die
Schirmung unterbrochen ist�
Attention
If the microswitch is not used,
the locking screw (order no�
31009552) must be screwed in,
since otherwise the shielding will
be interrupted�