Multi-Contact MA095 Benutzerhandbuch
Seite 9
Advanced Contact Technology
www.multi-contact.com
9 / 20
25
26
27
S
24
O
(ill. 24)
Befestigungsmutter von hinten
aufschrauben und mit einem Haken-
schlüssel anziehen bis der Befesti-
gungsflansch eben an der Montage-
platte anliegt (35 - 40Nm)�
Hinweis:
Bei der Montage von der Rück-
seite der Einbauplatte wird die Be-
festigungsmutter zuerst aufgebracht.
Dann wird die Einbaudose von
hinten durch die Platte geführt, und
anschliessend der Befestigungsflan-
sch wie zuvor beschrieben montiert.
Nach erfolgreicher Montage des Be-
festigungsflansch die Befestigungs-
mutter anziehen (35 - 40Nm).
(ill. 24)
Screw on fixing nut from the back and
tighten with a hook wrench until the
fixing collar is flush against the instal-
lation panel� (35 - 40Nm)�
Note:
If the receptacle is installed from
the back of the installation panel, the
fixing nut is fitted first.
The receptacle is then pushed
through the panel from the back and
the fixing collar is fitted as described
above. When the fixing collar has
been fitted in place, tighten the fixing
nut (35 - 40Nm).
Mit verdrehschutz
With rotation lock
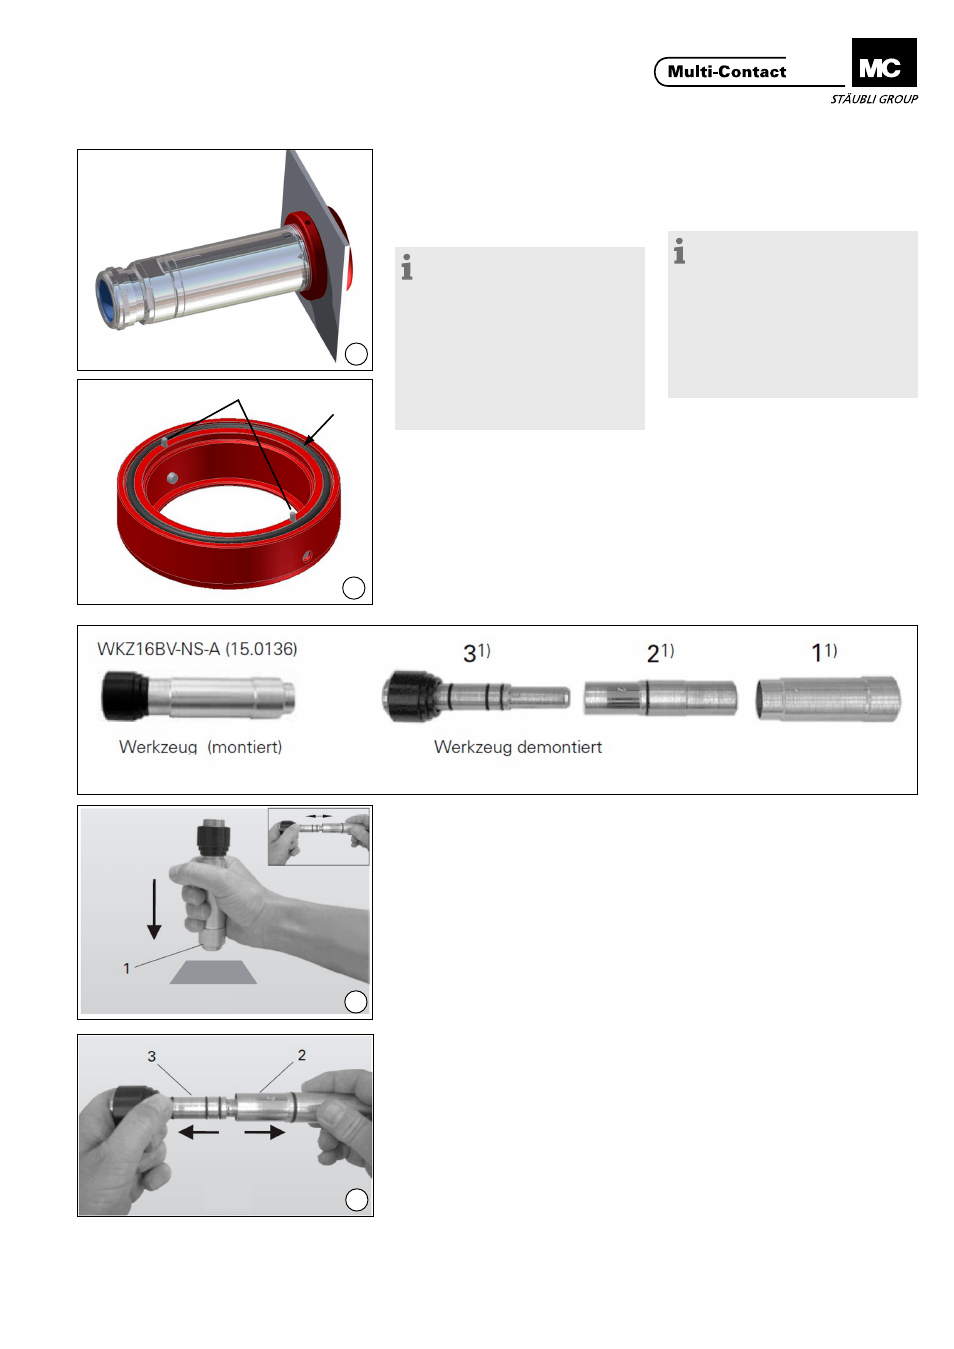
(ill. 25)
Beigelegte 2mm Stifte (S) in den
Flansch einpressen�
Folgende Schritte wie bei der End-
montage ohne Verdrehschutz
(ill. 25)
Press the supplied 2mm pins (S) into
the collar�
Subsequent steps as in final assembly
without rotation lock
Demontage und Montage des
WKZ16BV-NS-A
Dismantling and assembling
WKZ16BV-NS-A
Demontage des Werkzeugs
Dismantling the tool
(ill. 26)
Hülse 1 (durch drücken auf eine harte
Unterlage) lösen und herausziehen�
(ill. 26)
Release sleeve 1 (by pressing on a
hard surface) and pull out�
(ill. 27)
Bolzen 3 und Hülse 2 auseinanderzie-
hen�
(ill. 27)
Pull apart pin 3 and sleeve 2�
1)
Nummer auf den Teilen eingraviert
1)
Number engraved on the parts